


 Transform your videos by making their backgrounds transparent and replace them in just a few clicks without the need for any green-screen technology. Personalize your video background by adding images or videos of places, scenarios or on-slide content. Get your project on the road with free media assets shipped with Adobe Captivate or choose your own.
Steps:
Adobe Captivate 2019 now supports webcam capture and automatic chroma key effects to clip your background out entirely, or to replace the background with any image that you desire.
- To begin, double click the Video Demo thumbnail from the Adobe Captivate 2019 launch screen.
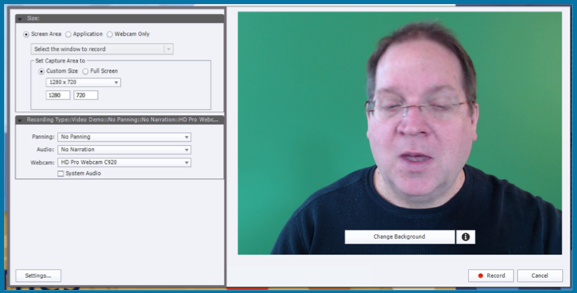
- The video capture dialog will appear.
- The capture dialog includes parameters on the left to adjust the screen area selected, enable both microphone and system audio and automate panning.

- You will see your webcam image on the right side. To begin the chroma key process, click the Change Background button at the bottom of the image preview.
- Next click the Take my snapshot button to let Captivate start filtering your image from the background.
- Draw a vertical line from your forehead to the bottom of the screen, and then to draw a horizontal line across your shoulders. This will isolate your head from the background.
- You don’t need a greenscreen to accomplish this. Use any wall that is handy, as long as the wall is a solid color. You will want to choose wall colors that are at least a little different than the color of your skin or clothing. Decorative wallpaper or ornate backgrounds are not usually good candidates for replacement.
- If you miss anything, you can always go back and draw over the missing elements. Commonly hair must be selected with a bit more careful brush.
- Once you have completed selection, click I am fully selected to move on to the next stage.
- Captivate will display a preview of your video, this time with the background clipped away and a new background substituted. Check the image to verify that it is doing a good job of clipping out the speaker and replacing the background.
- Once you are satisfied, click the My preview looks good button to explore additional backgrounds.
- You can now change the background, and even remove the background by clicking on the background itself.
- After a few images, you will come to one that is a checkerboard pattern. The checkerboard represents transparency. When you use this background, your image will be placed directly over the desktop screen capture, making the background the desktop itself.


Watch this video to learn more about this feature in Adobe Captivate (2019 release):
Dear Adobe support,
How could i solve below : Capture is disallowed since High-desnsity was dected. Please set “DpiAwareness = 1`” in adobe Captivate.ini and restart the aplication ? How can i do this steps ?
You must be logged in to post a comment.


