 Newbie
38 posts
Newbie
38 posts
Video demos in Adobe Captivate are a way to demonstrate product capabilities in video format. You might want to create a video demonstration of your product. You could also use this to demonstrate a new product feature. In this document, let’s create a video demonstration of a feature in PowerPoint.
Assets and samples
The procedures in this document require you to use assets such as images and sample Adobe Captivate project files. You can choose to use your own assets and samples. However, it is recommended that you download and extract the following zip file to your computer:create-video-demonstrations.zip
Create a video demo
First, let’s create a video demo that demonstrates how to create a new PowerPoint presentation.

- In the New tab on Captivate’s Welcome screen, choose Video Demo and click Create.
- The dialog box provides you with the options to record the demo. Choose the following options:
- Application
- In the drop-down list, choose PowerPoint
- Ensure that Application window is selected

- Click Record.
After the counter counts down to 1, the PowerPoint application comes to the foreground. - Perform the following steps in PowerPoint:
- Click File.
- Click New.
- Choose a theme.
- In the dialog box, click Create.
- To end your simulation:
- On Windows, click the End key on your keyboard
- On MAC, click the Captivate icon in the top bar

As soon as you end your simulation, Captivate comes to the foreground again.
Captivate runs the video that you just created in preview mode.
- To go back to Captivate, click Edit in the lower right corner of the preview window.
A new project is created with the name untitled<number>.cpvc
Add objects to videos
You can add any of Captivate’s non-interactive objects to a video demo. For example, you can add a text caption for information. You can also add shapes to highlight a part of the screen that you want to bring user focus. Let’s add a text caption to introduce our demo.
- In the downloaded files folder, navigate to the samples subfolder and open:
create-video-demos.cpvc
Note:It is not mandatory that you download the project file that ships with this tutorial. You can still follow along with the steps in this procedure. However, make sure that you create a video demo in Adobe Captivate.
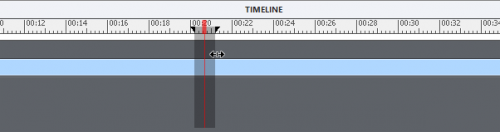
As a video demo project does not consist of slides like other Captivate projects, you can browse the frames using the playbar controls in the Timeline. - From the Window menu, choose Timeline.
The timeline is displayed at the bottom of the Captivate window.

The timeline displays the entire duration of the video that we created. Also note the playhead that you can drag left or right to move the location of the video on the timeline.
When we add objects to the video, we use the Timeline to place the object at the required location.
- Move the play head to the point on the timeline where you want to place the text caption.
- In the toolbar, click Text and then choose Text Caption.
As soon as you place a text caption on a slide, the placeholder text is selected, by default. This convenience allows you to immediately enter the text for the caption. - Enter the following text:
Create a new PowerPoint presentation
- Let’s quickly preview the project.
Click Preview on the toolbar and then choose Project.
When you preview the project, if the time for which the text caption is displayed in the video is too short or too long, you can simply resize the text caption object in the timeline.Hover the mouse pointer over the left or right edge of the text caption in the timeline. - Hover the mouse pointer over the left or right edge of the text caption in the timeline.

-
Resize the text caption in the timeline to increase or decrease the time that it will display in the video.
Besides text captions, you can place any other non-responsive object in the video. For example, you can use transparent (opacity 0%) shapes to highlight (and draw attention to) specific areas of the screen in a part of a video.Add pan and zoom effect to videos

The pan and zoom effect allows you to zoom into (and draw user focus to) a specific area on a screen in a video. Let’s add pan and zoom effect to our video demo.
- In the downloaded files folder, navigate to the samples subfolder and open:
create-video-demos.cpvc
Note:It is not mandatory that you download the project file that ships with this tutorial. You can still follow along with the steps in this procedure. However, make sure that you create a video demo in Adobe Captivate. - From the Window menu, choose Timeline.
The timeline is displayed at the bottom of the Captivate window.

The timeline displays the entire duration of the video that we created. Also note the playhead that you can drag left or right to move the location of the video on the timeline. - Move the playhead to the point on the timeline where you want to start the zoom.
- Click Pan & Zoom at the bottom of the Timeline.
The Video Effects Inspector is opened to the right of the slide. Also, in the inspector a blue bounding box appears over the slide. - Use the handles on the bounding box to resize the box to the area in the slide that you want to zoom into.
As you do this, the slide resizes to show you what it will look like for the user. - Drag the playhead to the point in the timeline where you want to end the pan and zoom effect and then click Zoom Out in the Video Effects Inspector.
Notice that the slide now displays zoomed out.
To see if the pan and zoom effect is working fine, let’s preview the project.
Click Preview on the toolbar and then choose Project.

Trim videos
When you’re creating a video demo, there’s often sections of the video that you recorded initially that you later find are not required. Instead of recording the video again, you can simply trim the unwanted parts out of the video. Let’s use the trim feature to remove unwanted parts of our video.
- In the downloaded files folder, navigate to the samples subfolder and open:create-video-demos.cpvc
Note:It is not mandatory that you download the project file that ships with this tutorial. You can still follow along with the steps in this procedure. However, make sure that you create a video demo in Adobe Captivate. - From the Window menu, choose Timeline.
The timeline is displayed at the bottom of the Captivate window.

- Move the playhead to the start point on the timeline from where you want to trim the video.
- Click Trim at the bottom of the Timeline.
The gray area on the timeline represents the duration of the video to be trimmed. The first handle represents the initial point of the trim and the second handle represents the end of the trim.


- Hover the mouse pointer over the left or right edge of the gray area.
- Resize the trim area in the timeline to increase or decrease the duration that you want to trim out of the video.
- Click
 at the bottom of the Timeline.
Let’s preview the project after we have trimmed out the unwanted sections.
Click Preview on the toolbar and then choose Project.
Preview and Publish
After you have created a video demo and made all the required updates and edits, you’ll want to create a video file that you can share with your end users. Let’s do that now.
- Click Publish on the toolbar and then choose Publish to Computer.
- In the Publish Video Demo dialog box, enter the required details:

- Click Publish.
- In the Video dialog box, you can choose to:
- Publish the video to YouTube
- Run the video in the default application on your computer

Assets and samples
The procedures in this document require you to use assets such as images and sample Adobe Captivate project files. You can choose to use your own assets and samples. However, it is recommended that you download and extract the following zip file to your computer:create-video-demonstrations.zip
Create a video demo
First, let’s create a video demo that demonstrates how to create a new PowerPoint presentation.
- In the New tab on Captivate’s Welcome screen, choose Video Demo and click Create.
- The dialog box provides you with the options to record the demo. Choose the following options:
- Application
- In the drop-down list, choose PowerPoint
- Ensure that Application window is selected
- Click Record.
After the counter counts down to 1, the PowerPoint application comes to the foreground. - Perform the following steps in PowerPoint:
- Click File.
- Click New.
- Choose a theme.
- In the dialog box, click Create.
- To end your simulation:
- On Windows, click the End key on your keyboard
- On MAC, click the Captivate icon in the top bar
As soon as you end your simulation, Captivate comes to the foreground again.
Captivate runs the video that you just created in preview mode.
- To go back to Captivate, click Edit in the lower right corner of the preview window.
A new project is created with the name untitled<number>.cpvc
Add objects to videos
You can add any of Captivate’s non-interactive objects to a video demo. For example, you can add a text caption for information. You can also add shapes to highlight a part of the screen that you want to bring user focus. Let’s add a text caption to introduce our demo.
- In the downloaded files folder, navigate to the samples subfolder and open:
create-video-demos.cpvc
Note:It is not mandatory that you download the project file that ships with this tutorial. You can still follow along with the steps in this procedure. However, make sure that you create a video demo in Adobe Captivate.
As a video demo project does not consist of slides like other Captivate projects, you can browse the frames using the playbar controls in the Timeline. - From the Window menu, choose Timeline.
The timeline is displayed at the bottom of the Captivate window.
The timeline displays the entire duration of the video that we created. Also note the playhead that you can drag left or right to move the location of the video on the timeline.
When we add objects to the video, we use the Timeline to place the object at the required location.
- Move the play head to the point on the timeline where you want to place the text caption.
- In the toolbar, click Text and then choose Text Caption.
As soon as you place a text caption on a slide, the placeholder text is selected, by default. This convenience allows you to immediately enter the text for the caption. - Enter the following text:
Create a new PowerPoint presentation
- Let’s quickly preview the project.
Click Preview on the toolbar and then choose Project.
When you preview the project, if the time for which the text caption is displayed in the video is too short or too long, you can simply resize the text caption object in the timeline.Hover the mouse pointer over the left or right edge of the text caption in the timeline. - Hover the mouse pointer over the left or right edge of the text caption in the timeline.
-
Resize the text caption in the timeline to increase or decrease the time that it will display in the video.
Besides text captions, you can place any other non-responsive object in the video. For example, you can use transparent (opacity 0%) shapes to highlight (and draw attention to) specific areas of the screen in a part of a video.Add pan and zoom effect to videos
The pan and zoom effect allows you to zoom into (and draw user focus to) a specific area on a screen in a video. Let’s add pan and zoom effect to our video demo.
- In the downloaded files folder, navigate to the samples subfolder and open:
create-video-demos.cpvc
Note:It is not mandatory that you download the project file that ships with this tutorial. You can still follow along with the steps in this procedure. However, make sure that you create a video demo in Adobe Captivate. - From the Window menu, choose Timeline.
The timeline is displayed at the bottom of the Captivate window.
The timeline displays the entire duration of the video that we created. Also note the playhead that you can drag left or right to move the location of the video on the timeline. - Move the playhead to the point on the timeline where you want to start the zoom.
- Click Pan & Zoom at the bottom of the Timeline.
The Video Effects Inspector is opened to the right of the slide. Also, in the inspector a blue bounding box appears over the slide. - Use the handles on the bounding box to resize the box to the area in the slide that you want to zoom into.
As you do this, the slide resizes to show you what it will look like for the user. - Drag the playhead to the point in the timeline where you want to end the pan and zoom effect and then click Zoom Out in the Video Effects Inspector.
Notice that the slide now displays zoomed out.
To see if the pan and zoom effect is working fine, let’s preview the project.
Click Preview on the toolbar and then choose Project.
Trim videos
When you’re creating a video demo, there’s often sections of the video that you recorded initially that you later find are not required. Instead of recording the video again, you can simply trim the unwanted parts out of the video. Let’s use the trim feature to remove unwanted parts of our video.
- In the downloaded files folder, navigate to the samples subfolder and open:create-video-demos.cpvc
Note:It is not mandatory that you download the project file that ships with this tutorial. You can still follow along with the steps in this procedure. However, make sure that you create a video demo in Adobe Captivate. - From the Window menu, choose Timeline.
The timeline is displayed at the bottom of the Captivate window.
- Move the playhead to the start point on the timeline from where you want to trim the video.
- Click Trim at the bottom of the Timeline.
The gray area on the timeline represents the duration of the video to be trimmed. The first handle represents the initial point of the trim and the second handle represents the end of the trim.
- Hover the mouse pointer over the left or right edge of the gray area.
- Resize the trim area in the timeline to increase or decrease the duration that you want to trim out of the video.
- Click at the bottom of the Timeline.
Let’s preview the project after we have trimmed out the unwanted sections.
Click Preview on the toolbar and then choose Project.
Preview and Publish
After you have created a video demo and made all the required updates and edits, you’ll want to create a video file that you can share with your end users. Let’s do that now.
- Click Publish on the toolbar and then choose Publish to Computer.
- In the Publish Video Demo dialog box, enter the required details:
- Click Publish.
- In the Video dialog box, you can choose to:
- Publish the video to YouTube
- Run the video in the default application on your computer


You must be logged in to post a comment.
- Most Recent
- Most Relevant
This is a nice reference.
Thanks for the info!
Thank you for the tutorial. I will try to record a demo based on your tips. thx
If you use a recent version, you can increase the efficiency by converting the video demo to an interactive video. Here is an example:
I like the idea of using pan and zoom to add another dimension to my presentations.
Pan and Zoom (non-destructive) works only in Video Demo projects, not in normal Captivate projects. Are you aware of that?
I’ve never used it but it sounds an interesting option.
If ou are on the most recent version, CP2019, you can also use the published Video Demo to convert it to an interactive video. Here is a link to an example, a tutorial for Captivate:
Thank you. I’m definitely interested in this feature.
I have recorded a video demo. When I attempt to add to an existing project, I can’t find my cptx files. What am I doing wrong?
You need to use the Insert menu, cpvc-slide if you want to insert the video demo on a slide in a cptx-project. You will get access to the video demo editor in its Properties panel.
The raw cpvc can be inserted in a cptx-project using the Insert menu. I use that feature a lot, and the cpvc-slide remains fully editale with the dedicated editor.
Another application is to replace FMR slides (SWF based) in software simulations, inserting a Video Demo slide with the Big Button Slides during recording.
Pausing is not available for Video Demo as it is for software simulations. Workaround is to end the Video Demo. When ready to continue, put the playhead in the Video Demo at the end and record a new video clip. It will not be one video, you have clips, same result as with the Split funcitonality.
I have a blog post dedicated to the Timeline in the Video Demo Editor in this portal.
The project change links are all broken.
