 Master
55 posts
Master
55 posts

In this blog we are going to demonstrate, how to design a multi-module course with Adobe Captivate 2019. The process involves the use of branching logic, a few variables, and advanced actions.
Visit our website for more insights: www.swiftelearningservices.com
Let’s look at the steps:
Step 1:
From the Slides menu, select Asset Library…
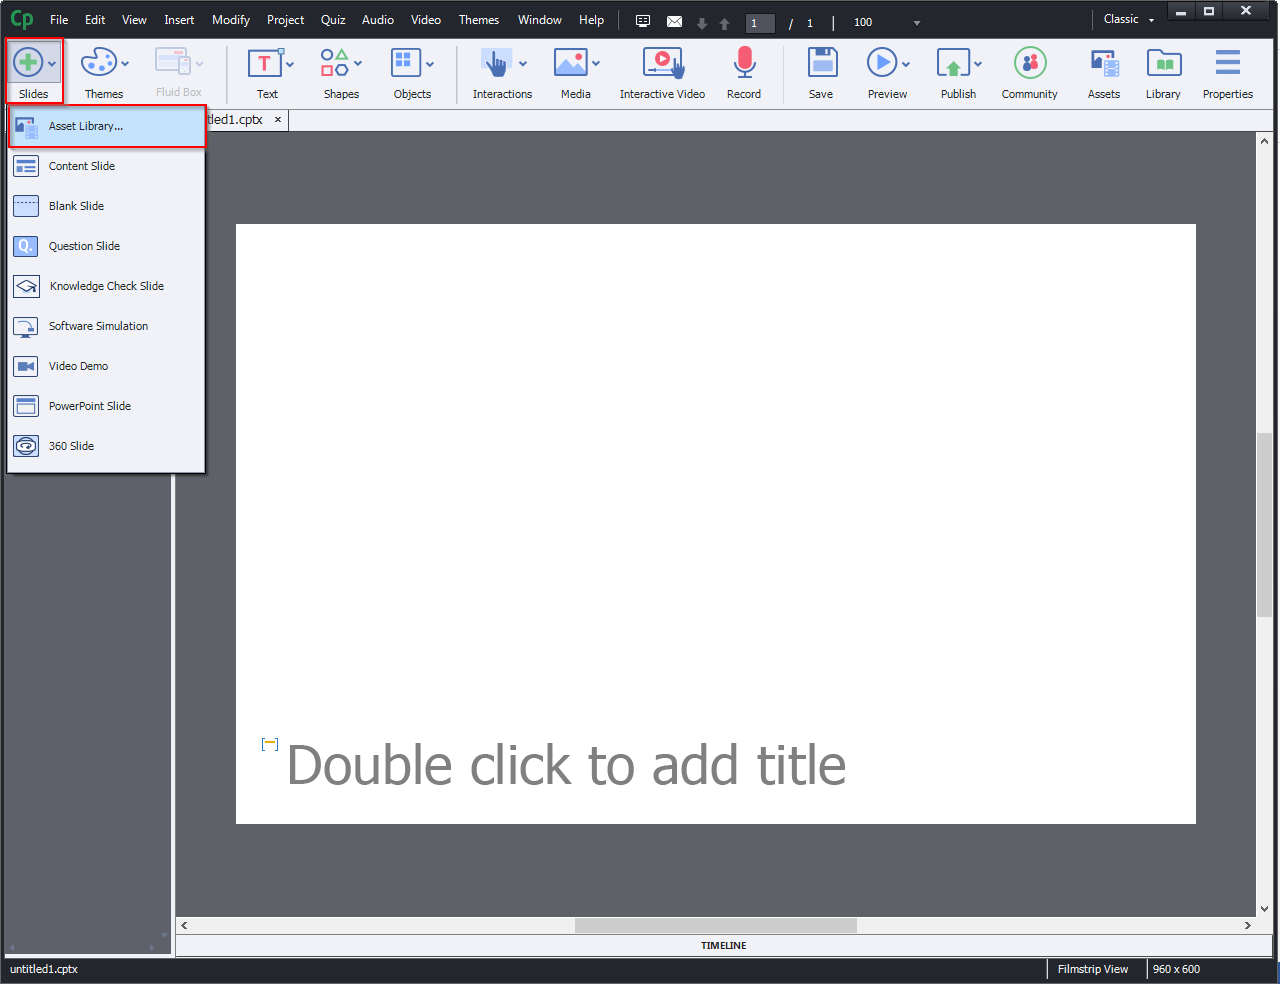
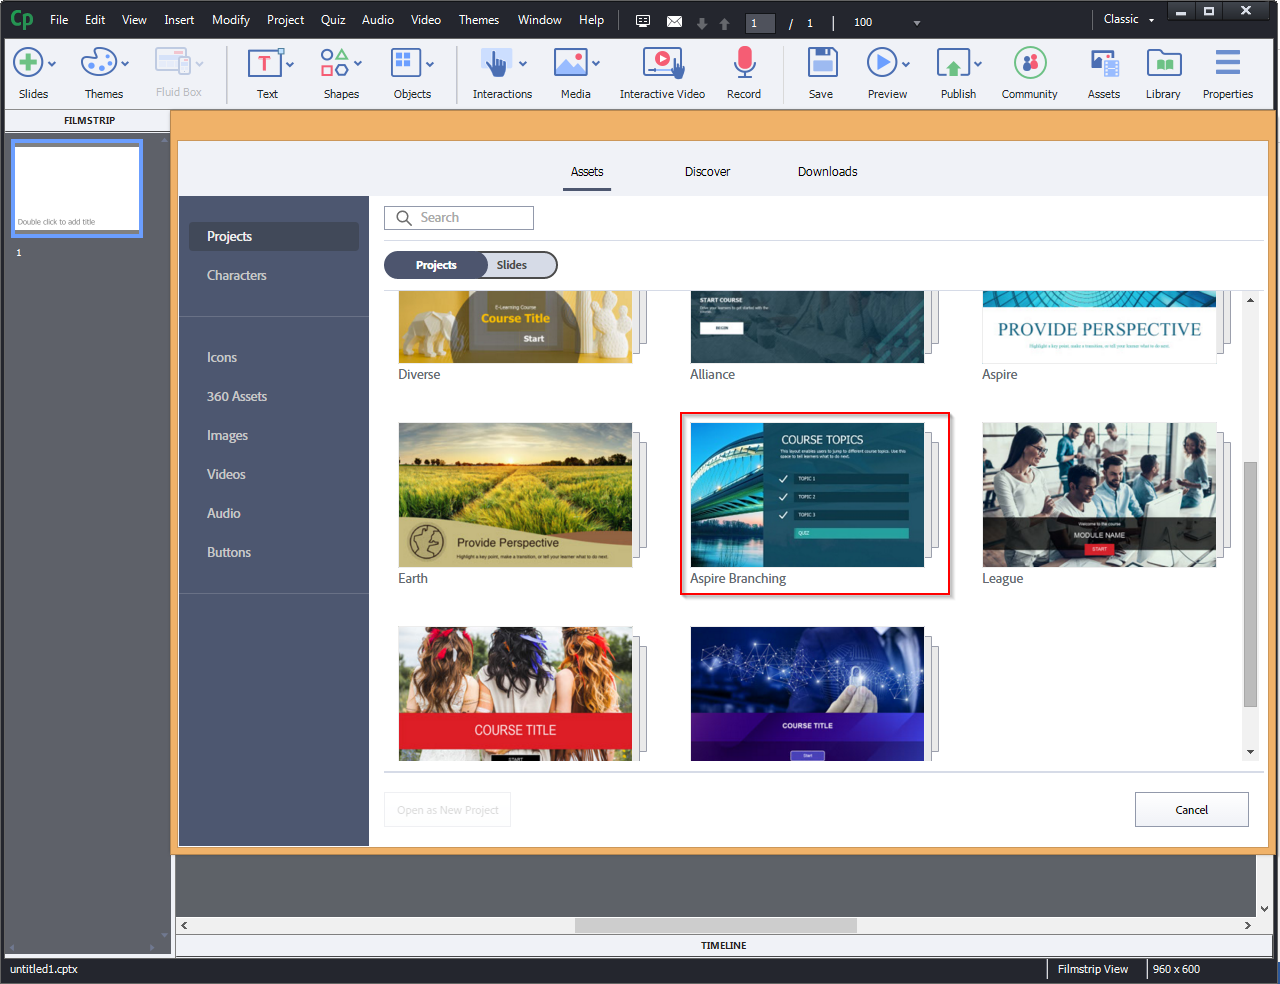
Step 2:
Select Aspire branching…
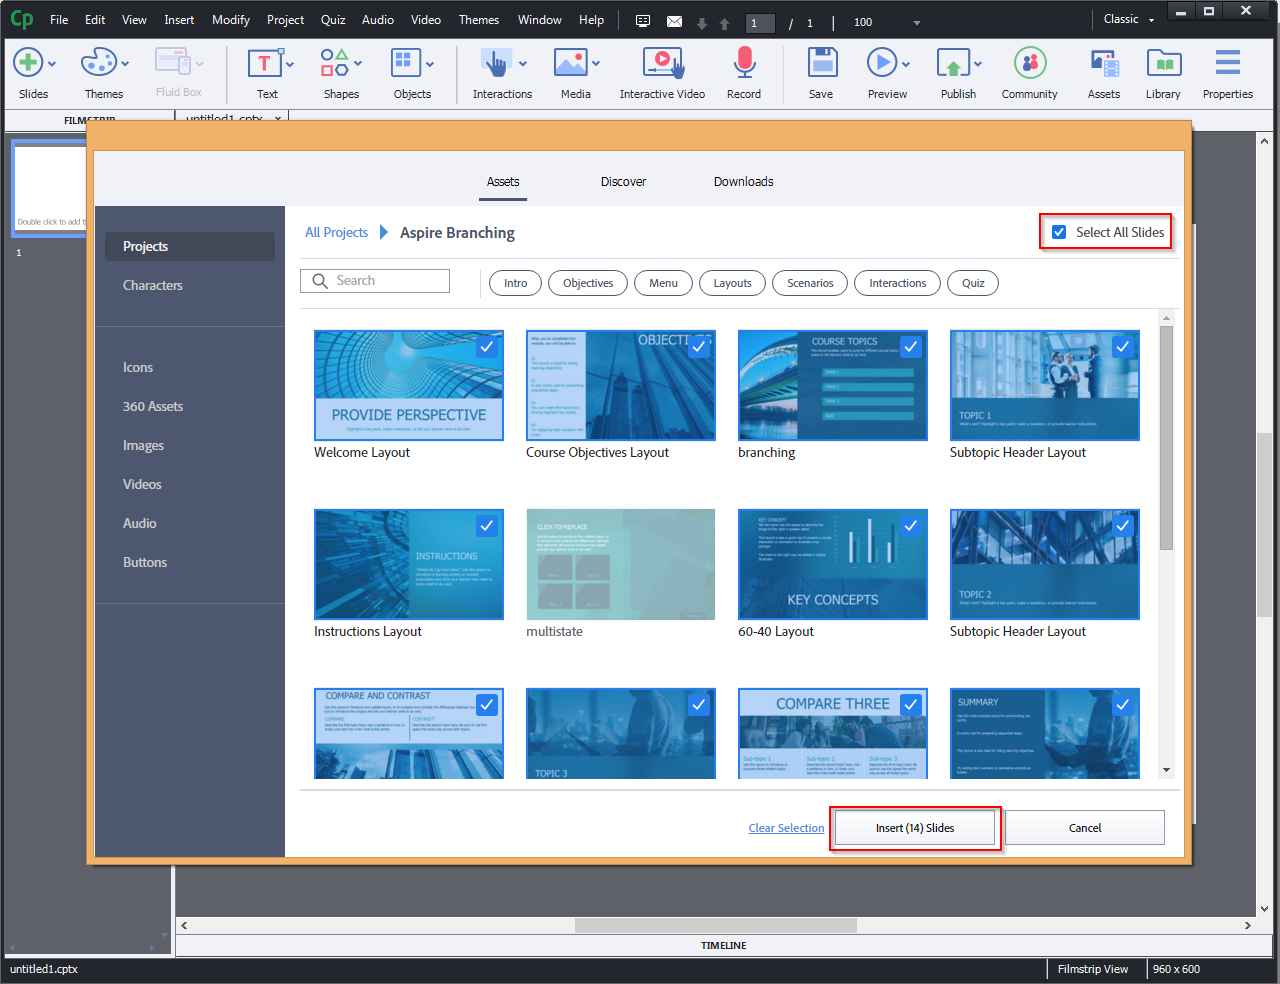
Step 3:
Select All Slides from the top menu, then press Insert Slides as shown in the screenshot.
Step 4:
Now you can see COURSE TOPICS slide with topic buttons.
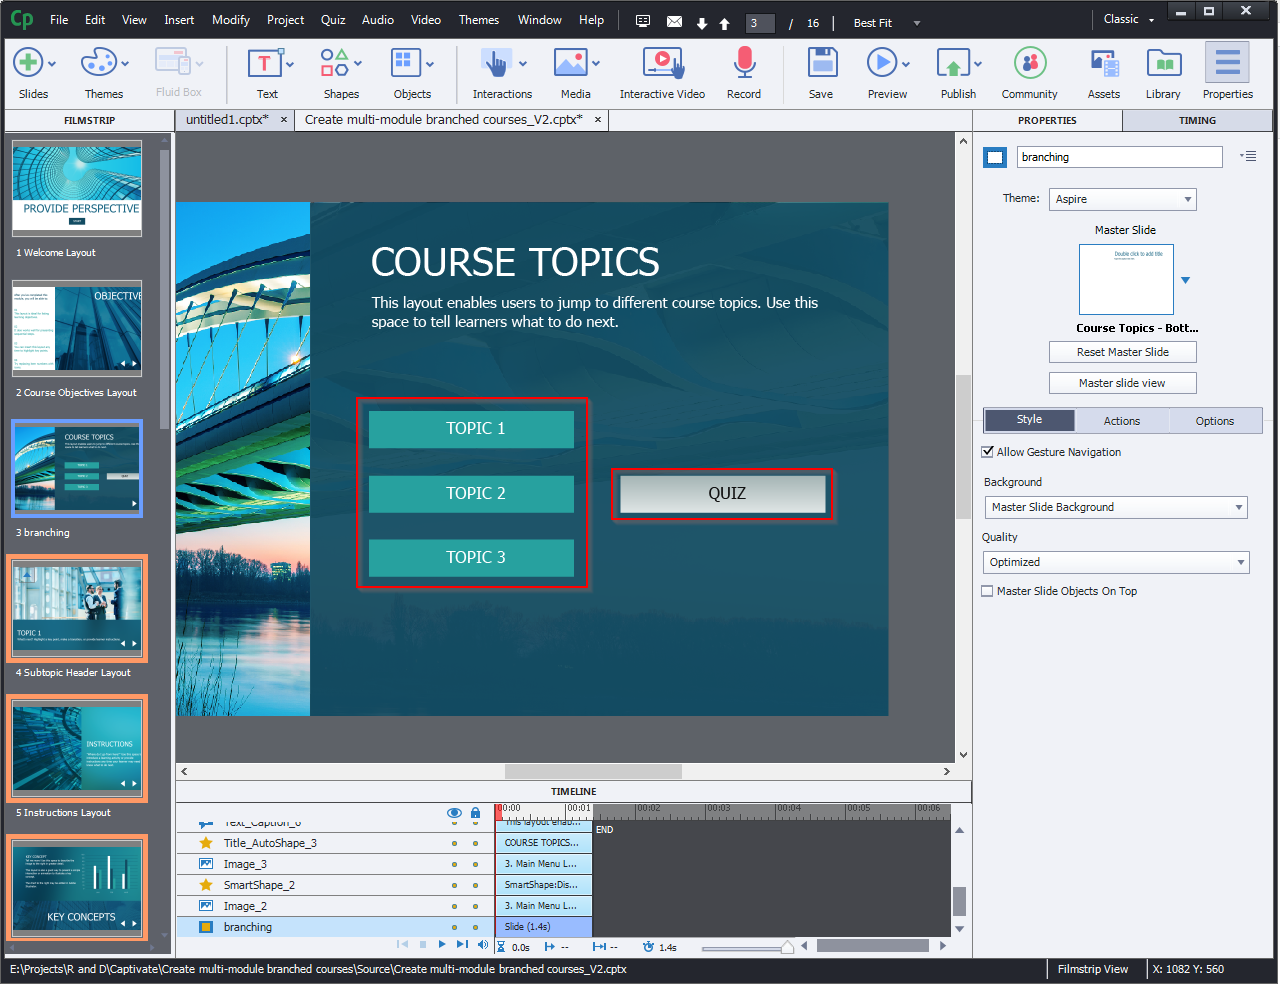
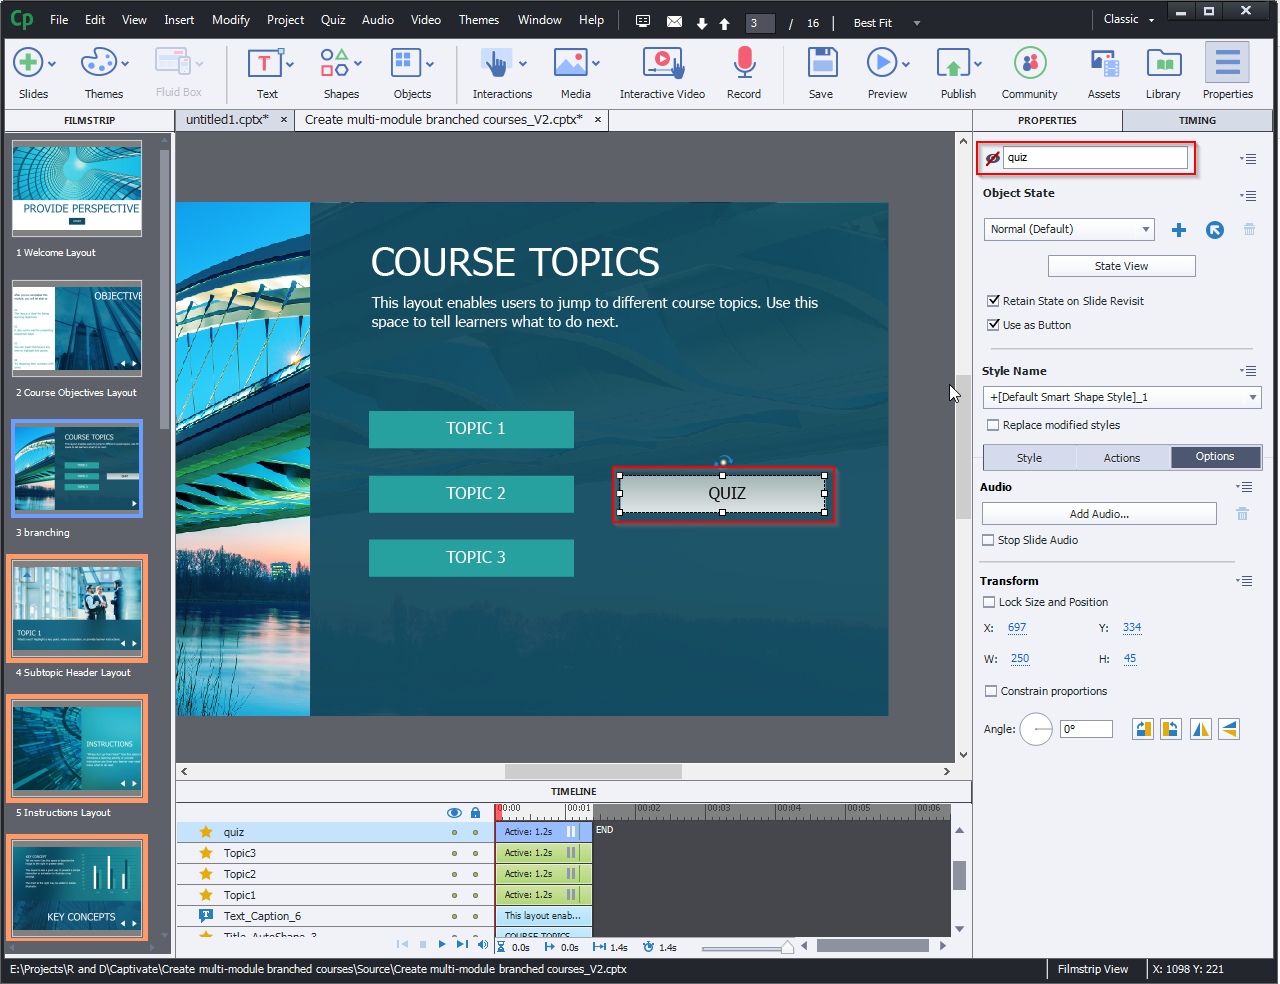
Step 5:
As shown below, select the Quiz button and hide the Eye icon.
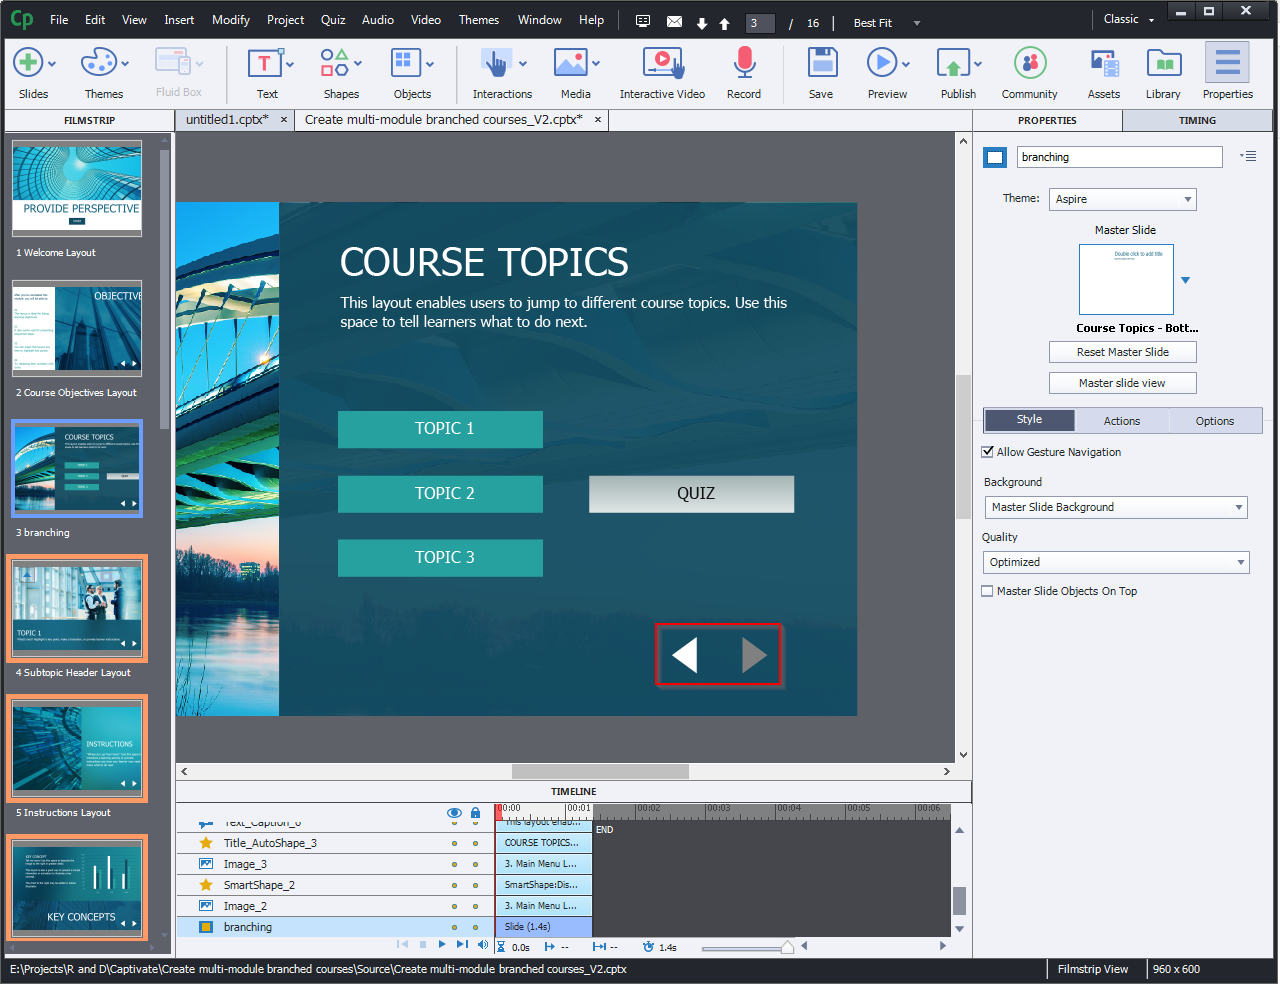
Step 6:
Add the custom navigation buttons (Next and Back).
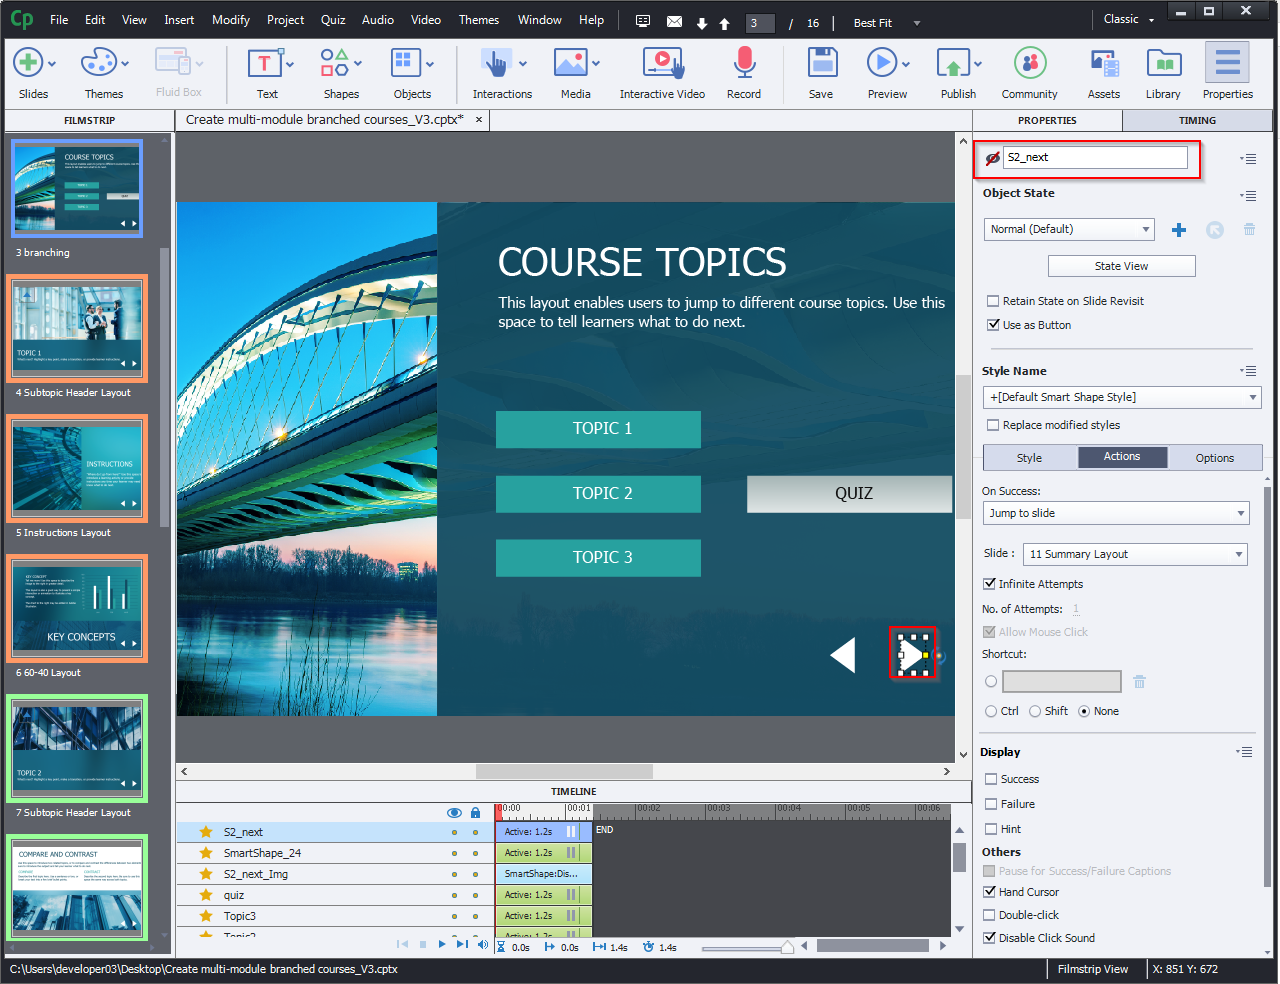
Step 7:
Select the Next button and hide the Eye icon.
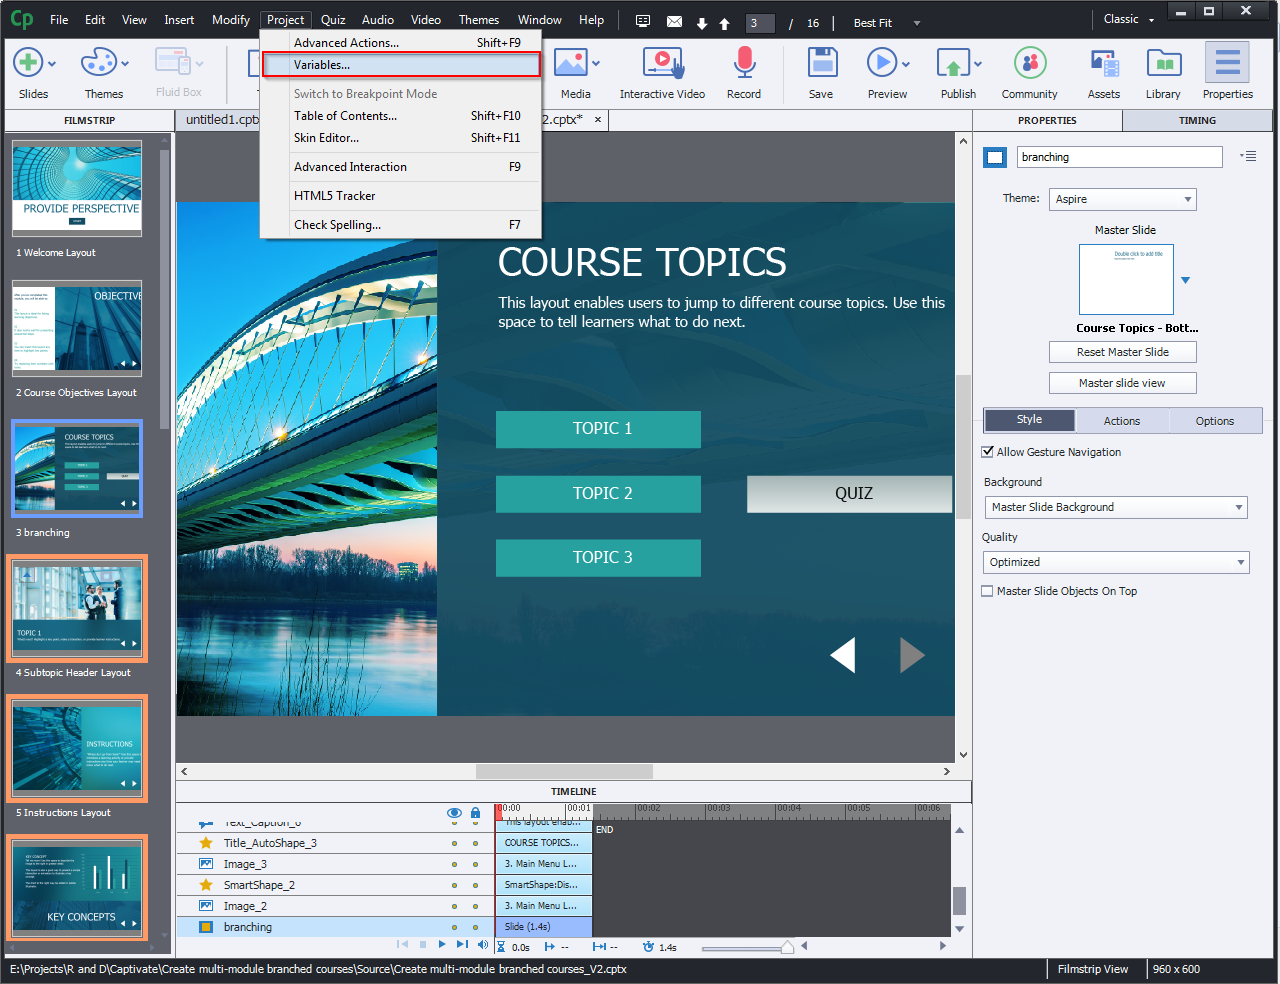
Step 8:
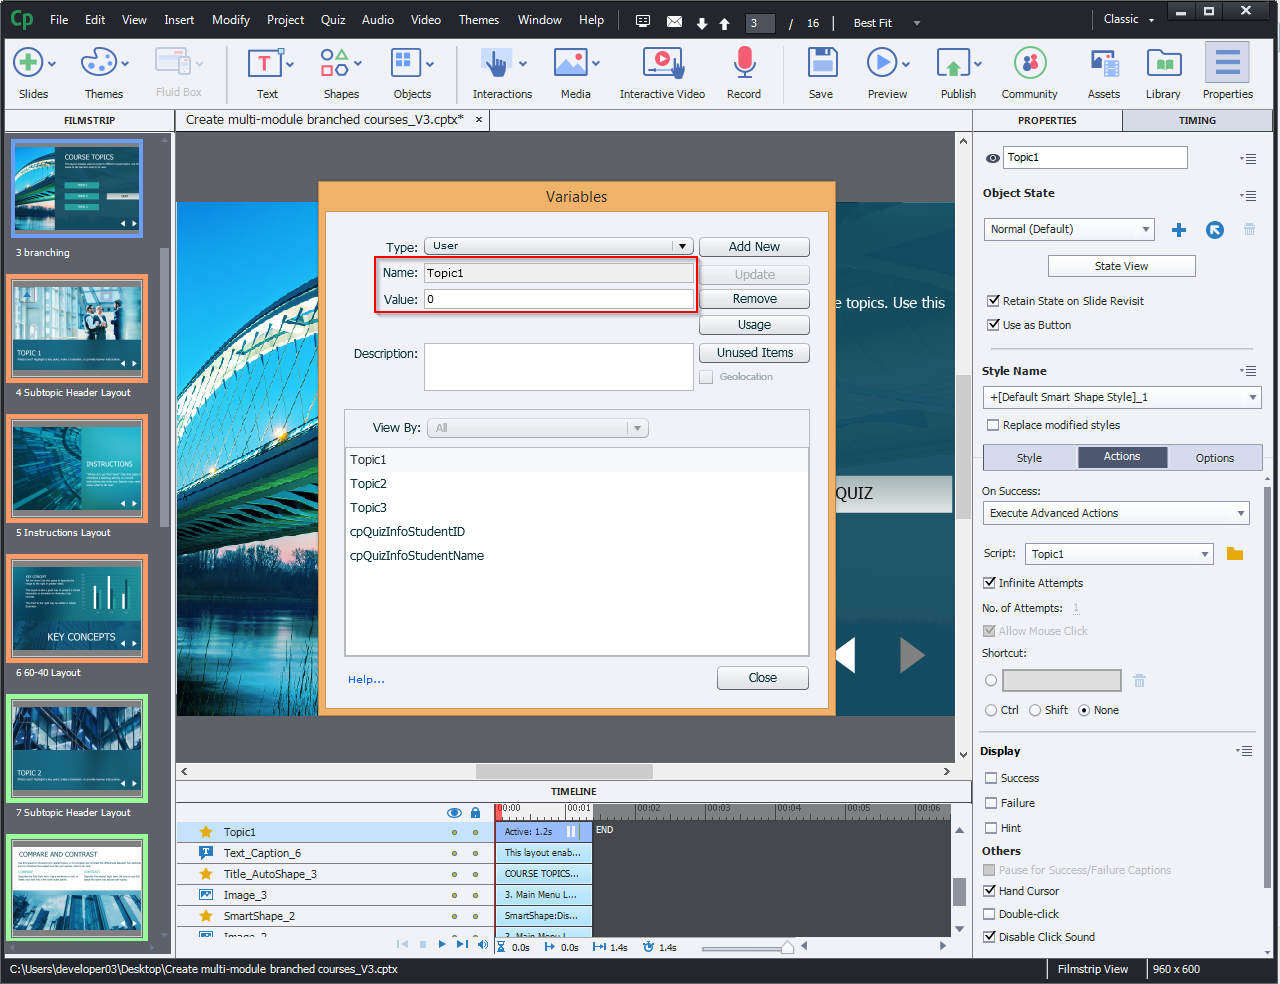
For creating new variables, Select variables….. From Project menu.
Step 9:
As shown below, give the variable a unique name
(Topic 1) and set the Value to “0“.
(Topic 2) and set the Value to “0“.
(Topic 3) and set the Value to “0“.
Step 10:
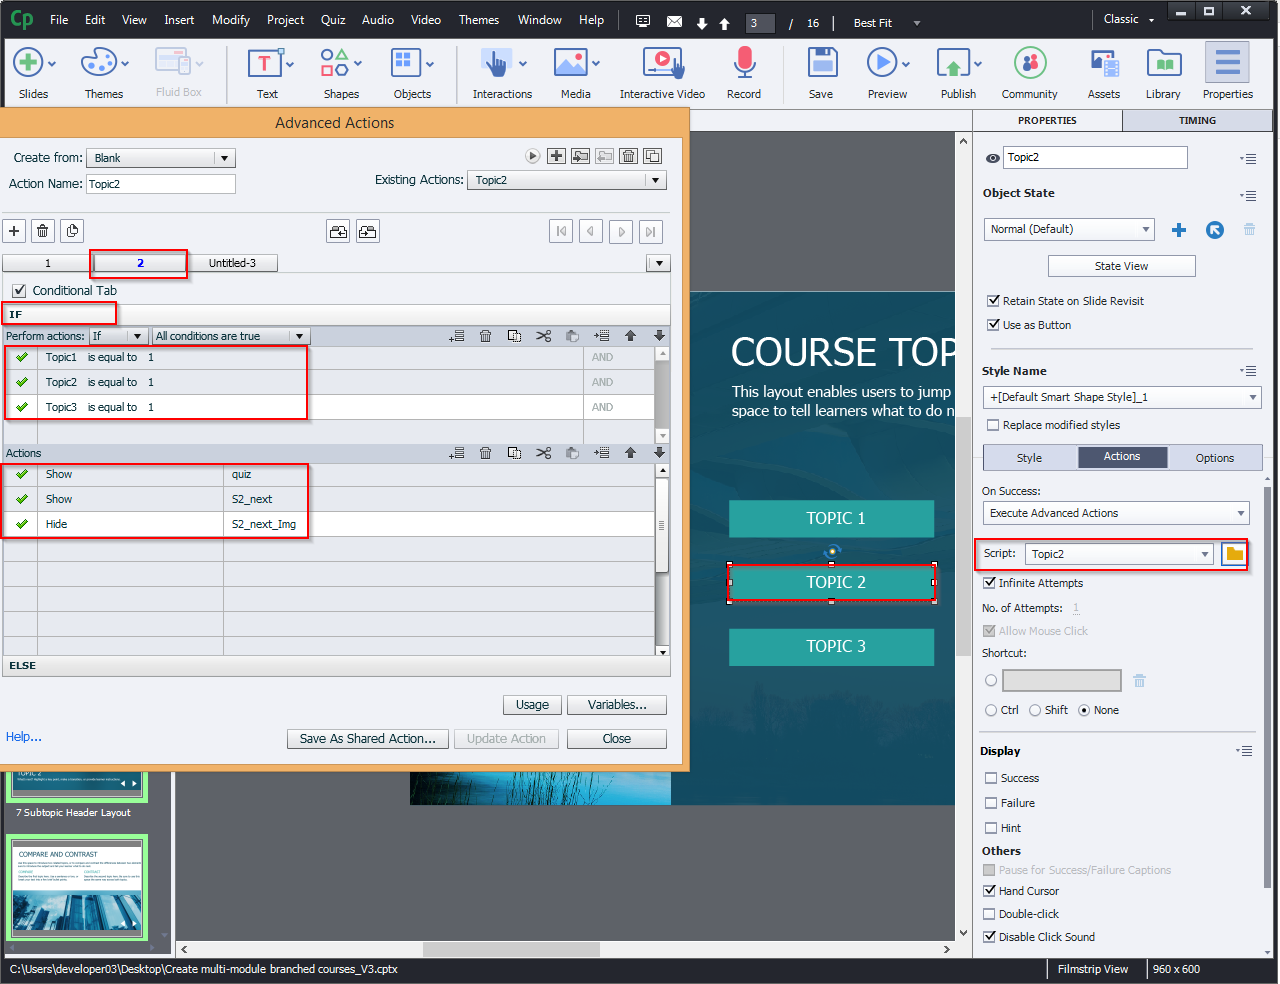
Now, select Topic 1 button and follow the actions as shown in the image.
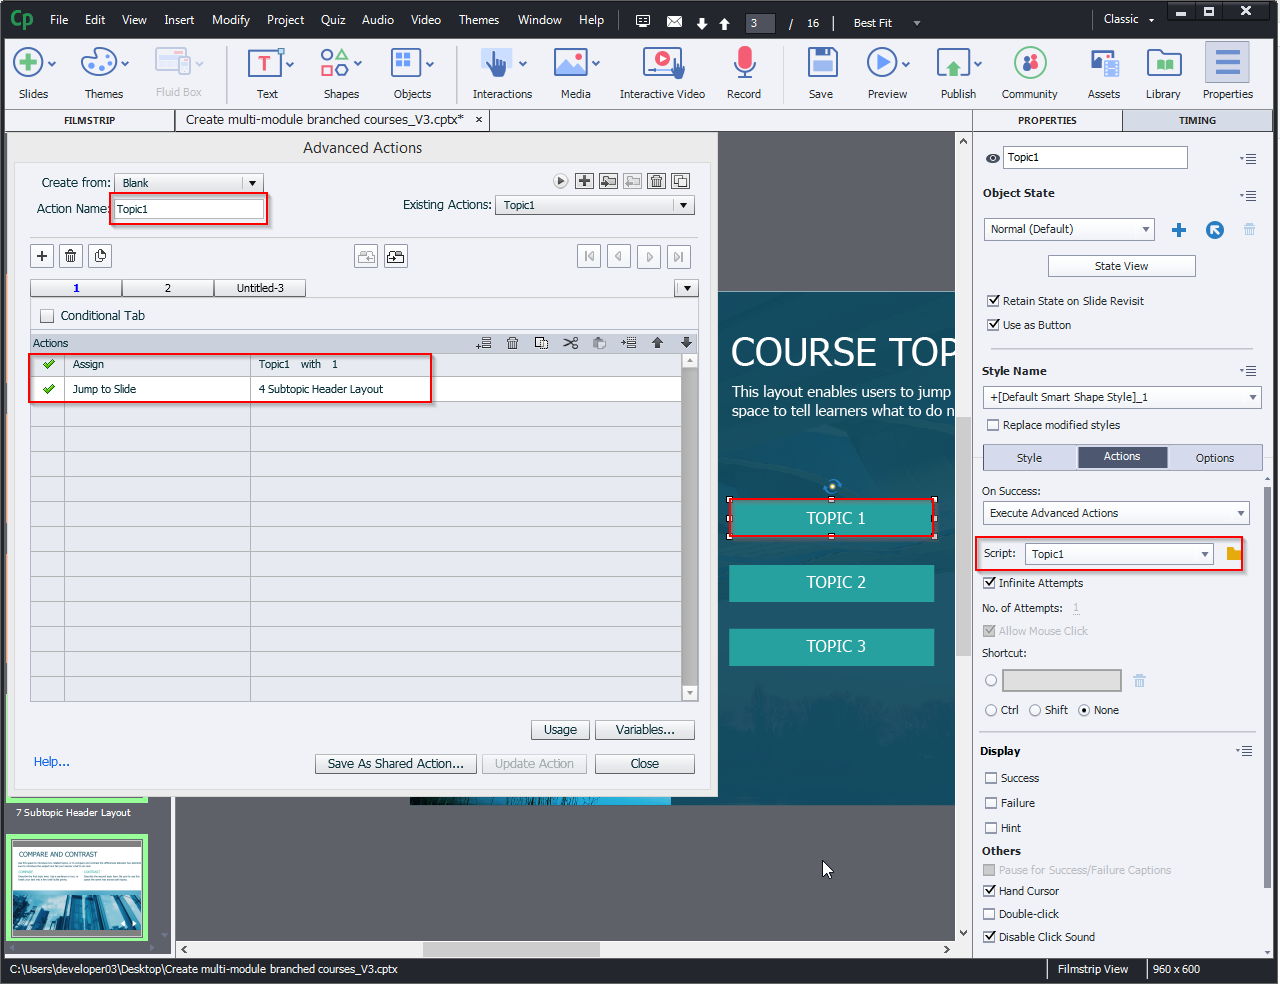
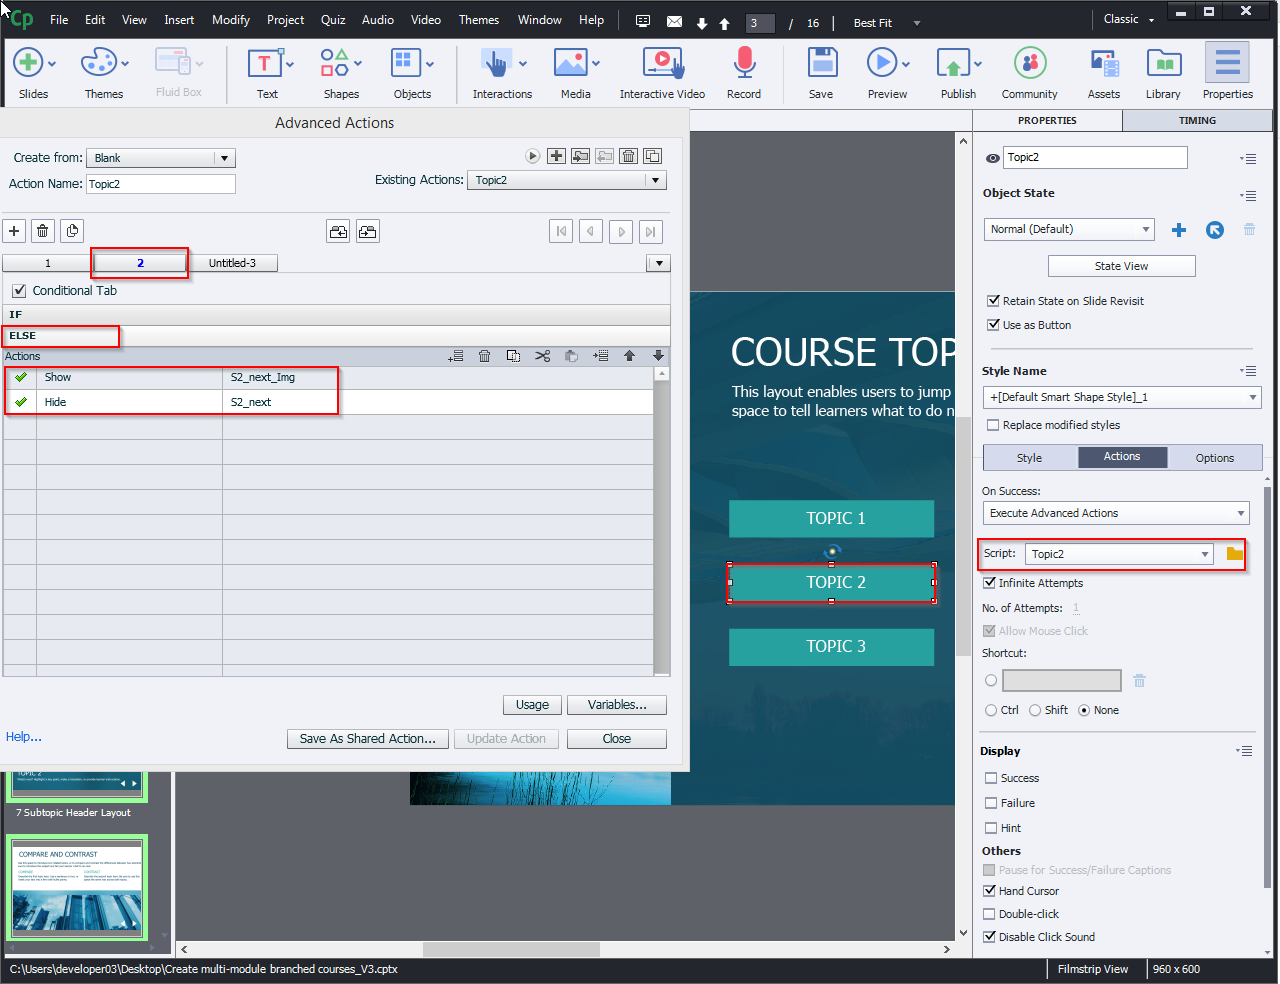
Actions field:
ELSE Field:
The same procedure applies to all the topics:


Step 11:
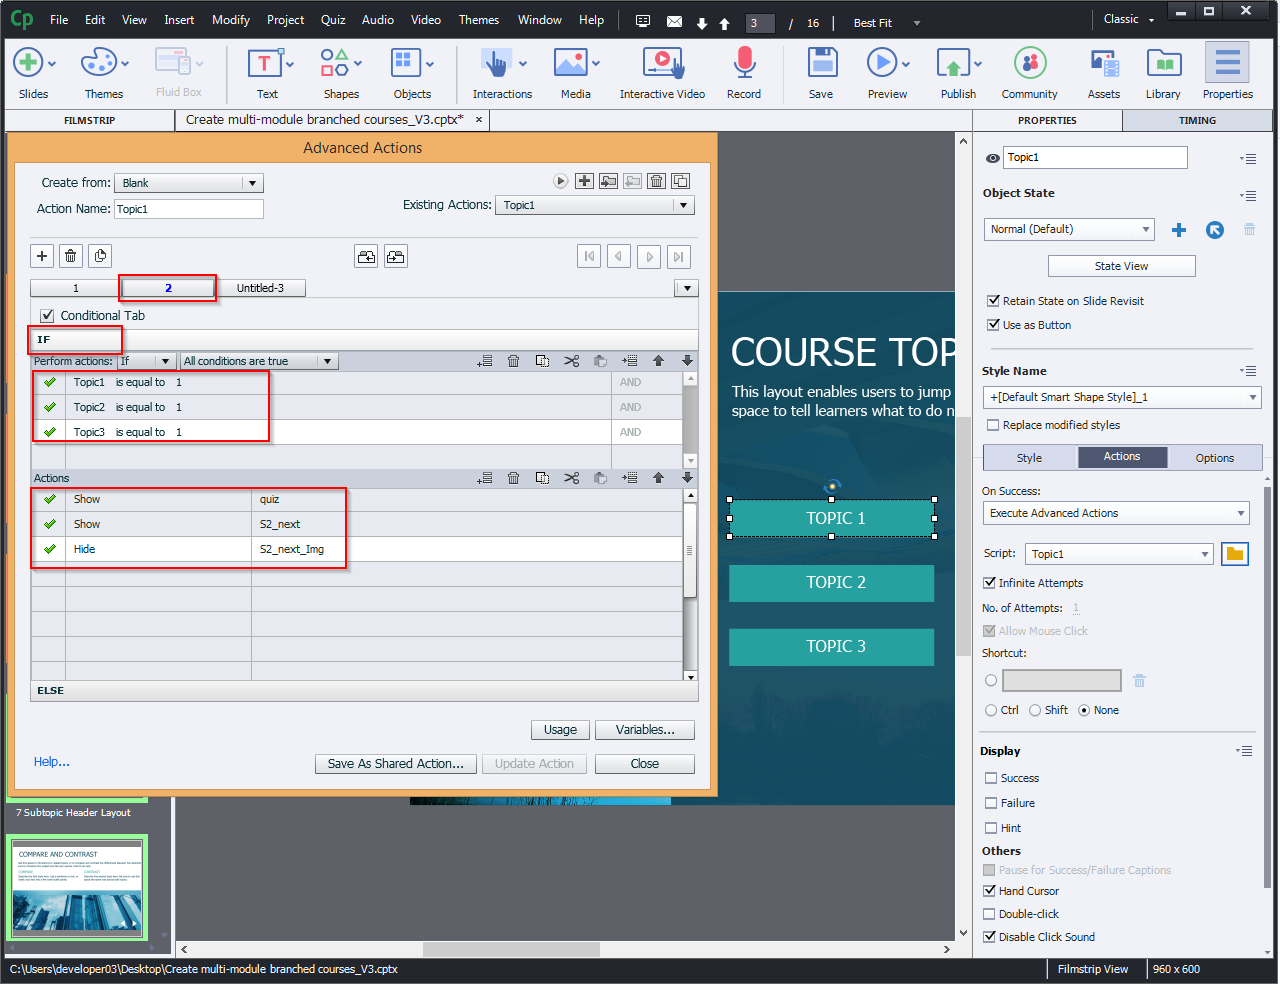
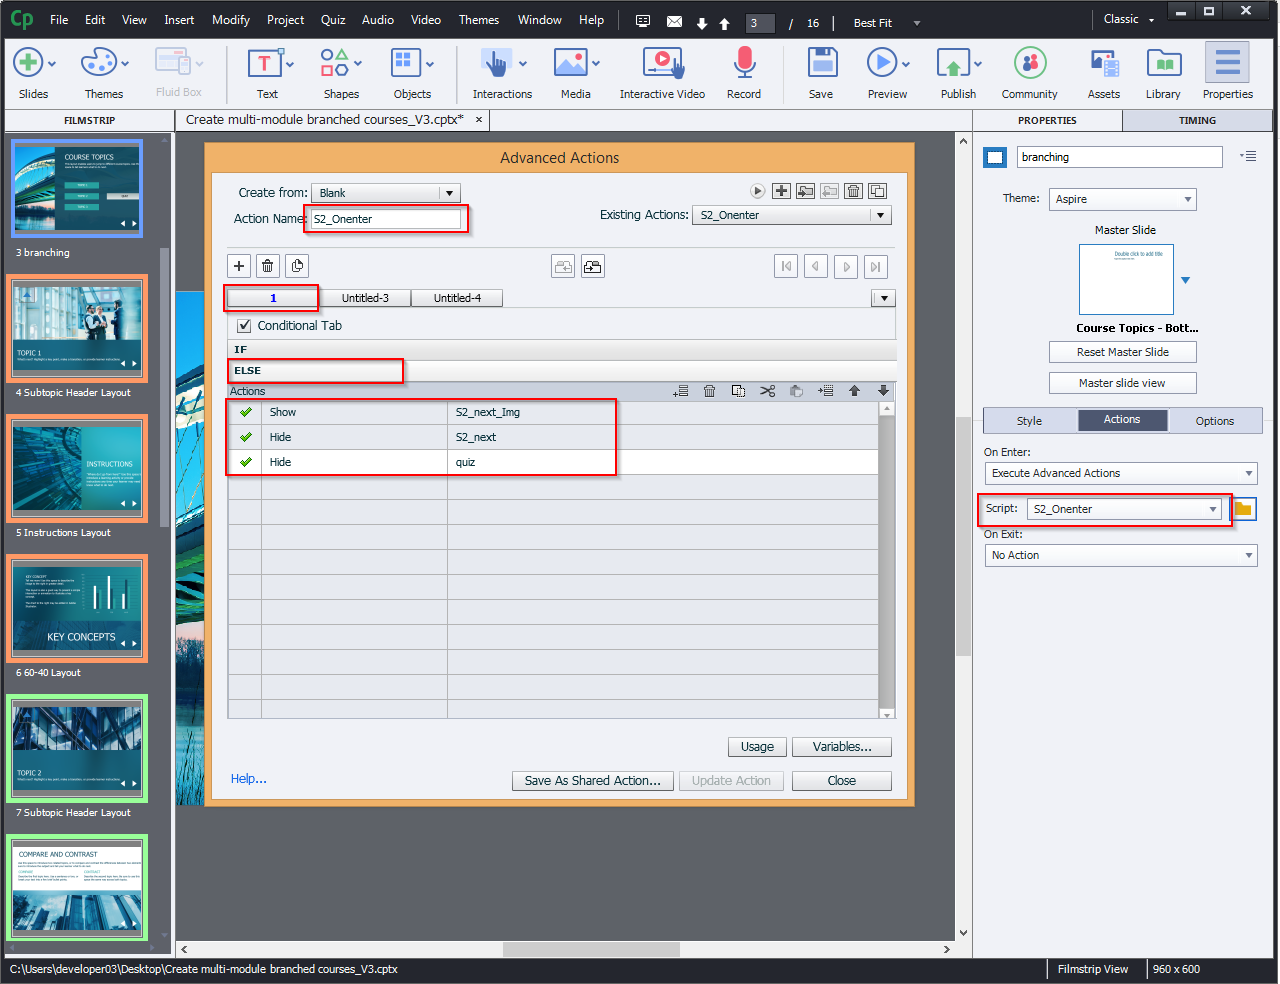
Add an action to the branching slide “On Enter” as highlighted below.
IF: Condition
Topic1 is equal to 1.
Topic2 is equal to 1.
Topic3 is equal to 1.
Actions:
Show Quiz button
Show Slide2_next
Hide Slide2_Img
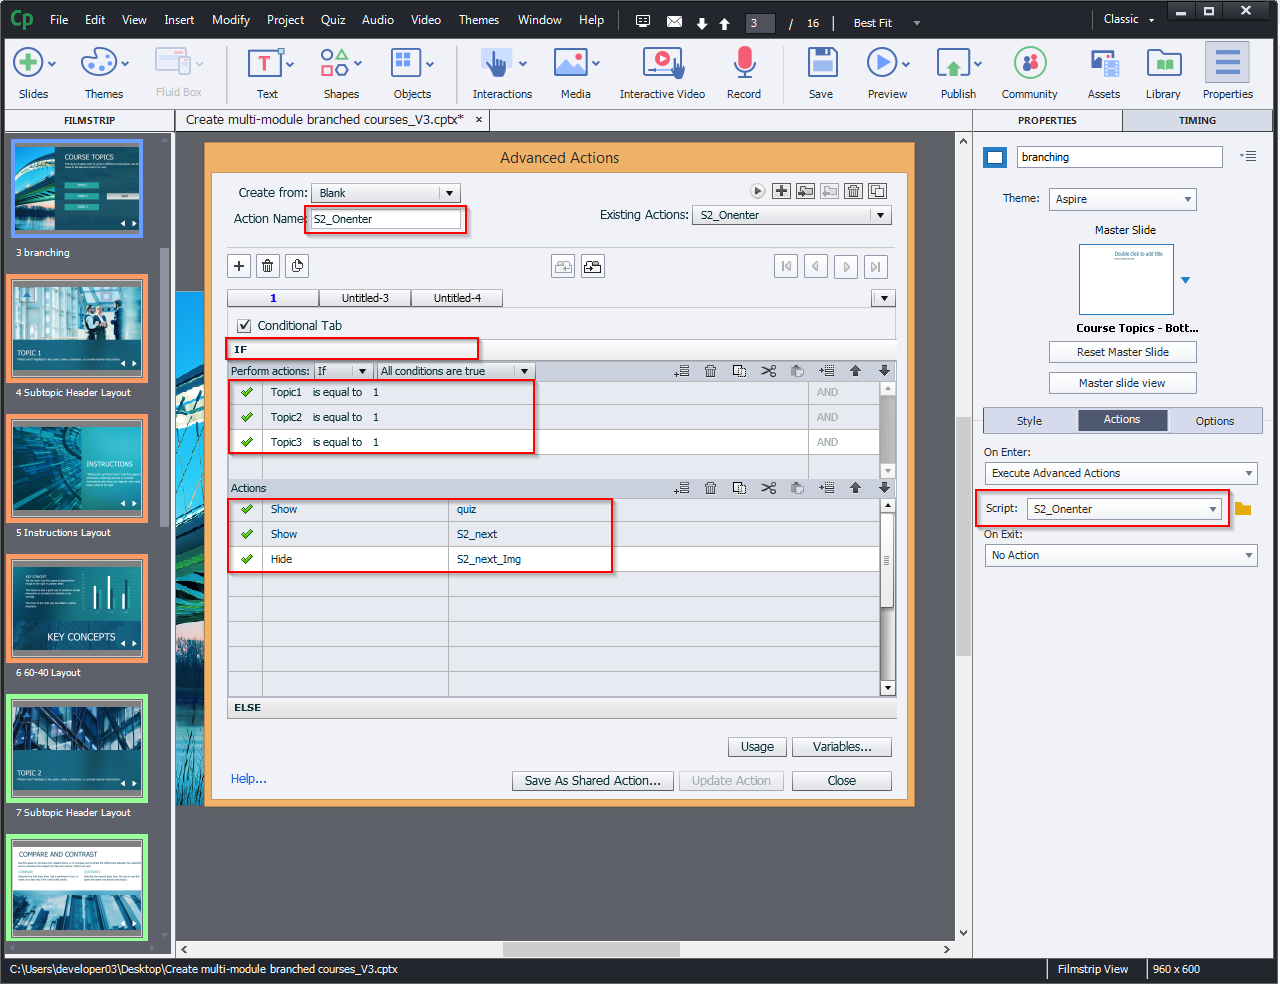
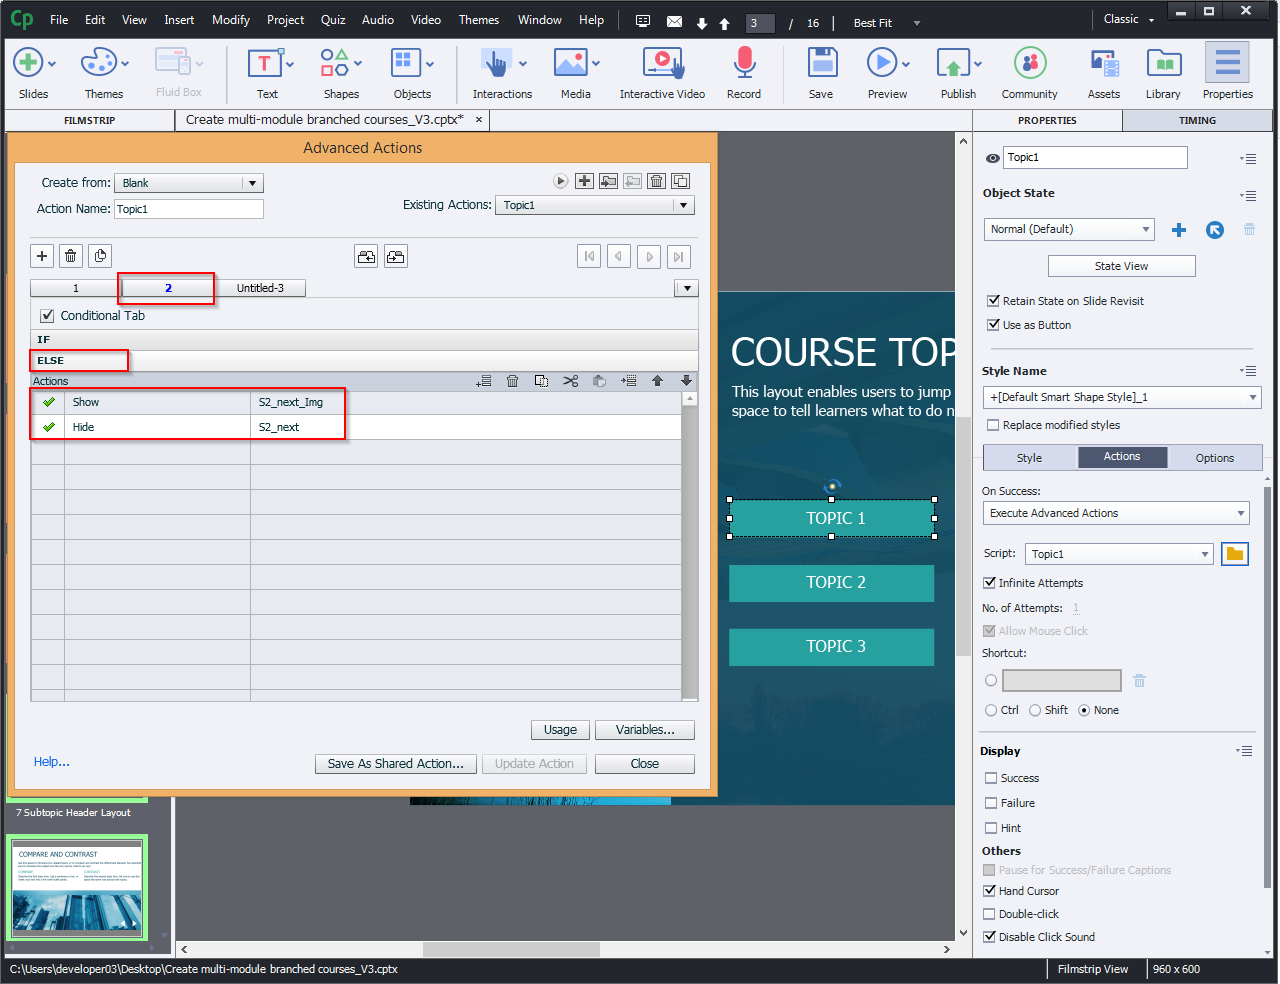
ELSE Field:
Show Slide2_Img
Hide Slide2_next
Hide Quiz button
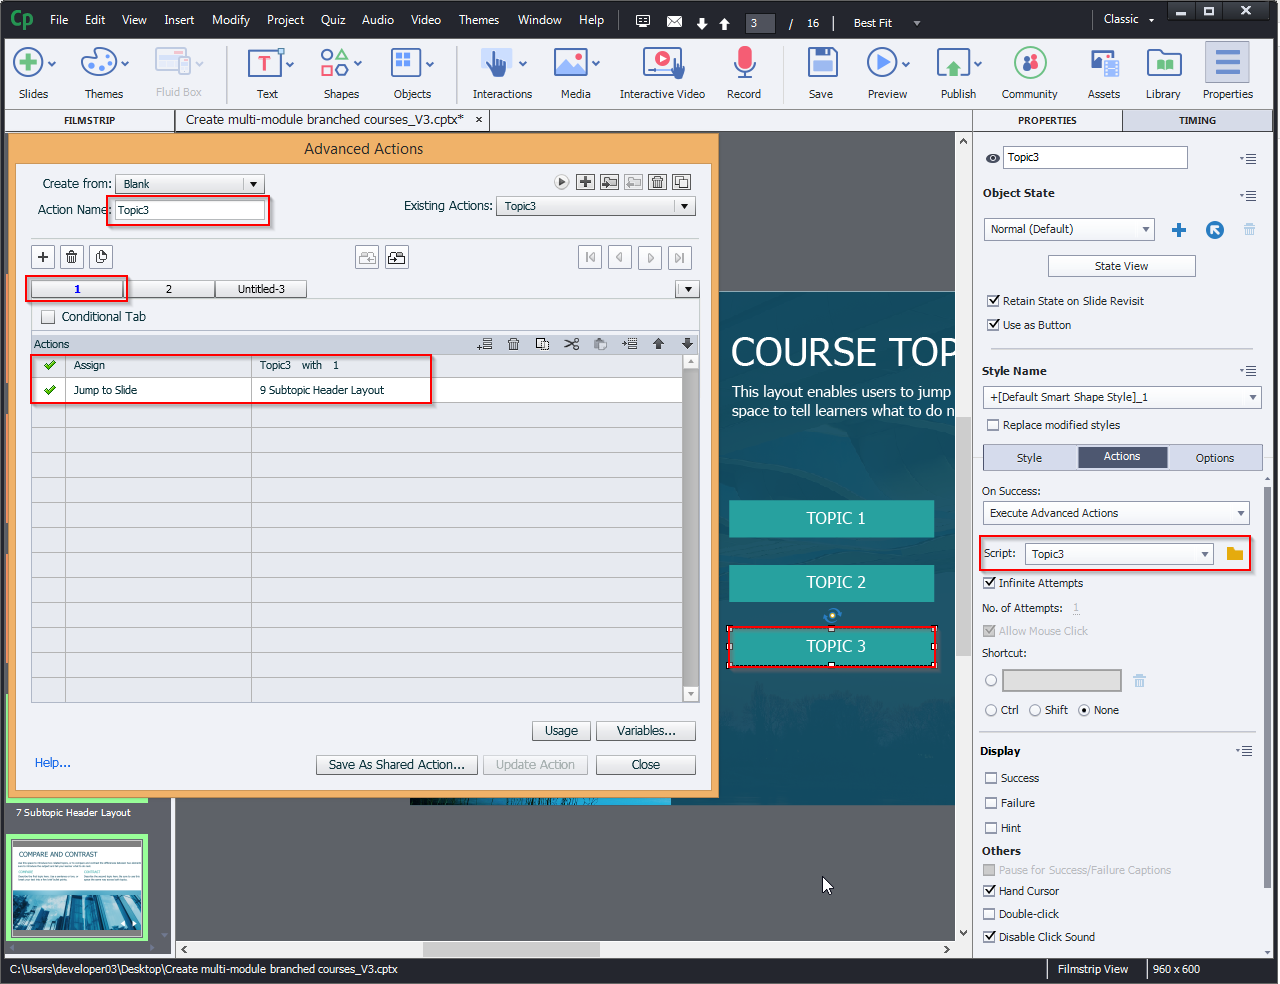
Step 12:
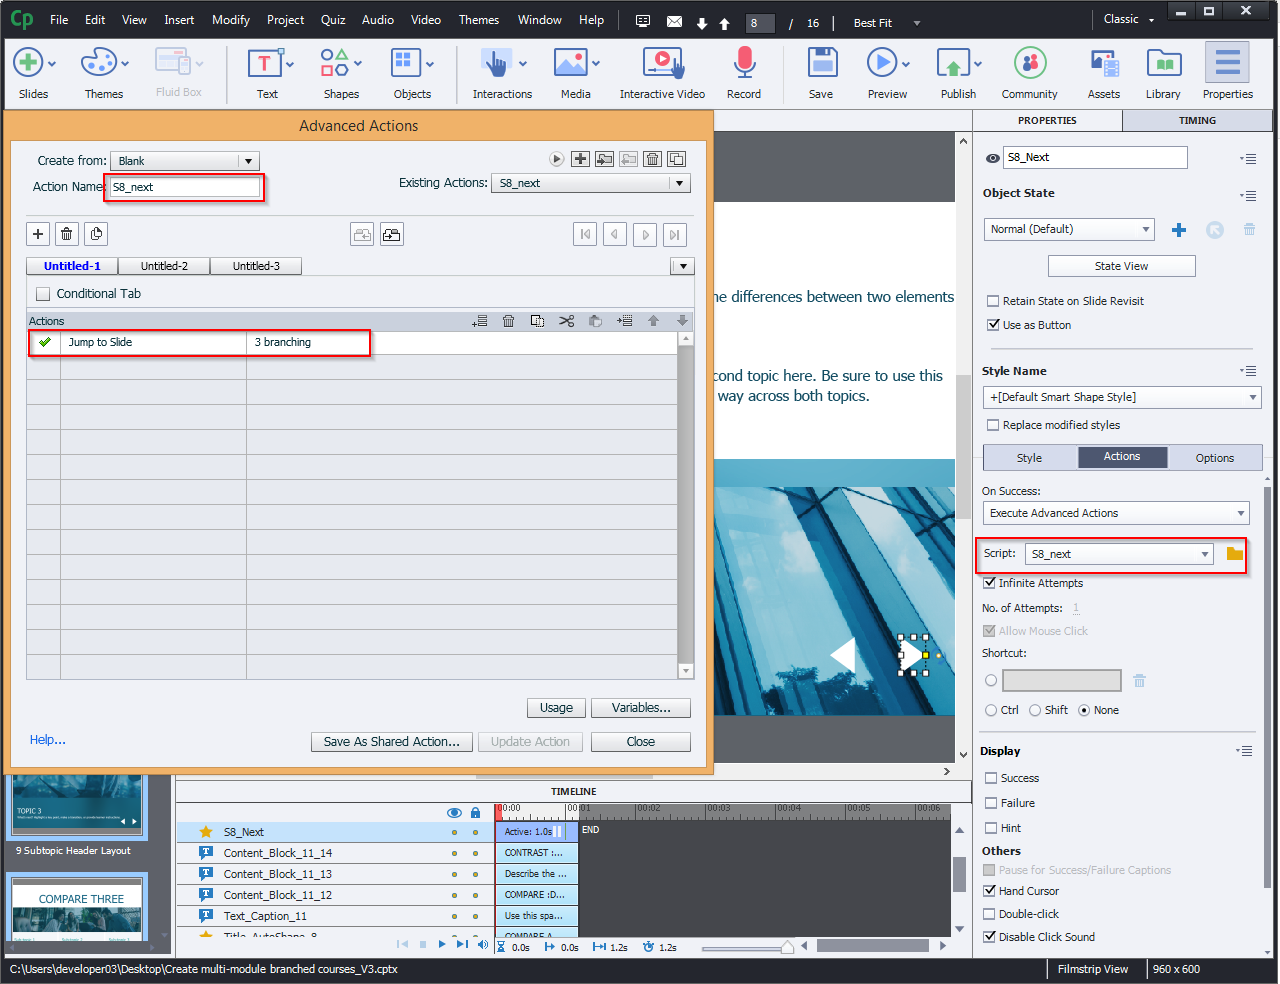
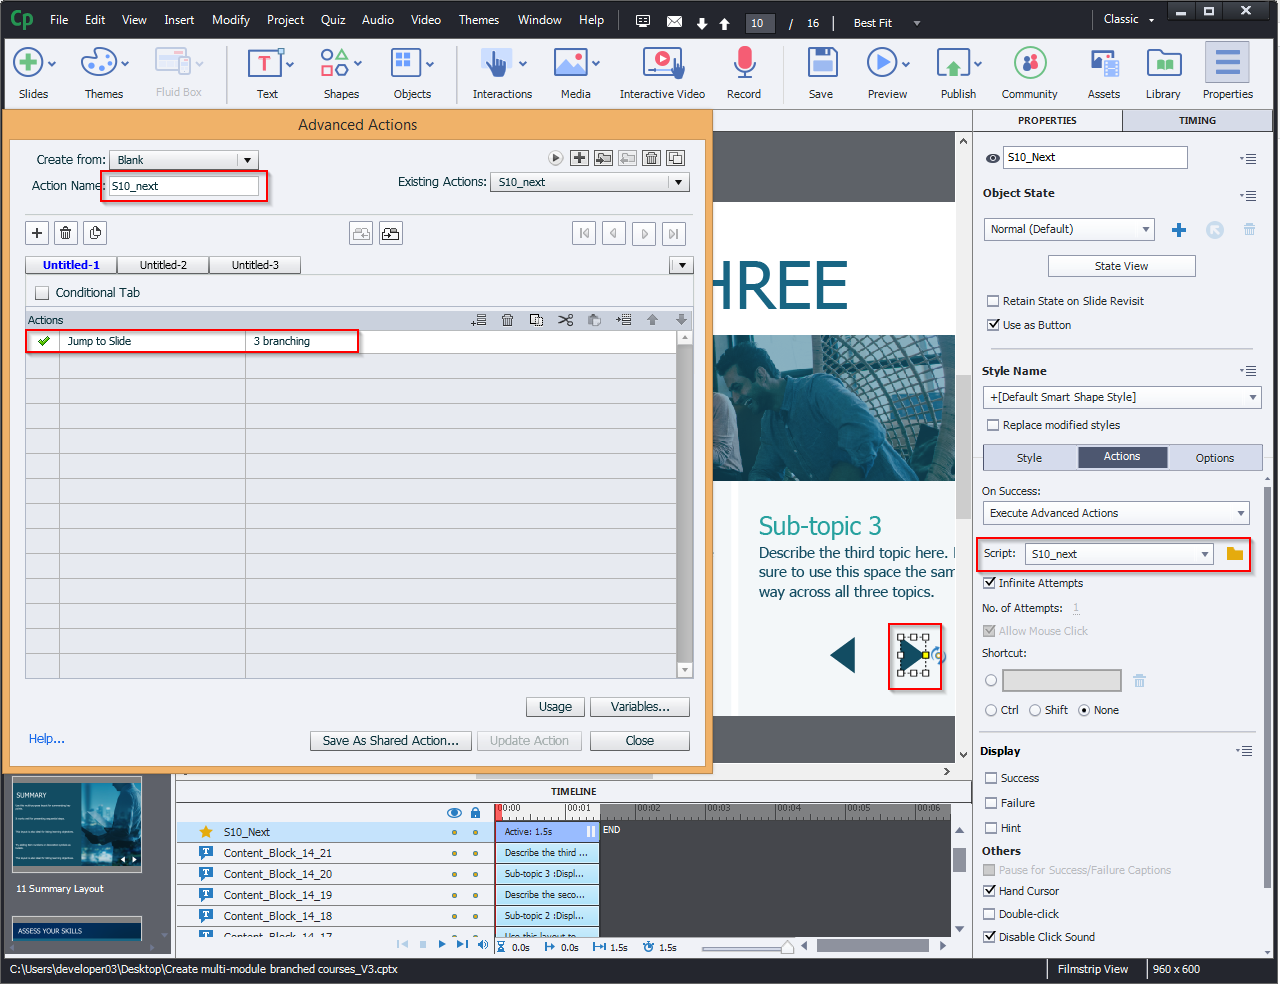
On the topic end screen, add an action to the next button to jump to the branching screen.

The same procedure applies to all the topics that has a next button.
In this blog we are going to demonstrate, how to design a multi-module course with Adobe Captivate 2019. The process involves the use of branching logic, a few variables, and advanced actions.
Visit our website for more insights: www.swiftelearningservices.com
Let’s look at the steps:
Step 1:
From the Slides menu, select Asset Library…
Step 2:
Select Aspire branching…
Step 3:
Select All Slides from the top menu, then press Insert Slides as shown in the screenshot.
Step 4:
Now you can see COURSE TOPICS slide with topic buttons.
Step 5:
As shown below, select the Quiz button and hide the Eye icon.
Step 6:
Add the custom navigation buttons (Next and Back).
Step 7:
Select the Next button and hide the Eye icon.
Step 8:
For creating new variables, Select variables….. From Project menu.
Step 9:
As shown below, give the variable a unique name
(Topic 1) and set the Value to “0“.
(Topic 2) and set the Value to “0“.
(Topic 3) and set the Value to “0“.
Step 10:
Now, select Topic 1 button and follow the actions as shown in the image.
Actions field:
ELSE Field:
The same procedure applies to all the topics:
Step 11:
Add an action to the branching slide “On Enter” as highlighted below.
IF: Condition
Topic1 is equal to 1.
Topic2 is equal to 1.
Topic3 is equal to 1.
Actions:
Show Quiz button
Show Slide2_next
Hide Slide2_Img
ELSE Field:
Show Slide2_Img
Hide Slide2_next
Hide Quiz button
Step 12:
On the topic end screen, add an action to the next button to jump to the branching screen.
The same procedure applies to all the topics that has a next button.


You must be logged in to post a comment.
- Most Recent
- Most Relevant
