 Wizard
This blog explains how to enhance hotspot interactions in Adobe Captivate 13 by adding audio, creating a more engaging and accessible learning experience. It walks through a simple step-by-step process to attach audio clips to hotspot callouts and highlights best practices for clear, concise implementation.
Have you ever created a hotspot interaction in your eLearning course and wished it could be more engaging? Well, here’s some good news, you can now add audio to your hotspot callouts in Adobe Captivate 13, and it’s surprisingly easy to do!
Why Add Audio to Hotspots?
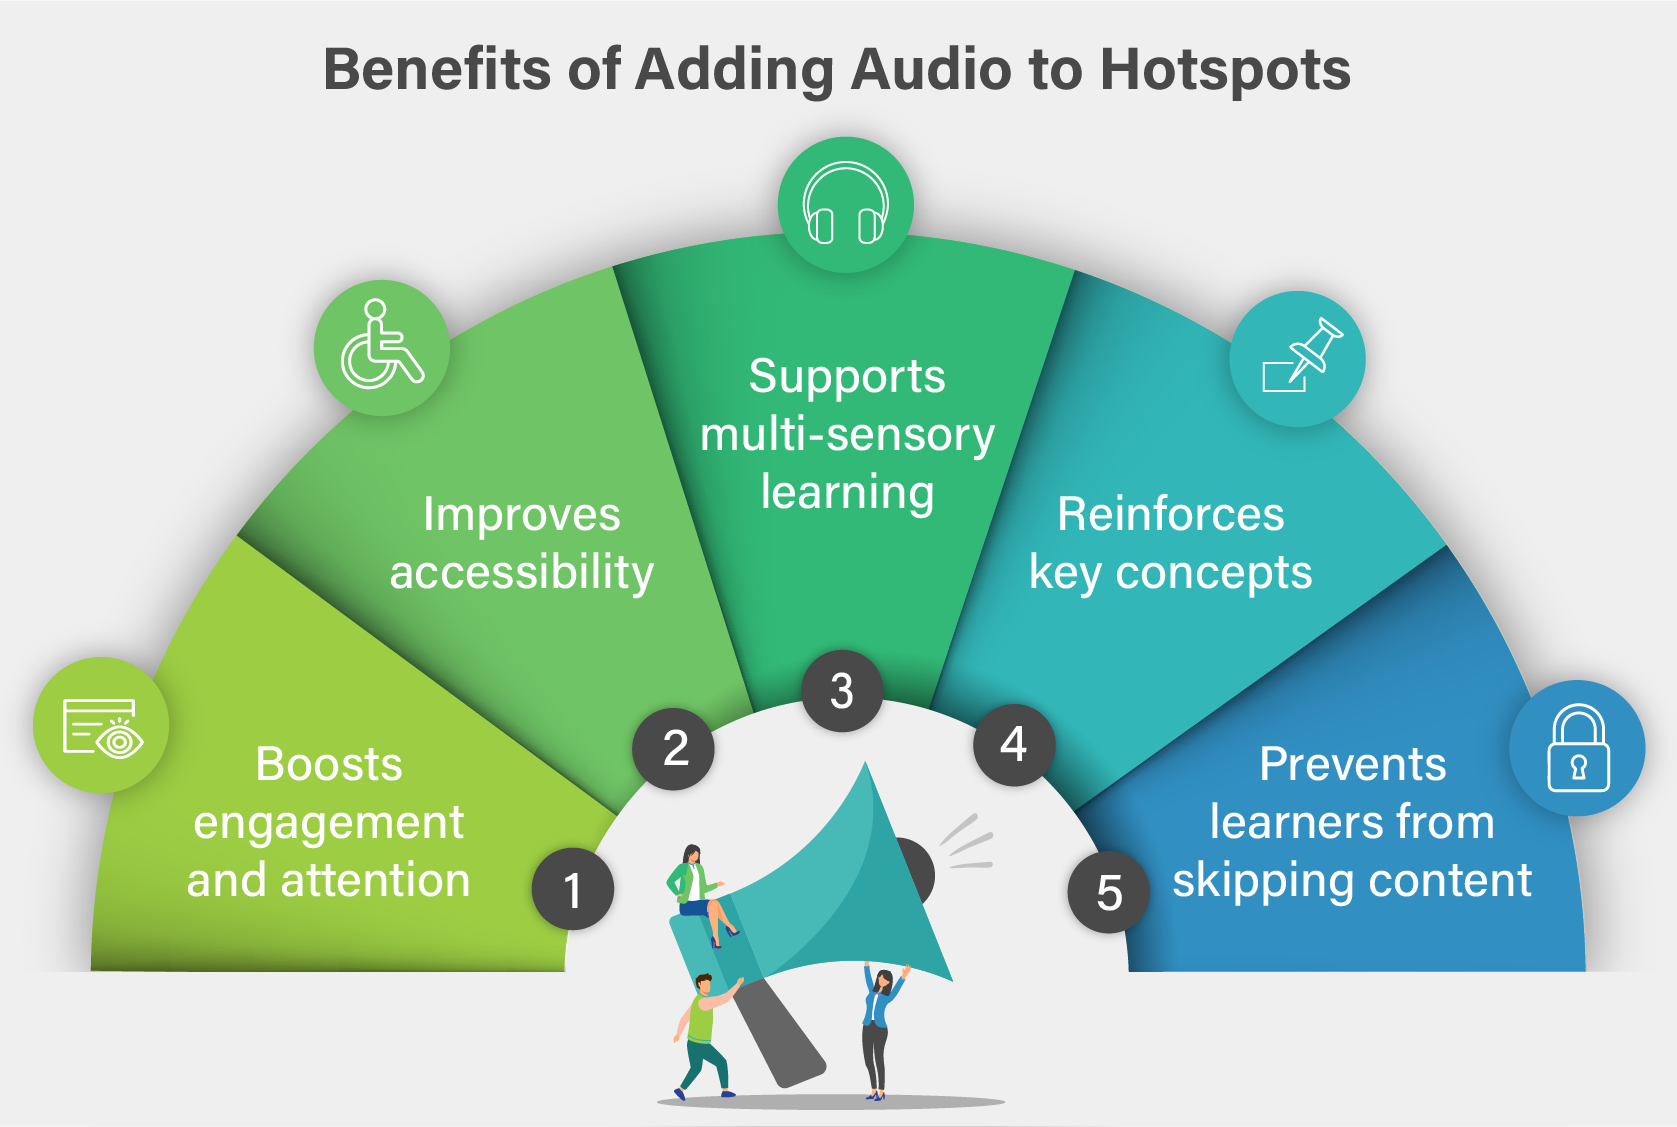
Before we jump into the “how,” let’s talk about the “why.” Adding audio to your hotspot interactions makes your course more engaging and accessible. Instead of just reading text, learners can listen to explanations while exploring different areas of your content. This multi-sensory approach helps reinforce learning and keeps students engaged.

What You’ll Need
You’ll need Adobe Captivate version 13 (the latest version at the time of writing) and some audio files ready to go. These can be simple voice recordings explaining each hotspot area.
Creating Your Hotspot Interaction
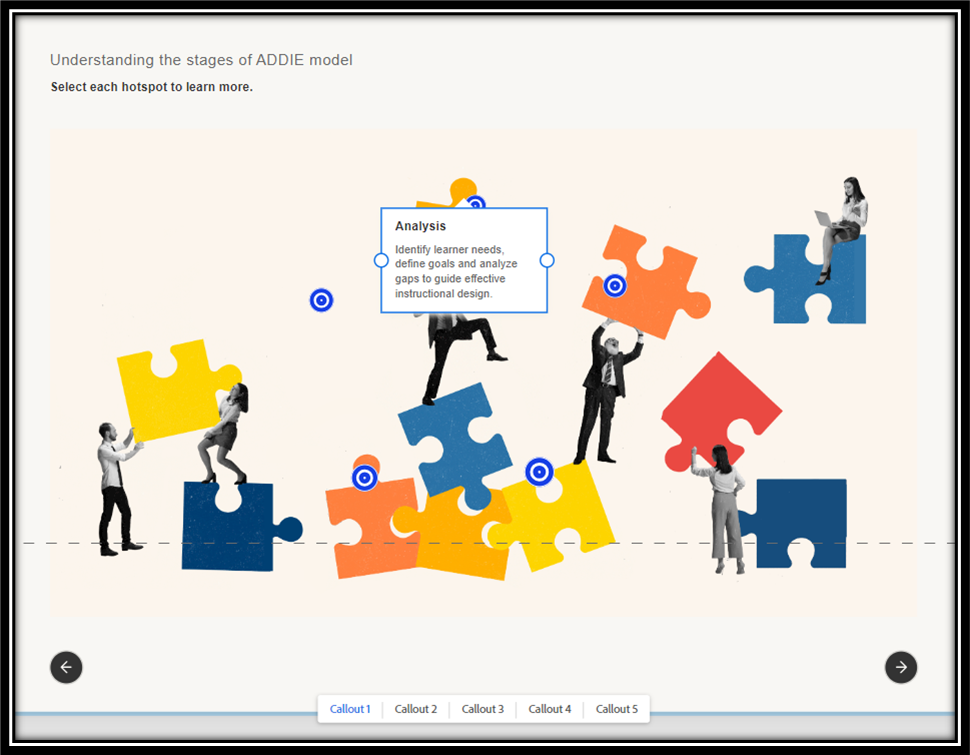
Let’s walk through a practical example. Imagine you’re creating a course about the ADDIE model – those five stages of instructional design: Analysis, Design, Development, Implementation, and Evaluation. You want learners to click on each stage and hear an explanation.
First, set up your basic hotspot interaction with all five callouts positioned on your slide. Make sure each hotspot is clearly marked and easy to click.
Adding Audio: Step by Step
Here’s where the magic happens, and trust me, it’s much simpler than you might think.
For Your First Hotspot: Select the first callout by clicking on it. Look for the interactions icon and click “Add Interaction.” You’ll see an option to “Play Media” – expand this option. Now, browse to where your first audio file is saved on your computer, select it, and click “Open.” Then press “Done.”
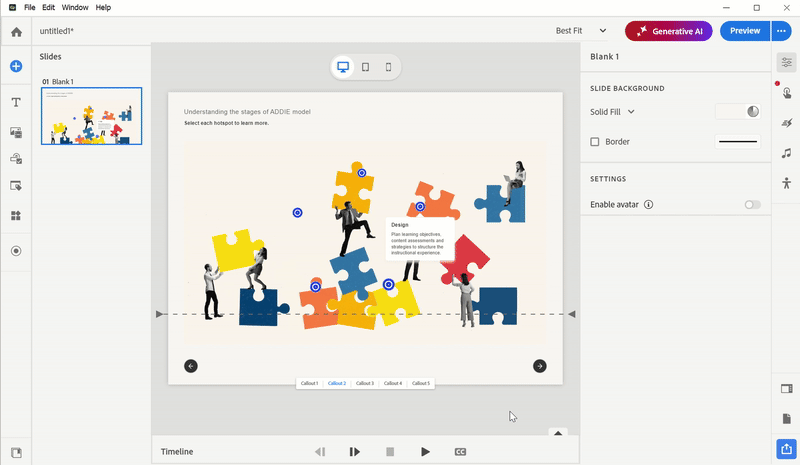
For Remaining Hotspots: Repeat this same process for each additional hotspot. Select the hotspot, click the interactions icon, add an interaction, choose “Play Media,” browse to your audio file, and open it. It’s that straightforward!
A helpful tip: Before adding the audio, click on each callout to make sure you’re selecting the right one. This prevents confusion, especially when you have multiple hotspots close together.
How It Works for Learners
Once you’ve added audio to all your hotspots, here’s what your learners will experience:
When they click on the Analysis hotspot, they might hear: “Identify learner needs, define goals and analyze gaps to guide effective instructional design.”
Click on Design: “Plan learning objectives, content assessments and strategies to structure the instructional experience.”
And so on for each stage. The audio plays automatically when they expand each hotspot, creating a smooth, guided learning experience.
A Smart Feature
One particularly useful aspect of Adobe Captivate’s hotspot widget is that you can set it up so learners must click on all hotspots before moving forward. The “Next” button stays disabled until they’ve explored every area. This ensures they don’t skip important content – they can only continue once they’ve clicked that final hotspot and heard all the information.

Best Practices
Keep your audio clips concise and clear. Each explanation should be long enough to convey the necessary information but short enough to maintain attention. Think 10-15 seconds per hotspot. Make sure your audio quality is good.
Position your hotspots thoughtfully. In the ADDIE example, arranging them in a circular cycle makes visual sense because it’s a cyclical process.
Final Thoughts
Adding audio to hotspot callouts transforms a simple click-and-reveal interaction into an engaging multimedia experience. It’s a small change that makes a big difference in how learners interact with your content.
The best part? You don’t need to be a tech wizard to make it happen. If you can click a few buttons and select files from your computer, you can add audio to your hotspots.
So next time you’re building a hotspot interaction, take that extra step and add some audio. Your learners will thank you for it, and you’ll create a more professional, polished eLearning experience.
Remember, good eLearning isn’t just about delivering information, it’s about creating an experience that helps people learn effectively. Audio-enhanced hotspots are one more tool in your toolkit to make that happen.
Have you ever created a hotspot interaction in your eLearning course and wished it could be more engaging? Well, here’s some good news, you can now add audio to your hotspot callouts in Adobe Captivate 13, and it’s surprisingly easy to do!
Why Add Audio to Hotspots?
Before we jump into the “how,” let’s talk about the “why.” Adding audio to your hotspot interactions makes your course more engaging and accessible. Instead of just reading text, learners can listen to explanations while exploring different areas of your content. This multi-sensory approach helps reinforce learning and keeps students engaged.
What You’ll Need
You’ll need Adobe Captivate version 13 (the latest version at the time of writing) and some audio files ready to go. These can be simple voice recordings explaining each hotspot area.
Creating Your Hotspot Interaction
Let’s walk through a practical example. Imagine you’re creating a course about the ADDIE model – those five stages of instructional design: Analysis, Design, Development, Implementation, and Evaluation. You want learners to click on each stage and hear an explanation.
First, set up your basic hotspot interaction with all five callouts positioned on your slide. Make sure each hotspot is clearly marked and easy to click.
Adding Audio: Step by Step
Here’s where the magic happens, and trust me, it’s much simpler than you might think.
For Your First Hotspot: Select the first callout by clicking on it. Look for the interactions icon and click “Add Interaction.” You’ll see an option to “Play Media” – expand this option. Now, browse to where your first audio file is saved on your computer, select it, and click “Open.” Then press “Done.”
For Remaining Hotspots: Repeat this same process for each additional hotspot. Select the hotspot, click the interactions icon, add an interaction, choose “Play Media,” browse to your audio file, and open it. It’s that straightforward!
A helpful tip: Before adding the audio, click on each callout to make sure you’re selecting the right one. This prevents confusion, especially when you have multiple hotspots close together.
How It Works for Learners
Once you’ve added audio to all your hotspots, here’s what your learners will experience:
When they click on the Analysis hotspot, they might hear: “Identify learner needs, define goals and analyze gaps to guide effective instructional design.”
Click on Design: “Plan learning objectives, content assessments and strategies to structure the instructional experience.”
And so on for each stage. The audio plays automatically when they expand each hotspot, creating a smooth, guided learning experience.
A Smart Feature
One particularly useful aspect of Adobe Captivate’s hotspot widget is that you can set it up so learners must click on all hotspots before moving forward. The “Next” button stays disabled until they’ve explored every area. This ensures they don’t skip important content – they can only continue once they’ve clicked that final hotspot and heard all the information.
Best Practices
Keep your audio clips concise and clear. Each explanation should be long enough to convey the necessary information but short enough to maintain attention. Think 10-15 seconds per hotspot. Make sure your audio quality is good.
Position your hotspots thoughtfully. In the ADDIE example, arranging them in a circular cycle makes visual sense because it’s a cyclical process.
Final Thoughts
Adding audio to hotspot callouts transforms a simple click-and-reveal interaction into an engaging multimedia experience. It’s a small change that makes a big difference in how learners interact with your content.
The best part? You don’t need to be a tech wizard to make it happen. If you can click a few buttons and select files from your computer, you can add audio to your hotspots.
So next time you’re building a hotspot interaction, take that extra step and add some audio. Your learners will thank you for it, and you’ll create a more professional, polished eLearning experience.
Remember, good eLearning isn’t just about delivering information, it’s about creating an experience that helps people learn effectively. Audio-enhanced hotspots are one more tool in your toolkit to make that happen.


You must be logged in to post a comment.
- Most Recent
- Most Relevant
