 Legend
227 posts
When playing an educational game, going through a course, or answering questions, it’s always desirable by the learners to be able to see a visual indication of their progress. This helps them keep a reality check on how they are performing. The same holds true for learning interactivities and scenarios as well, where a progress bar can indicate whether the learner is headed in the right direction or not.
So the good news is that we can create Progress Bars in Adobe Captivate courses… Yippee! 🙂
There are a few steps that you need to follow and use some advanced actions and variables to do so.
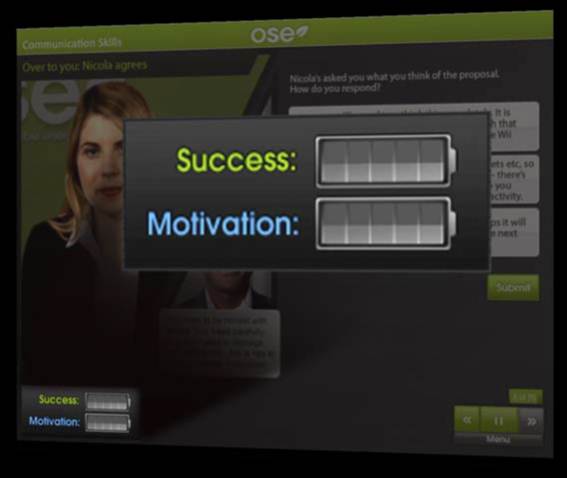
Ready? Here’s an example of a progress bar added to a scenario-based course, which fills up if you make the correct decisions. There are three decision points with three options each. The first option is correct and holds a score of 2, second option is partially correct and is worth a score of 1, and the third option is incorrect and holds a score of -1. Try playing around with this course and see how the progress bar moves up and down based on the options you select.
Now let’s get down to see how to create a progress bar for your courses:
Want to try creating a progress bar and feel comfortable if the steps are listed… here you go!
1. Create variables:
a. To store the scores: Score1, Score2, Score3, etc.
b. To calculate and store the total score: TotalScore
c. To store the options selected: Decision1, Decision2, Decision3, etc.
2. Define actions for each option:
a. Assign score to the option
b. Add the score to total score
c. Assign the decision value to the option (Will be used to display the feedback)
d. Go to the next slide
3. Add Progress Bar graphics to a blank slide:
a. Label them: Cell1, Cell2, Cell3, etc.
b. Uncheck visible option for all the graphics except the one in empty state.
c. Change the display time for the graphics to rest of the project.
d. Change the duration of the slide to 0.1 second.
4. Define On Enter Conditional Action for this slide:
a. If TotalScore is equal to 1, show Cell1 graphic and hide the rest.
b. If TotalScore is equal to 2, show Cell2 graphic and hide the rest.
c. If TotalScore is equal to 3, show Cell3 graphic and hide the rest.
d. If TotalScore is equal to 4, show Cell4 graphic and hide the rest.
e. If TotalScore is greater or equal to 5, show Cell5 graphic and hide the rest.
f. If TotalScore is lesser or equal to 0, hide all the graphics.
5. For feedback screen, define On Enter Conditional Action:
a. Show feedback text based on the option selected in decision screen and hide the rest.
6. Add blank screens before the feedback screens:
a. Assign the conditional action defined for progress bar display.
b. Change the duration of the slide to 0.1 second.
7. Repeat steps 2, 5, and 6 for the rest of the decision and feedback screens.
That’s it! The progress bar is up and running! 🙂
 Legend
227 posts
This is really great stuff. And exactly what I need.
However, I’m having a problem making it work. Would it be possible to see the source file? I thought I understood it all, but when I click on any of the options, nothing happens. I’m confused about statement “add screens before the feedback screens”. I thought there was only one feedback screen? This doesn’t show in your slide sorter view at the side, so I’m not sure what you mean by that. Help?
Here’s the link to download the source file. Let me know if you have any further questions. https://acrobat.com/#d=zP6CXXu40CbCvl3Tnm0AdA
Hello Dr. Pooja,
Great work. Exactly what I was looking for. I unfortunately cannot see the source file. Do you think having Captivate 5 is an issue did you use 5.5? Is there another link for the source file? The error message I receive is make sure the file is not open already, it is not damaged, you have sufficient space and resources. Non of the previously mentioned is applicable. Thank you in advance for your help.
Yes, the source file is created using Captivate 5.5, that’s why you are not able to access it.
Try adding this functionality with the help of instructions provided in the post. You can also view this recorded training session for more details: https://www.adobe.com/cfusion/event/index.cfm?event=register%5Fno%5Fsession&loc=en%5Fus&id=1934970&sdid=JNTAK
And if you are stuck somewhere, leave a comment here, and I’ll help you through it… 🙂
The instructions for creating a progress bar are exactly what I am looking for. I am new to Captivate so I am not very savvy. I had never worked with Advanced Actions or Variables until I attempted to follow the instructions given so I know I messed up somewhere. I’m also working in Captivate 5 and was unable to download the source file. When you say to try adding this funcitonality with the help of instructions provided in the post, which instructions are you referring to and what functionality? Thank you for any help you can give!
Hydee, you can see the demonstration embedded in the blog and follow the instructions. The steps would be the same for Captivate 5. If you’ve followed all the steps and for some reason it’s not working, please share the file with me at pjaising@adobe.com and I can check it for you.
Hello, Dr. Jaisingh. The link to the source file is not working, and after following the tutorial I’m still having a hard time. Please, Do you have another link to the source file to help guide Me? Joann


