Scenario-based courses help learners to try workflows as they proceed and learn as they make mistakes and learn. I wanted to create one such course and thought of taking my HTML5 course on Photography Basics to the next level by adding another scenario, in that way teaching two topics of Photography. Watch the course below to know more…
What’s the building block…
Mostly scenario-based courses work on the principle of questions and answers where questions are the actual steps in the scenario and answers are the consequences based on those steps. When we develop using Adobe Captivate, question slides becomes an integral part of it, so, taking care of quiz scope is very important because learners go back and forth while trying out different workflows. What I did to take care of it is to first make the quiz as multiple attempts so that they can still answer questions if they come back to those questions.
How is it structured?
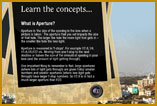
Section 1: Slides explaining couple of concepts like Aperture and Shutter Speed
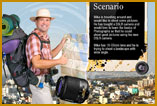
Section 2: Scenario on Aperture and Shutter speed. Here I took the example of a traveller who is trying out different scenarios to get the Photograph right. Here, I’ve used Question slides and navigate to different slides based on Advanced Answer option… cool isn’t it?
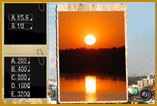
Section 3: Scenario on ISO settings of a DSLR camera. I wanted to make this a little different so created a single screen experience to try different combinations. BTW, if you were wondering how did I get all these photographs… I shot them… 🙂
What about the Graphics…
Because it is a course on Basics of Photography, it is important that the course looks good visually too 🙂 So tried a few options to make it look good…
 Background: For all the slides, created Master Slides to be associated which have related background images.
Object Styles: Created object styles for various types of text. This is one of my favorites because it is very easy to manage the look at one go.
 Buttons: This is very interesting… there are buttons at various places, in question slides and in content slides… so the best option is to create image buttons of different labels. Adobe Photoshop gives us more power to do this and as you all know… it is better if they are transparent PNGs… 🙂
 More importantly… the scenario images: My interest to shoot lots of pictures came handy here because I needed multiple images with multiple combinations of Aperture, Shutter speed and ISO settings. Later, resized them and added border using Adobe Photoshop… made sure not to do any color correction 🙂
Authoring in Adobe Captivate 5.5…
Whenever I create these type of courses, somehow I like working a lot with Master Slides and Groups… Master slides for the consistency of look and Groups of organizing the content. Other important things to consider is, labeling the slides and objects, create object styles as far as possible and… keep saving it 🙂
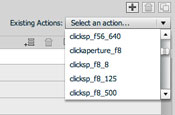 Advanced Actions: Especially when showing multiple scenarios in a single screen, I had to go take the Advanced Actions route. These are standard actions with show/hide behavior but one caution is to select the proper objects to show/hide, so now you know why it is very important to properly name the objects.
I’ve shared the source file here. If you have any alternate approaches, please let me know by commenting below… even otherwise you can comment if you like it 🙂
Thank you!!
What are you observing? Can you send me a screenshot to viswanat@adobe.com?
You must be logged in to post a comment.


