 Staff
44 posts
Staff
44 posts
 Guest Blog Post by By Shawn Scivally (eLearning Brothers)
Brother Shawn is the co-founder of eLearning Brothers. Along with my brother Andrew, we create awesome eLearning stuff. Specializing in eLearning Templates, games, page layouts, cutout people pictures, interactions, quizzes and much more. Having much success, and now being a trusted brand in the eLearning industry—we are an award winning eLearning development team.
Do you know you have options for navigation player skins in Adobe Captivate 7? It can be extremely helpful to know this before you start your project. So, if you didn’t know you had options—keep reading.
Three options for navigation player skins in Adobe Captivate 7:

1. Captivate Skin Editor Widgets
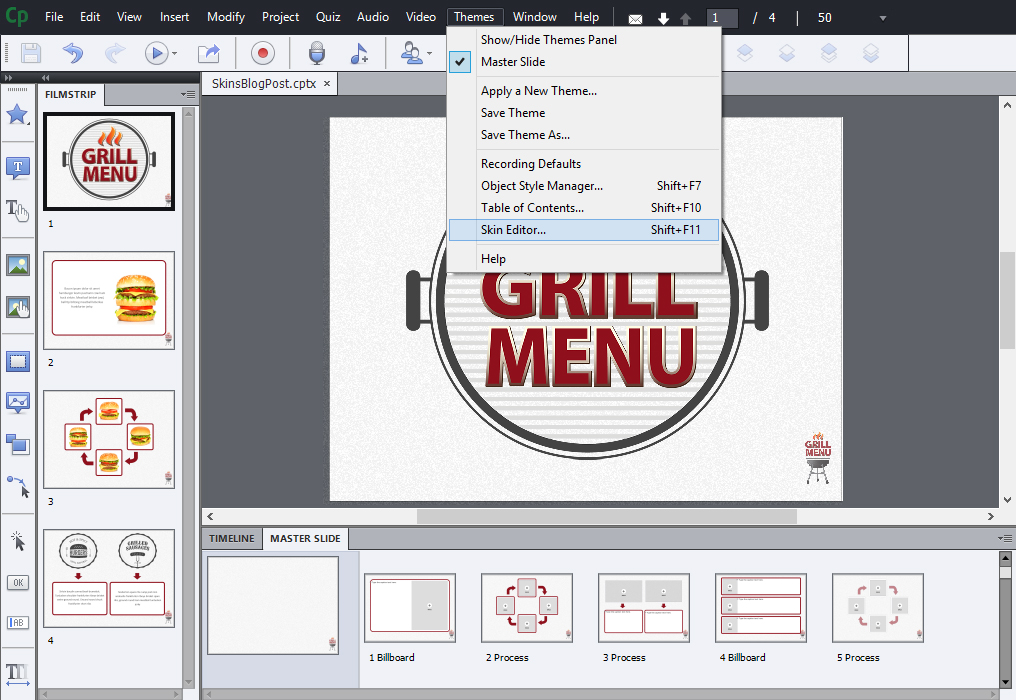
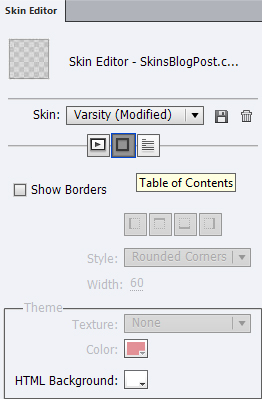
To activate the Captivate Skin Editor Widget go to Themes –> Skin Editor. This will pull up a new window for editing options. [Pic] In the Captivate Skin Editor Widget you’ll find three main tabs for controlling your navigation:
Your playback control allows you to choose a skin, player control buttons, and what controls show up within the skin. The borders let you edit the color and size the border around the course. Then the Table of Contents editor allows you to pick which slides you want to show the Table of Contents.
Why would you want to use the Skin Editor Widget?
PROS: This widget is great for branding. You can change the colors, navigation functionality, and change things to meet the needs of any brand. Another reason to use this option is for HTML5 output. This means the Skin Editor Widget works on iPad and iPhone.
CONS: A reason you may not want to choose to go with this option is it’s a well-known and recognizable Captivate widget. It may not give you the unique look that you want.
Above is a video to understand more about the Captivate Skin Editor Widget.

2. Captivate Playbar Widgets
There are two options to enable this widget.
First option: The first is go to the top of the menu and click Insert–>Widget. A window will pull up to choose a widget from your computer. By default Captivate Playbar Widgets are populated. The problem with this way is you can’t preview the widget before your use it, but you can preview it through the second option.
Second option: The second way to enable the Playbar Widget is through the Skin Editor Widget. Go to Themes –> Skin Editor –>Playbar Widgets. This way a window will allow you preview the five widgets. Then drag and drop the widget onto your slide. Make sure you slide this into your Master Slide.
Why would you want to use Captivate Playbar Widgets?
PROS: What is great about this widget is most people don’t recognize this as a Captivate Widget. You can quickly add this to your project if you need. You can preview the widget before you use it.
CONS: You are limited on branding and customizing colors and functions. Also this widget is not HTML5 compatible so this is not a widget for iPad or iPhone. Note: Remember to turn off your Skins Editor to enable the Captivate Playbar Widget or it will not work. Captivate won’t allow both widgets in navigation. If you have this issue, you will need to un-check all the Skins editor tabs (Show Playback Control, Show Borders, and Show Table of Content boxes) that enable this widget to show.

3. Custom Player Skins
Are you looking for a completely custom looking skin? Looking for something that’s “out of the box”? Then you may want to try a custom skin. There are various companies that build custom skins and/or offer custom template skins. One option is going to eLearningTemplates.com and downloading a custom skin widget to your computer. (Current Template Library subscribers get access to 9 skins.) I downloaded an Adobe Captivate skin called the Gizmo Captivate Player Skin. Once it’s downloaded to my computer go to the top of the menu and click Insert–>Widget. Find your new widget on your computer. Now a Widget Properties window will appear. You can customize color and functionality. You can choose to hide certain navigations buttons.
Why use a Custom Player Skin?
PROS: You can customize it to your brand, it doesn’t look like the other navigation widgets, you can export out to HTML5, and it has the “WOW!” factor that most learners have never seen before.
CONS: The limitations with custom player skins are it doesn’t allow viewing live changes for editing until you preview the project in Captivate. Other than that you have a useful tool to make great eLearning navigation.


Guest Blog Post by By Shawn Scivally (eLearning Brothers)
Brother Shawn is the co-founder of eLearning Brothers. Along with my brother Andrew, we create awesome eLearning stuff. Specializing in eLearning Templates, games, page layouts, cutout people pictures, interactions, quizzes and much more. Having much success, and now being a trusted brand in the eLearning industry—we are an award winning eLearning development team.
Do you know you have options for navigation player skins in Adobe Captivate 7? It can be extremely helpful to know this before you start your project. So, if you didn’t know you had options—keep reading.
Three options for navigation player skins in Adobe Captivate 7:
1. Captivate Skin Editor Widgets
To activate the Captivate Skin Editor Widget go to Themes –> Skin Editor. This will pull up a new window for editing options. [Pic] In the Captivate Skin Editor Widget you’ll find three main tabs for controlling your navigation:
Your playback control allows you to choose a skin, player control buttons, and what controls show up within the skin. The borders let you edit the color and size the border around the course. Then the Table of Contents editor allows you to pick which slides you want to show the Table of Contents.
Why would you want to use the Skin Editor Widget?
PROS: This widget is great for branding. You can change the colors, navigation functionality, and change things to meet the needs of any brand. Another reason to use this option is for HTML5 output. This means the Skin Editor Widget works on iPad and iPhone.
CONS: A reason you may not want to choose to go with this option is it’s a well-known and recognizable Captivate widget. It may not give you the unique look that you want.
Above is a video to understand more about the Captivate Skin Editor Widget.
2. Captivate Playbar Widgets
There are two options to enable this widget.
First option: The first is go to the top of the menu and click Insert–>Widget. A window will pull up to choose a widget from your computer. By default Captivate Playbar Widgets are populated. The problem with this way is you can’t preview the widget before your use it, but you can preview it through the second option.
Second option: The second way to enable the Playbar Widget is through the Skin Editor Widget. Go to Themes –> Skin Editor –>Playbar Widgets. This way a window will allow you preview the five widgets. Then drag and drop the widget onto your slide. Make sure you slide this into your Master Slide.
Why would you want to use Captivate Playbar Widgets?
PROS: What is great about this widget is most people don’t recognize this as a Captivate Widget. You can quickly add this to your project if you need. You can preview the widget before you use it.
CONS: You are limited on branding and customizing colors and functions. Also this widget is not HTML5 compatible so this is not a widget for iPad or iPhone. Note: Remember to turn off your Skins Editor to enable the Captivate Playbar Widget or it will not work. Captivate won’t allow both widgets in navigation. If you have this issue, you will need to un-check all the Skins editor tabs (Show Playback Control, Show Borders, and Show Table of Content boxes) that enable this widget to show.
3. Custom Player Skins
Are you looking for a completely custom looking skin? Looking for something that’s “out of the box”? Then you may want to try a custom skin. There are various companies that build custom skins and/or offer custom template skins. One option is going to eLearningTemplates.com and downloading a custom skin widget to your computer. (Current Template Library subscribers get access to 9 skins.) I downloaded an Adobe Captivate skin called the Gizmo Captivate Player Skin. Once it’s downloaded to my computer go to the top of the menu and click Insert–>Widget. Find your new widget on your computer. Now a Widget Properties window will appear. You can customize color and functionality. You can choose to hide certain navigations buttons.
Why use a Custom Player Skin?
PROS: You can customize it to your brand, it doesn’t look like the other navigation widgets, you can export out to HTML5, and it has the “WOW!” factor that most learners have never seen before.
CONS: The limitations with custom player skins are it doesn’t allow viewing live changes for editing until you preview the project in Captivate. Other than that you have a useful tool to make great eLearning navigation.


You must be logged in to post a comment.
- Most Recent
- Most Relevant
How you create that design? Can you share whole tutorial with us???
Hey lad, if you are referring to the custom skin you need AS3 programmer skills to pull it off.
It’s not simple, tough…
Ahh…! Yep that’s tough. BTW, thanks buddy ;-))
[…] Read the original here: 3 Navigation Player Options in Adobe Captivate 7 […]
[…] Fuente / Source: “https://elearning.adobe.com/2013/11/3-navigation-player-options-in-adobe-captivate-7.ht… […]
