 Staff
3 posts
Staff
3 posts
Please make sure you have read the articles- “Using Fluid boxes: Knowledge Facts – 1” and “Using Fluid boxes: Knowledge Facts – 2“, to understand this article better.
In this article, I will be discussing about Fluid box properties. While working with fluid boxes, it is very important to understand and utilize fluid box properties like Wrap, Flow, Alignment, Stretch to Fit and Padding, to create a truly responsive content.
So, let us get started!
Properties of a Fluid box and how they work:
Whenever you select a Fluid box, this is how your properties panel looks like with respect to the Fluid box properties:

Let us have a look at each of them specifically.
- Flow: Flow property determines the direction of flow of fluid boxes or objects which are contained within the selected fluid box.
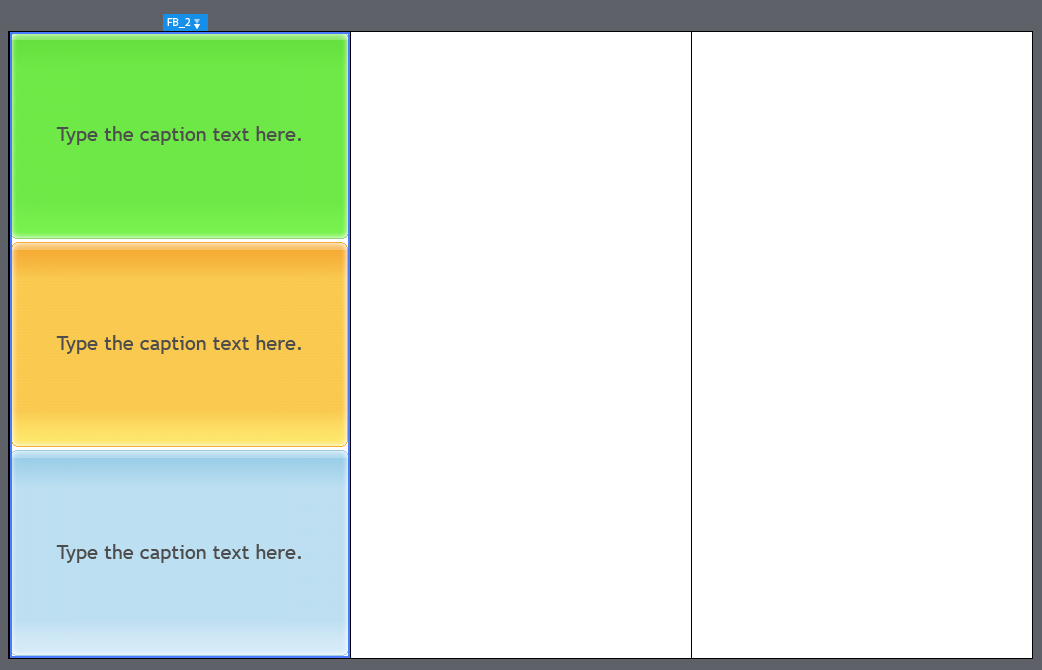
For example, suppose you insert a fluid box layout with three fluid boxes in horizontal direction, flow of your root fluid box is horizontal (as shown in figure below):

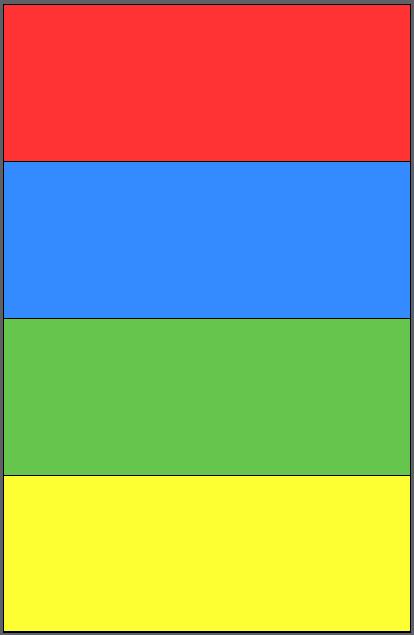
If you go to properties and change flow from horizontal to vertical – 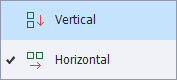 , you will see your layout transforms to something like below:

Remember, changing flow direction does not only determine the direction in which child fluid boxes will be inserted within the selected fluid box, but also the same property applies to objects which will be added to the fluid box.
For example, suppose in our initial layout where we had flow of root fluid box (FB_1) as horizontal and flow of each child fluid boxes (FB_2, FB_3 and FB_4) as vertical, upon inserting objects to FB_2, they will be added in vertical fashion as below:
- Wrap: Wrap is one of the most important aspect of fluid boxes and it determines how your content layouts on lower view devices.
One of the most important point to remember while working with fluid boxes is to always set fluid box properties and edit your objects while your preview mode is desktop or at project width. This will help you achieve correct results when viewing your content on lower devices, albeit maintaining the integrity of content on desktop as well.
Wrap property can be set at fluid box level but it always applies to immediate child fluid boxes/objects i.e. suppose if you set wrap type as “Wrap to next row” for a fluid box, its immediate child objects or fluid boxes will layout themselves in that manner.
Before we move further, let us talk about wrap point and its significance.
Wrap point has got two roles to play:
- It determines the threshold at which the immediate child objects/fluid boxes start rearranging themselves depending upon the wrap type you set for your fluid box.
For example, let us discuss the default case when you insert a fluid box layout of root horizontal flowing fluid box with three child fluid boxes using the fluid box option from tool bar on a blank slide – 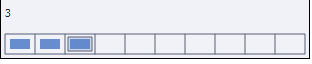 .
.
For convenience of understanding, I will be filling child fluid boxes FB_2, FB_3 and FB_4 with red, blue and green color respectively. Here is how it looks in desktop preview mode-

Wrap property for root fluid box is by default set as “Wrap to next row” and wrap point as 80%.
Now if you move the preview slider from width of 1024px to 819px, layout remains same. However, if you move the preview slider to 818px, layout changes to something like below-

As you can see, FB_4 which is green in color shifts down to next row (Wrapped to next row). Reason, wrap point is set as 80% for the root fluid box. 80% of 1024px (project width) is 819px (rounded). If you keep moving preview slider further, next wrap is going to happen at 545px and the layout looks something like below. Reason why next wrap is 545px will be covered as part of second significance of wrap point.

Remember- Wrapping always works from “right to left” and “bottom to top” for horizontal and vertical flow fluid boxes respectively.
- Second significance of Wrap point is the available area within a fluid box which can be utilized to accommodate child fluid boxes or objects (always considering stretch to fit option is disabled).
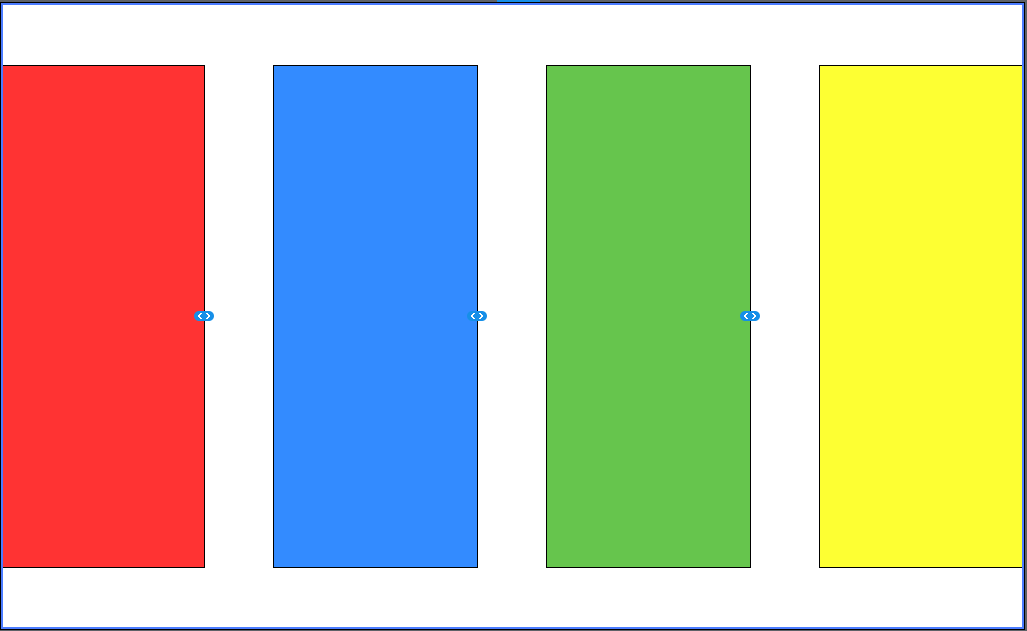
For example, in our original layout if we disable horizontal and vertical stretch to fit for root fluid box (FB_1), this is how our layout is going to look in desktop mode:

In this case, project width is 1024px. Root fluid box is of width 1024px. Since wrap point is set as 80%, only 80% of root fluid box (FB_1) area i.e. 819px is available for child fluid boxes and is distributed equally across them with 273px each.
Remember, “stretch to fit” option only stretches the child fluid boxes or objects within the fluid box. It does not change their original size within the fluid box. That is why even when the child fluid boxes (FB_2, FB_3 and FB_4) are all 273px each, summing up to 819px, they take up the entire space within the root fluid box i.e. 1024px.
Now let us come back to the question of how first wrapping happens at 818px and second at 545px in this case.
First wrap always happens at wrap point percentage of fluid box width. In our case root fluid box was 1024px, therefore first wrap happened at 80% of 1024px, i.e. right after 819px. Another way to look at this can be, wrap always happens if any of the immediate child object or fluid box needs to compromise in its actual width. Since in this case, our three child fluid boxes FB_2, FB_3 and FB_4 were all 273px each, summing to 819px, wrap happened at 818px.
When it comes to second wrap it happens when there is compromise in actual widths of left over objects which have not wrapped yet. In our case after the first wrap, FB_2(red) and FB_3(blue) were still left and had not wrapped yet. Their actual widths were 273px each, summing to 546px. That is the reason second wrap happened at 545px.
Different Wrap types and their meanings:
- Wrap to next row: This wrap option is available only when the flow of selected fluid box is horizontal. In this case, fluid boxes or objects contained within the selected fluid box, start shifting downwards i.e. next row (rightmost first), every time there is a compromise in the actual widths of unwrapped fluid boxes or objects.
- Wrap to next column: This wrap option is available only when the flow of selected fluid box is vertical. In this case, fluid boxes or objects contained within the selected fluid box, start shifting to right i.e. next column (bottom most first), every time there is a compromise in the actual heights of unwrapped fluid boxes or objects.
- Squeeze in a row: This wrap option is available only when the flow of selected fluid box is horizontal. In this case, fluid boxes or objects contained within the selected fluid box, do not shift anywhere. They just keep decreasing in size on lower width screen size devices. Immediate child objects having Maintain Aspect Ratio checked will decrease in both width and height while maintaining their aspect ratios. Immediate child objects having Maintain Aspect Ratio unchecked will decrease only in width. Immediate child Fluid boxes will decrease only in width.
- Squeeze in a column: This wrap option is available only when the flow of selected fluid box is vertical. In this case, fluid boxes or objects contained within the selected fluid box, do not shift anywhere. They just keep decreasing in size on lower height screen size devices. Immediate child objects having Maintain Aspect Ratio checked will decrease in both width and height while maintaining their aspect ratios. Immediate child objects having Maintain Aspect Ratio unchecked will decrease only in height. Immediate child Fluid boxes will decrease only in height.
- One row/column: As the name suggests, this wrap type will either keep all immediate child fluid boxes or objects in one row or one column.
In case of horizontal flow fluid box, immediate child fluid boxes or objects are in one row. Once wrapping happens, they arrange themselves in one column.
In case of vertical flow fluid box, immediate child fluid boxes or objects are in one column. Once wrapping happens, they arrange themselves in one row.
- Symmetrical: With odd number of immediate child objects or fluid boxes, this works same as one row/column. With even number of immediate child objects or fluid boxes, this works like wrapping the items in symmetrical fashion.
For example, if our original layout would have consisted of 4 child fluid boxes within a root fluid box like below, this is how it would have looked like in desktop view, after first wrap and after second wrap:

In desktop mode
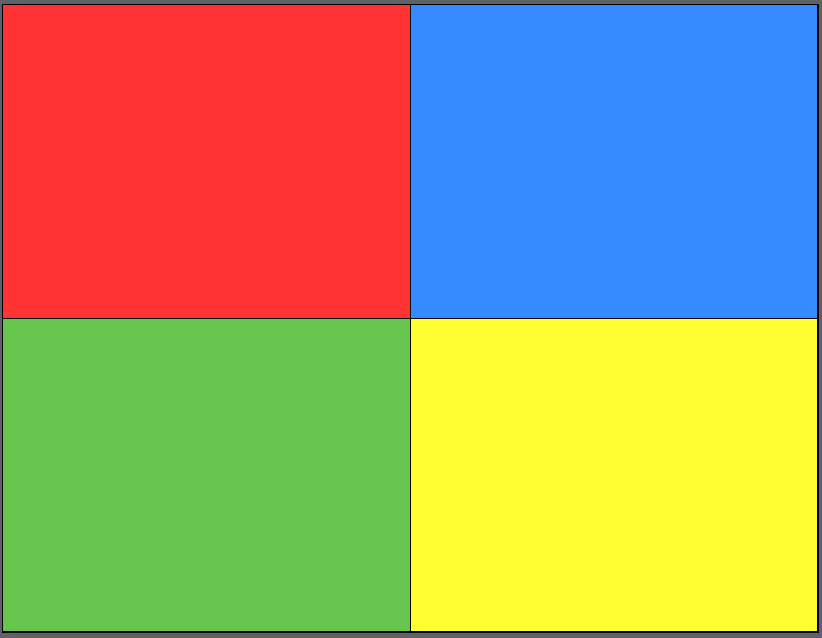
After first wrap
After second wrap
- Horizontal and Vertical Alignment: As the name suggests, these properties are same as alignment properties across any application we are familiar with.
Remember, alignment properties work only when stretch options are disabled for the fluid box.
Different alignment properties are:
- Left: Part of Horizontal alignment.
- Right: Part of Horizontal alignment.
- Center: Part of Horizontal alignment.
- Top: Part of Vertical alignment.
- Bottom: Part of Vertical alignment.
- Middle: Part of Vertical alignment.
- Space in between: Part of Horizontal alignment, if flow of fluid box is horizontal. Part of Vertical alignment, if flow of fluid box is vertical.
- Space around: Part of Horizontal alignment, if flow of fluid box is horizontal. Part of Vertical alignment, if flow of fluid box is vertical.
Easiest way to understand space around and space in between alignments and difference between them, is depicted via figures below:
Space in between alignment
Space around alignment
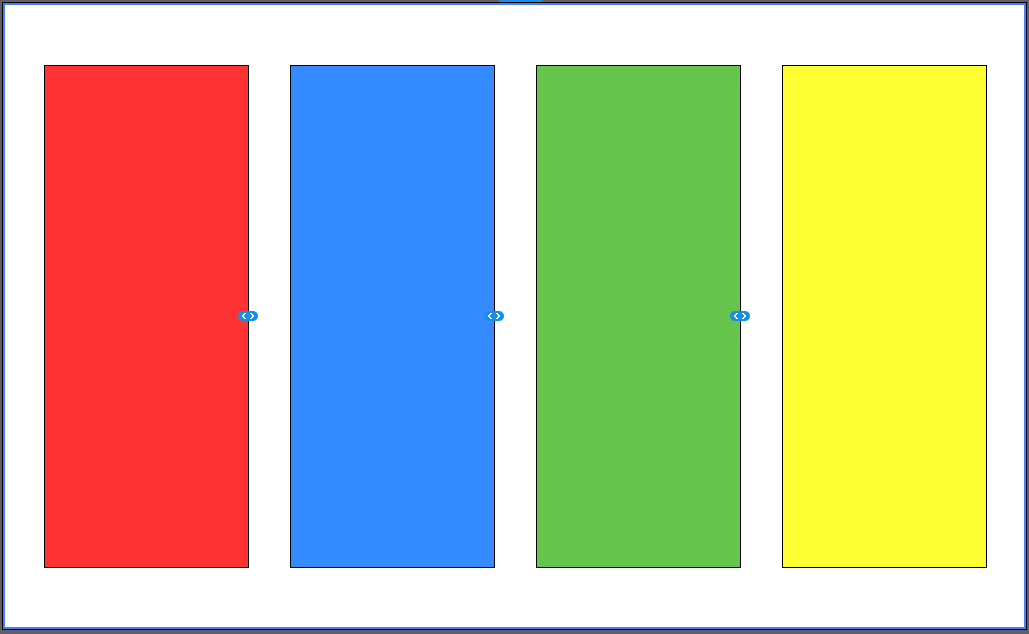
- Padding: As name suggests, padding can be applied within the fluid box in both horizontal and vertical direction. It is necessary to disable stretch to fit options to apply padding.
Do remember, padding value is distributed equally from the edges as well as in between the immediate child objects or fluid boxes.
Here is a figure, depicting our original layout of root fluid box with three child fluid boxes and having a horizontal padding of 10px:

Have you started using Fluid Boxes, please do share your experience & any questions you have around this new feature…
Please make sure you have read the articles- “Using Fluid boxes: Knowledge Facts – 1” and “Using Fluid boxes: Knowledge Facts – 2“, to understand this article better.
In this article, I will be discussing about Fluid box properties. While working with fluid boxes, it is very important to understand and utilize fluid box properties like Wrap, Flow, Alignment, Stretch to Fit and Padding, to create a truly responsive content.
So, let us get started!
Properties of a Fluid box and how they work:
Whenever you select a Fluid box, this is how your properties panel looks like with respect to the Fluid box properties:
Let us have a look at each of them specifically.
- Flow: Flow property determines the direction of flow of fluid boxes or objects which are contained within the selected fluid box.
For example, suppose you insert a fluid box layout with three fluid boxes in horizontal direction, flow of your root fluid box is horizontal (as shown in figure below):
If you go to properties and change flow from horizontal to vertical – , you will see your layout transforms to something like below:
Remember, changing flow direction does not only determine the direction in which child fluid boxes will be inserted within the selected fluid box, but also the same property applies to objects which will be added to the fluid box.
For example, suppose in our initial layout where we had flow of root fluid box (FB_1) as horizontal and flow of each child fluid boxes (FB_2, FB_3 and FB_4) as vertical, upon inserting objects to FB_2, they will be added in vertical fashion as below:
- Wrap: Wrap is one of the most important aspect of fluid boxes and it determines how your content layouts on lower view devices.
One of the most important point to remember while working with fluid boxes is to always set fluid box properties and edit your objects while your preview mode is desktop or at project width. This will help you achieve correct results when viewing your content on lower devices, albeit maintaining the integrity of content on desktop as well.
Wrap property can be set at fluid box level but it always applies to immediate child fluid boxes/objects i.e. suppose if you set wrap type as “Wrap to next row” for a fluid box, its immediate child objects or fluid boxes will layout themselves in that manner.
Before we move further, let us talk about wrap point and its significance.
Wrap point has got two roles to play:
- It determines the threshold at which the immediate child objects/fluid boxes start rearranging themselves depending upon the wrap type you set for your fluid box.
For example, let us discuss the default case when you insert a fluid box layout of root horizontal flowing fluid box with three child fluid boxes using the fluid box option from tool bar on a blank slide – .
For convenience of understanding, I will be filling child fluid boxes FB_2, FB_3 and FB_4 with red, blue and green color respectively. Here is how it looks in desktop preview mode-
Wrap property for root fluid box is by default set as “Wrap to next row” and wrap point as 80%.
Now if you move the preview slider from width of 1024px to 819px, layout remains same. However, if you move the preview slider to 818px, layout changes to something like below-
As you can see, FB_4 which is green in color shifts down to next row (Wrapped to next row). Reason, wrap point is set as 80% for the root fluid box. 80% of 1024px (project width) is 819px (rounded). If you keep moving preview slider further, next wrap is going to happen at 545px and the layout looks something like below. Reason why next wrap is 545px will be covered as part of second significance of wrap point.
Remember- Wrapping always works from “right to left” and “bottom to top” for horizontal and vertical flow fluid boxes respectively.
- Second significance of Wrap point is the available area within a fluid box which can be utilized to accommodate child fluid boxes or objects (always considering stretch to fit option is disabled).
For example, in our original layout if we disable horizontal and vertical stretch to fit for root fluid box (FB_1), this is how our layout is going to look in desktop mode:
In this case, project width is 1024px. Root fluid box is of width 1024px. Since wrap point is set as 80%, only 80% of root fluid box (FB_1) area i.e. 819px is available for child fluid boxes and is distributed equally across them with 273px each.
Remember, “stretch to fit” option only stretches the child fluid boxes or objects within the fluid box. It does not change their original size within the fluid box. That is why even when the child fluid boxes (FB_2, FB_3 and FB_4) are all 273px each, summing up to 819px, they take up the entire space within the root fluid box i.e. 1024px.
Now let us come back to the question of how first wrapping happens at 818px and second at 545px in this case.
First wrap always happens at wrap point percentage of fluid box width. In our case root fluid box was 1024px, therefore first wrap happened at 80% of 1024px, i.e. right after 819px. Another way to look at this can be, wrap always happens if any of the immediate child object or fluid box needs to compromise in its actual width. Since in this case, our three child fluid boxes FB_2, FB_3 and FB_4 were all 273px each, summing to 819px, wrap happened at 818px.
When it comes to second wrap it happens when there is compromise in actual widths of left over objects which have not wrapped yet. In our case after the first wrap, FB_2(red) and FB_3(blue) were still left and had not wrapped yet. Their actual widths were 273px each, summing to 546px. That is the reason second wrap happened at 545px.
Different Wrap types and their meanings:
- Wrap to next row: This wrap option is available only when the flow of selected fluid box is horizontal. In this case, fluid boxes or objects contained within the selected fluid box, start shifting downwards i.e. next row (rightmost first), every time there is a compromise in the actual widths of unwrapped fluid boxes or objects.
- Wrap to next column: This wrap option is available only when the flow of selected fluid box is vertical. In this case, fluid boxes or objects contained within the selected fluid box, start shifting to right i.e. next column (bottom most first), every time there is a compromise in the actual heights of unwrapped fluid boxes or objects.
- Squeeze in a row: This wrap option is available only when the flow of selected fluid box is horizontal. In this case, fluid boxes or objects contained within the selected fluid box, do not shift anywhere. They just keep decreasing in size on lower width screen size devices. Immediate child objects having Maintain Aspect Ratio checked will decrease in both width and height while maintaining their aspect ratios. Immediate child objects having Maintain Aspect Ratio unchecked will decrease only in width. Immediate child Fluid boxes will decrease only in width.
- Squeeze in a column: This wrap option is available only when the flow of selected fluid box is vertical. In this case, fluid boxes or objects contained within the selected fluid box, do not shift anywhere. They just keep decreasing in size on lower height screen size devices. Immediate child objects having Maintain Aspect Ratio checked will decrease in both width and height while maintaining their aspect ratios. Immediate child objects having Maintain Aspect Ratio unchecked will decrease only in height. Immediate child Fluid boxes will decrease only in height.
- One row/column: As the name suggests, this wrap type will either keep all immediate child fluid boxes or objects in one row or one column.
In case of horizontal flow fluid box, immediate child fluid boxes or objects are in one row. Once wrapping happens, they arrange themselves in one column.
In case of vertical flow fluid box, immediate child fluid boxes or objects are in one column. Once wrapping happens, they arrange themselves in one row.
- Symmetrical: With odd number of immediate child objects or fluid boxes, this works same as one row/column. With even number of immediate child objects or fluid boxes, this works like wrapping the items in symmetrical fashion.
For example, if our original layout would have consisted of 4 child fluid boxes within a root fluid box like below, this is how it would have looked like in desktop view, after first wrap and after second wrap:
In desktop mode
After first wrap
After second wrap
- Horizontal and Vertical Alignment: As the name suggests, these properties are same as alignment properties across any application we are familiar with.
Remember, alignment properties work only when stretch options are disabled for the fluid box.
Different alignment properties are:
- Left: Part of Horizontal alignment.
- Right: Part of Horizontal alignment.
- Center: Part of Horizontal alignment.
- Top: Part of Vertical alignment.
- Bottom: Part of Vertical alignment.
- Middle: Part of Vertical alignment.
- Space in between: Part of Horizontal alignment, if flow of fluid box is horizontal. Part of Vertical alignment, if flow of fluid box is vertical.
- Space around: Part of Horizontal alignment, if flow of fluid box is horizontal. Part of Vertical alignment, if flow of fluid box is vertical.
Easiest way to understand space around and space in between alignments and difference between them, is depicted via figures below:
Space in between alignment
Space around alignment
- Padding: As name suggests, padding can be applied within the fluid box in both horizontal and vertical direction. It is necessary to disable stretch to fit options to apply padding.
Do remember, padding value is distributed equally from the edges as well as in between the immediate child objects or fluid boxes.
Here is a figure, depicting our original layout of root fluid box with three child fluid boxes and having a horizontal padding of 10px:
Have you started using Fluid Boxes, please do share your experience & any questions you have around this new feature…


You must be logged in to post a comment.
- Most Recent
- Most Relevant
Zeeshan, I have a problem with this sentence ‘It is necessary to disable stretch to fit options to apply padding.’When checking the Quiz master slides, I see that padding will be honored when Space around is activated and Stretch to fit as well (Question FB is an example: horizontally you have space around and there is a padding of 50px causing the indent of the Question placeholder). What do I miss?
Hi Lieve,
I think that is a mistake from my end. Thanks for pointing this out.
The sentence was actually meant to be written for “Space around” and “Space in between” alignment properties. In order too see these alignments working, one must disable stretch to fit option in container fluid box’s flow direction.
Regards,
Zeeshan
Truly excellent articles Zeeshan!
Really looking forward to your next one, detailing how to effectively use Fluid Boxes with Master Slides.
Thanks for your sterling efforts.
Kind Regards,
John
Thanks, Zeeshan. This is really useful.
Super helpful Zeeshan, thanks for sharing these three posts!
Cheers,
Steve
Thanks for this very extensive and clear explanation of Fluid boxes!
What about the fluid boxes on Master slides? You explained very clearly the layout on normal slides. However I always start with customizing the theme. The provided themes have fluid boxes. I’m struggling with the fluid boxes on the quizzing master slides because the individual answers are in one common fluid box within the answer area.
Hi Lieve,
I will be posting a blog soon on working with Fluid boxes and Master slide layout.
As far as your concern with question slides is concerned, can you please let me know the functionality you are trying to achieve with respect to answer items.
Regards,
Zeeshan
I am busy with tips about using quiz slides with the Fluid boxes on the master slides. When you have very long answers, with fluid boxes the desktop version will decrease the font size so that the answer is fitting in one line. That is already much better than in previous versions, but such a small font size is not always wanted. If you want to start with the normal font size, you have to change the individual answer captions on the slide itself, increase the size, make it the same for all answers and distribute. That takes up a lot of time.
I discovered an issue with the score slide as well. If you don’t want all the date, but uncheck some in Quiz Preferences under Show Score Slide, Quiz Review messages, the I expected that Fluid box to disappear. It is not happening but the placeholder for the variable remains. Only when you delete that placeholder manually will the Fluid box be deleted and layout is adapted.
