 Newbie
5 posts
Newbie
5 posts

My patience has paid off! I have just published my first fully responsive Captivate project using fluid boxes. It took me a while to familiarise myself with the concept of fluid boxes, but now I’m glad I persisted, and I think that they are the best option for creating a responsive project with the least amount of fuss, provided that you keep your visual design simple.
Below I discuss a few of my learnings from creating this project.
- It is worth spending some time thinking about the visual design for the project. I tried to keep it as simple as possible, which is even more important when you are designing for small mobile phone screens, and it was very important to me that this project should work very well with smaller devices. From what I’ve seen it works very well with all kinds of devices.
- I wanted to test how I could take full control of non-standard fonts. Apart from the standard Arial I used the Google font Barlow in this project after downloading it from here. However, in order for such Google fonts to display in your published project, you will need to embed some JavaScript on the first slide of your project. This article contains a very good description of how to do this.
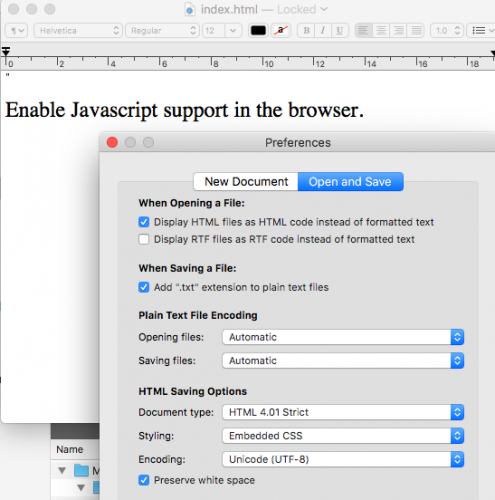
- As for navigation buttons in my view there is nothing better and easier than FontAwesome. But again, this font won’t display in your published project, unless you add a snippet of code to your index.html file. This video by Captivate guru Paul Wilson describes the process perfectly. If you are a Mac user, you should note that in order for TextEdit to actually display the HTML code within the index file, you will need to go to the Preferences panel and tick the box next to “Display HTML files as HTML code instead of formatted text”:
My patience has paid off! I have just published my first fully responsive Captivate project using fluid boxes. It took me a while to familiarise myself with the concept of fluid boxes, but now I’m glad I persisted, and I think that they are the best option for creating a responsive project with the least amount of fuss, provided that you keep your visual design simple.
Below I discuss a few of my learnings from creating this project.
- It is worth spending some time thinking about the visual design for the project. I tried to keep it as simple as possible, which is even more important when you are designing for small mobile phone screens, and it was very important to me that this project should work very well with smaller devices. From what I’ve seen it works very well with all kinds of devices.
- I wanted to test how I could take full control of non-standard fonts. Apart from the standard Arial I used the Google font Barlow in this project after downloading it from here. However, in order for such Google fonts to display in your published project, you will need to embed some JavaScript on the first slide of your project. This article contains a very good description of how to do this.
- As for navigation buttons in my view there is nothing better and easier than FontAwesome. But again, this font won’t display in your published project, unless you add a snippet of code to your index.html file. This video by Captivate guru Paul Wilson describes the process perfectly. If you are a Mac user, you should note that in order for TextEdit to actually display the HTML code within the index file, you will need to go to the Preferences panel and tick the box next to “Display HTML files as HTML code instead of formatted text”:


You must be logged in to post a comment.
- Most Recent
- Most Relevant
