 Legend
639 posts
Legend
639 posts
![]()
I’m always looking for shortcuts in online learning design. One of my favourites is the Adobe Captivate Alignment Toolbar. To use for each session you will need to check Enable custom workspaces/panel undocking in your Adobe Captivate Preferences. This option can be found in the General Settings Category.
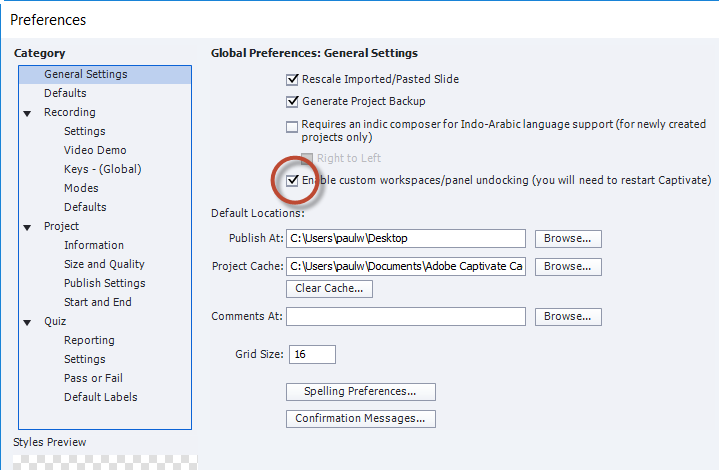
As the entry suggests you will need to restart Adobe Captivate for the changes to take effect, but the advantage is that you will be able to permanently turn various toolbars on or off as you see fit. Those changes will be persistent each time you start Captivate. You can then turn on the Adobe Captivate Alignment Toolbar by selecting it from the Window drop-down menu.
Once the Alignment Toolbar appears in your Captivate interface you can save time aligning, resizing, and ordering your on-slide objects with ease. Sure you can right click your objects and select the same settings, however, this requires two mouse clicks. Having the toolbar up on your screen saves you a mouse click for each of these alignment adjustments. Over the course of a lifetime of Captivate projects, the toolbar will save you time and many clicks.
Here is a simple and FREE job aid on what each icon from the toolbar can do for you. The link takes you to my website where you can download this job aid.
https://www.paulwilsonlearning.com/articles/alignment
![]()
I’m always looking for shortcuts in online learning design. One of my favourites is the Adobe Captivate Alignment Toolbar. To use for each session you will need to check Enable custom workspaces/panel undocking in your Adobe Captivate Preferences. This option can be found in the General Settings Category.
As the entry suggests you will need to restart Adobe Captivate for the changes to take effect, but the advantage is that you will be able to permanently turn various toolbars on or off as you see fit. Those changes will be persistent each time you start Captivate. You can then turn on the Adobe Captivate Alignment Toolbar by selecting it from the Window drop-down menu.
Once the Alignment Toolbar appears in your Captivate interface you can save time aligning, resizing, and ordering your on-slide objects with ease. Sure you can right click your objects and select the same settings, however, this requires two mouse clicks. Having the toolbar up on your screen saves you a mouse click for each of these alignment adjustments. Over the course of a lifetime of Captivate projects, the toolbar will save you time and many clicks.
Here is a simple and FREE job aid on what each icon from the toolbar can do for you. The link takes you to my website where you can download this job aid.
https://www.paulwilsonlearning.com/articles/alignment


You must be logged in to post a comment.
- Most Recent
- Most Relevant
I used to use it. But stopped for some time and I wasn’t able to find the alignment bar. I’m glad I got to this tutorial. Thank you. It’s back in my Captivate.
Thank you, wasn’t of this feature neither
I was not aware of this feature. Saving mouse clicks and time is always a great thing. Thank you for sharing.
When I upgraded from Captivate 7 to 2017, this was the first thing I looked for. I use this all the time. A thing to remember is that Adobe uses your selection order when grouping objects to align them so remember to pick things based on how you want them to align. This is especially important when using the distribution tools.
