 Legend
639 posts
Legend
639 posts
When managing Advanced Actions in Adobe Captivate, I recommend that you open the Advanced Actions window from the drop down menu rather than from the Actions tab in the Properties of a slide or object. This way you reduce the risk of accidentally selecting a new Advanced Action in place of what was there from the start. Click on the Project dropdown menu and select Advanced Actions. Alternatively, you can press SHIFT+F9 (which doesn’t always work for me) to open the Advanced Actions window. Once open you can scroll through all the Advanced Actions in your project using the Existing Actions selection drop-down shown below.
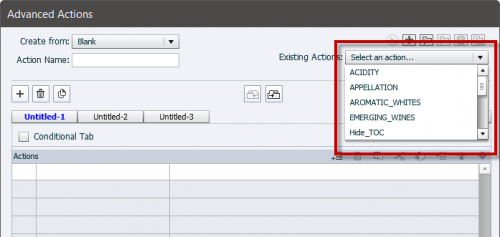
You should become familiar with the toolbar controls just above this drop-down selection box.
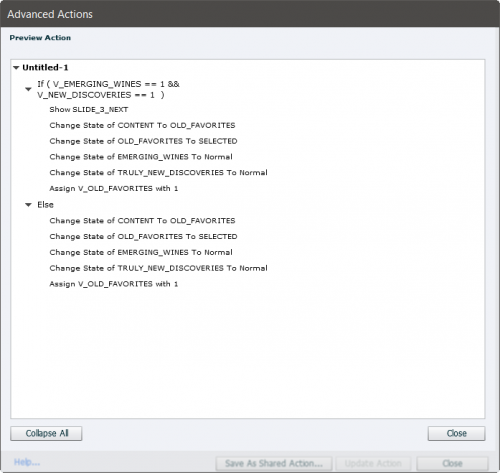
 The first icon is Preview Action. This makes Advanced Actions easier to read and share with others. Normally items like your Else statements are collapsed so using Preview Action will show the entire script in one list. If you want help troubleshooting Advanced Actions on the forum, using the script as it’s written here is helpful to the other users assisting you. Here is an example Conditional Action I have for one of my projects:
 The next icon is the plus symbol and allows you to start making a new blank Advanced Action.
 After that is the import icon which allows you to import Shared Actions. A well created Shared Action is completely reusable and can be shared across more than one project. It also can be used multiple times within the same project just by changing the parameters that reference various objects and variables used throughout your project. Here is a video tutorial I did some time ago on Shared Actions if you would like to learn more: https://youtu.be/uoTe03qcGNs
 The next icon is to export Shared Actions and will be greyed out if you don’t presently have any Shared Actions in your project. Captivate Shared Actions can be saved as a CPAA file format but they can reside as part of your Captivate Library if you don’t need them to be stored outside of a single project file.
 This is the delete action icon and its function is self explanatory. I use this when I’m feeling overwhelmed by all the extraneous Advanced Actions I might end up with in an eLearning project. This is mostly due to starting an Advanced Actions and then abandoning it and rewriting it and so on. The good news is that if you try to delete an Advanced Action that is in use somewhere in your project you will get a warning like the following:
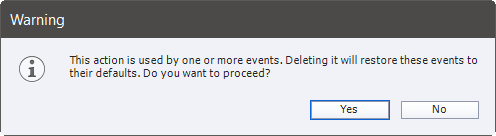
Just be careful when deleting these advanced actions that you don’t delete something you actually need.
 Lastly is my favourite icon from this section and that’s the Duplicate Advanced Action icon. As the name suggests this icon will make a copy of the currently selected Advanced Action. You will find that there are many sets of advanced actions that are reused. The modern solution for cases where you need a similar version of an advanced action duplicated is to simply use Shared Actions. Duplicating actions and making a few small changes to them was the way things were done before Shared Actions were introduced in Adobe Captivate version 7. Also some people are just more comfortable making a new action from the old action. The duplicate action will be named “Duplicate_Of_” followed by the original name and then a number to make sure that duplicated actions are named something already in use.
When managing Advanced Actions in Adobe Captivate, I recommend that you open the Advanced Actions window from the drop down menu rather than from the Actions tab in the Properties of a slide or object. This way you reduce the risk of accidentally selecting a new Advanced Action in place of what was there from the start. Click on the Project dropdown menu and select Advanced Actions. Alternatively, you can press SHIFT+F9 (which doesn’t always work for me) to open the Advanced Actions window. Once open you can scroll through all the Advanced Actions in your project using the Existing Actions selection drop-down shown below.
You should become familiar with the toolbar controls just above this drop-down selection box.
The first icon is Preview Action. This makes Advanced Actions easier to read and share with others. Normally items like your Else statements are collapsed so using Preview Action will show the entire script in one list. If you want help troubleshooting Advanced Actions on the forum, using the script as it’s written here is helpful to the other users assisting you. Here is an example Conditional Action I have for one of my projects:
The next icon is the plus symbol and allows you to start making a new blank Advanced Action.
After that is the import icon which allows you to import Shared Actions. A well created Shared Action is completely reusable and can be shared across more than one project. It also can be used multiple times within the same project just by changing the parameters that reference various objects and variables used throughout your project. Here is a video tutorial I did some time ago on Shared Actions if you would like to learn more: https://youtu.be/uoTe03qcGNs
The next icon is to export Shared Actions and will be greyed out if you don’t presently have any Shared Actions in your project. Captivate Shared Actions can be saved as a CPAA file format but they can reside as part of your Captivate Library if you don’t need them to be stored outside of a single project file.
This is the delete action icon and its function is self explanatory. I use this when I’m feeling overwhelmed by all the extraneous Advanced Actions I might end up with in an eLearning project. This is mostly due to starting an Advanced Actions and then abandoning it and rewriting it and so on. The good news is that if you try to delete an Advanced Action that is in use somewhere in your project you will get a warning like the following:
Just be careful when deleting these advanced actions that you don’t delete something you actually need.
Lastly is my favourite icon from this section and that’s the Duplicate Advanced Action icon. As the name suggests this icon will make a copy of the currently selected Advanced Action. You will find that there are many sets of advanced actions that are reused. The modern solution for cases where you need a similar version of an advanced action duplicated is to simply use Shared Actions. Duplicating actions and making a few small changes to them was the way things were done before Shared Actions were introduced in Adobe Captivate version 7. Also some people are just more comfortable making a new action from the old action. The duplicate action will be named “Duplicate_Of_” followed by the original name and then a number to make sure that duplicated actions are named something already in use.


You must be logged in to post a comment.
- Most Recent
- Most Relevant
Paul, I appreciate you sharing this information on advanced actions. I have book marked and plan to use in the future.
Thanks, Lieve, that link was helpful.
Complete explanation pf the refurbished Advanced Actions dialog, box was published months ago: https://elearning.adobe.com/2017/05/advanced-actions-2017-outfit/
For users of previous versions: the Preview button was only available for Conditional, not for Standard actions. The other buttons in the top right control panel have the same functionality as in CP2017.
When copying an item with an attached advanced action to another project, it will look like a ‘shared action’ if items referenced in the action are missing. It is much more interesting to build shared actions, since they appear in the Library.
Thanks, Lieve. I’m sure many will find your article interesting. This article was written to address the managing of existing Advanced Actions and not meant to be entirely comprehensive. I had a client who asked what all these controls were for and I thought I would share the explanation with the broader audience.
