Hello, all. If you’re anything like me, getting excited about any Captivate release is a regular occurrence. However, with the latest major version of the software, Captivate 2019 proves to make your job easier, refine your skills as an educator/designer/developer/etc., and no doubt, wow your audience. In this post I’ll be highlighting the top 5 (among many others) new features and enhancements, selected by me as those I see immediately impacting my work. My top 5 are ordered by the amount of impact they will add to my work. ![]()
1: 360° Immersion (New feature) – I doubt I have to inform you of the increasing footprint that the 360° media and Virtual Reality (VR) technologies are making across numerous industries, and I am happy to say that Adobe has hit another home run with adding this new feature to the 2019 release of Captivate. I am incredibly excited about being able to immerse learners into a 360° environment. Even more so than the VR publishing option. To clarify, I am not saying I dislike the VR feature (truth is, I love it!), but rather, that the requirement to use a VR headset is not a readily available resource in my neck of the woods – creating training interactions for the corporate masses. So, I will highlight the 360° media element as my top choice of the five. A few notable feature highlights are below:
- Hotspots – Not only does this feature allow learners to better understand and visualize an environment, but hotspots allow them to seamlessly interact with it in real time.
- Hotspot Icon Set – Like you, I have also spent countless time creating a variety of assets for my courses, including clickable icons. The 2019 release of Captivate has a variety of icons built directly into the hotspot feature which promotes consistency in design, as well as ease of development.
- Action – Display Text – With any hotspot, learners will expect something to happen on their screen once they’ve clicked it. “So what?” You might be thinking. “I create advanced actions all the time. What’s the big deal?” The big deal, is that Captivate 2019 has a new action, Display Text, that, you guessed it, displays text once a hotspot is clicked. The beauty here is that there is zero development! Just insert a hotspot, choose the Display Text action, and type your text into the dialogue box (or choose a picture to display). And just like that, you’ve created a hotspot that toggles content to hide/show. No variables. No advanced actions. Just rapid development.
- Imagine the operational impact of building a course to be used during employee on-boarding to hammer home the look and feel, and location of tools at a workstation. Or creating a virtual tour of your facility. I, for one, will be looking to do both of these, and then some!
- Final Feature Note – Hotspots also come with successful click indicators to visually help learners identify which hotspots they’ve already clicked, and those they’ve yet to see. Again, no development required.

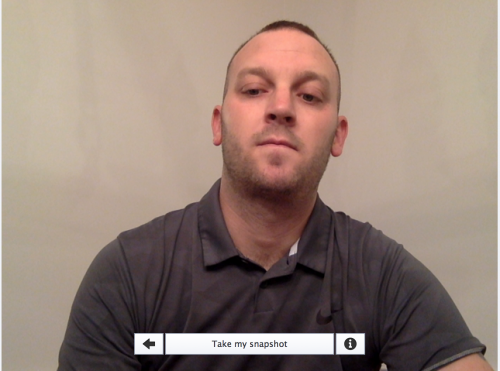
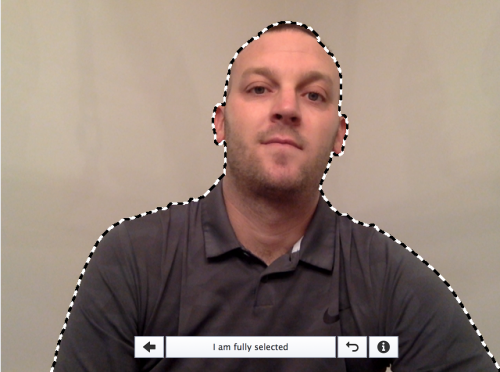
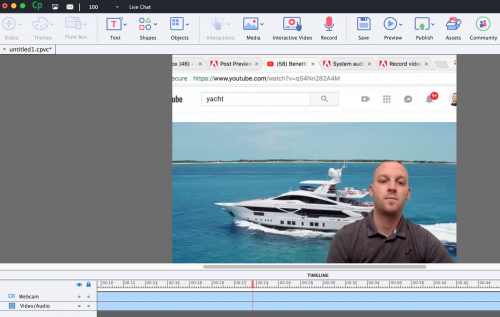
2: Simultaneous Webcam and Screen Recording – As my efforts continue to involve video software (Premiere Pro, Presenter, Camtasia, etc.), so too does the burden of exporting, rendering, and syncing assets to one another. I am very excited about this feature for its ability to help streamline media-rich projects, which in our world makes a drastic impact on ROI. A few additional feature notes are detailed below:
- One file, as opposed to separate audio and video files
- Audio and video are automatically synced on the timeline
- No external resources are needed
- Will help to reduce project size having audio, video, and screen captured as one.
- NOTE: Notice the YouTube tab, thus confirming there was no PhotoShop magic tricks. This process was incredibly easy, and with a little practice I’ll be quite polished at this.
3: Interactive Videos (Enhancement) – While the interactive video feature is not new, the folks at Adobe have added a couple rather impressive tools to the existing feature. See the bullets below for an overview
- Overlay slides allow designers to ‘layer’ an entire slide over the existing video to further reiterate a point, to add interactivity, or to merely help break the video up a bit and keep learners engaged.
- Bookmarks can now be added to videos directly in the timeline, and are independent. That is, they are not reliant on any overlay slides that are preexisting in the project.
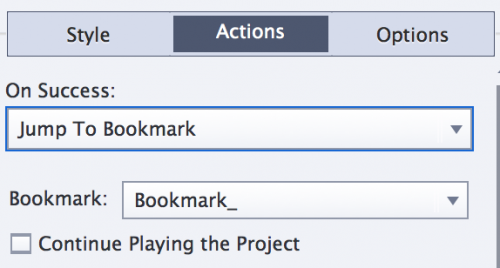
- A new action has been added that allows for the incredibly robust manipulation of the timeline. After adding one or more bookmarks, create a button and choose ‘Jump to Bookmark’ to see it in…action!


4: Live Device Preview (New Feature) – With so many people in today’s workforce working remotely, and travelling, the need is growing for us to develop learning experiences that that are optimized for viewing on a variety of devices. From desktop and laptop, to tablet and smartphone, devices come in all shapes and sizes. That said, Captivate 2019 now allows for live device previews. See the bullets below for more details.
- To preview on a physical device, Captivate 2019 generates a unique QR Code. Then, just scan the code with the device, and away you go!
- This feature will support the QA process immensely, as more and more of my work is ingested by learners not from atop a desk, but rather, from their hands.

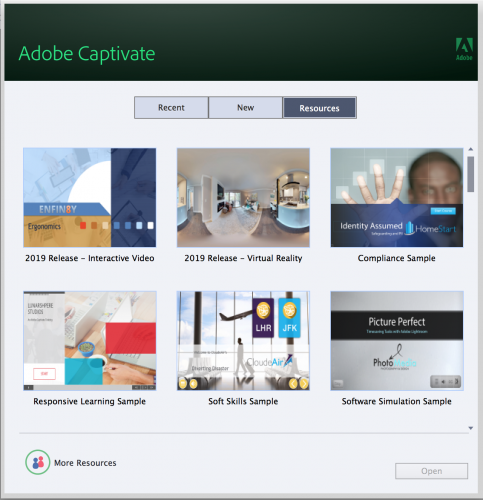
5: Resources on Project-selection Screen – One of the first things I noticed when I cracked open Captivate 2019 was the addition of a new tab on the project selection screen. Rather than seeing ‘Recent’ and ‘New’ as my only choices, I was impressed when I clicked on the newly added ‘Resources’ tab.
- Dozens of items to use and from which you will likely benefit
- Fully operational sample project files that highlight key new features like 360° media, VR, and interactive videos.
- Resources also include many quick and concise feature overview screen-casts, videos, and documents.
- This is the perfect place for the beginner to start! I wish I had these resources when I was brand new to Captivate.
In summary, Captivate 2019 is a must get for the modern trainer, instructional designer, and beyond!
Until next time, Cadets! Go be the YOND!
Hello, all. If you’re anything like me, getting excited about any Captivate release is a regular occurrence. However, with the latest major version of the software, Captivate 2019 proves to make your job easier, refine your skills as an educator/designer/developer/etc., and no doubt, wow your audience. In this post I’ll be highlighting the top 5 (among many others) new features and enhancements, selected by me as those I see immediately impacting my work. My top 5 are ordered by the amount of impact they will add to my work. ![]()
1: 360° Immersion (New feature) – I doubt I have to inform you of the increasing footprint that the 360° media and Virtual Reality (VR) technologies are making across numerous industries, and I am happy to say that Adobe has hit another home run with adding this new feature to the 2019 release of Captivate. I am incredibly excited about being able to immerse learners into a 360° environment. Even more so than the VR publishing option. To clarify, I am not saying I dislike the VR feature (truth is, I love it!), but rather, that the requirement to use a VR headset is not a readily available resource in my neck of the woods – creating training interactions for the corporate masses. So, I will highlight the 360° media element as my top choice of the five. A few notable feature highlights are below:
- Hotspots – Not only does this feature allow learners to better understand and visualize an environment, but hotspots allow them to seamlessly interact with it in real time.
- Hotspot Icon Set – Like you, I have also spent countless time creating a variety of assets for my courses, including clickable icons. The 2019 release of Captivate has a variety of icons built directly into the hotspot feature which promotes consistency in design, as well as ease of development.
- Action – Display Text – With any hotspot, learners will expect something to happen on their screen once they’ve clicked it. “So what?” You might be thinking. “I create advanced actions all the time. What’s the big deal?” The big deal, is that Captivate 2019 has a new action, Display Text, that, you guessed it, displays text once a hotspot is clicked. The beauty here is that there is zero development! Just insert a hotspot, choose the Display Text action, and type your text into the dialogue box (or choose a picture to display). And just like that, you’ve created a hotspot that toggles content to hide/show. No variables. No advanced actions. Just rapid development.
- Imagine the operational impact of building a course to be used during employee on-boarding to hammer home the look and feel, and location of tools at a workstation. Or creating a virtual tour of your facility. I, for one, will be looking to do both of these, and then some!
- Final Feature Note – Hotspots also come with successful click indicators to visually help learners identify which hotspots they’ve already clicked, and those they’ve yet to see. Again, no development required.

2: Simultaneous Webcam and Screen Recording – As my efforts continue to involve video software (Premiere Pro, Presenter, Camtasia, etc.), so too does the burden of exporting, rendering, and syncing assets to one another. I am very excited about this feature for its ability to help streamline media-rich projects, which in our world makes a drastic impact on ROI. A few additional feature notes are detailed below:
- One file, as opposed to separate audio and video files
- Audio and video are automatically synced on the timeline
- No external resources are needed
- Will help to reduce project size having audio, video, and screen captured as one.
- NOTE: Notice the YouTube tab, thus confirming there was no PhotoShop magic tricks. This process was incredibly easy, and with a little practice I’ll be quite polished at this.


3: Interactive Videos (Enhancement) – While the interactive video feature is not new, the folks at Adobe have added a couple rather impressive tools to the existing feature. See the bullets below for an overview
- Overlay slides allow designers to ‘layer’ an entire slide over the existing video to further reiterate a point, to add interactivity, or to merely help break the video up a bit and keep learners engaged.
- Bookmarks can now be added to videos directly in the timeline, and are independent. That is, they are not reliant on any overlay slides that are preexisting in the project.
- A new action has been added that allows for the incredibly robust manipulation of the timeline. After adding one or more bookmarks, create a button and choose ‘Jump to Bookmark’ to see it in…action!


4: Live Device Preview (New Feature) – With so many people in today’s workforce working remotely, and travelling, the need is growing for us to develop learning experiences that that are optimized for viewing on a variety of devices. From desktop and laptop, to tablet and smartphone, devices come in all shapes and sizes. That said, Captivate 2019 now allows for live device previews. See the bullets below for more details.
- To preview on a physical device, Captivate 2019 generates a unique QR Code. Then, just scan the code with the device, and away you go!
- This feature will support the QA process immensely, as more and more of my work is ingested by learners not from atop a desk, but rather, from their hands.

5: Resources on Project-selection Screen – One of the first things I noticed when I cracked open Captivate 2019 was the addition of a new tab on the project selection screen. Rather than seeing ‘Recent’ and ‘New’ as my only choices, I was impressed when I clicked on the newly added ‘Resources’ tab.
- Dozens of items to use and from which you will likely benefit
- Fully operational sample project files that highlight key new features like 360° media, VR, and interactive videos.
- Resources also include many quick and concise feature overview screen-casts, videos, and documents.
- This is the perfect place for the beginner to start! I wish I had these resources when I was brand new to Captivate.

In summary, Captivate 2019 is a must get for the modern trainer, instructional designer, and beyond!
Until next time, Cadets! Go be the YOND!
You must be logged in to post a comment.
- Most Recent
- Most Relevant
Synchronized video I have used all the time, but I don’t label that as interactive video myself. It was part of my workflow to mimick interactive video, by splitting the video up in chunks, creating a TOC for those chunks, create buttons to show popups. Just a difference in terminology. To me the workflow with the overlay slides which we have now in CP2019 is the real stuff, the workarounds with synchronized video were very time consuming, almost impossible to time correctly.
My apologies, as I thought we were using the same terminology (interactive video; interactive movie) with previous versions.
Terminology is a big problem. You point to two blog posts. The first one explains a workaround to have popup windows in a real movie. One of those workflows which could be done with synchronized video and actions. It is the only place where I use the term ‘interactive video’, never in any other blog.I use the term ‘interactive movie’, for a published fully interactive Captivate file. Not the same as an interactive video, which is – still with the present promising new workflow – in my teacher’s mind still levels below a fully interactive movie. That is the domain where Captivate excels since eons, and it has never limited my creative ideas for interactivity. Even with the present ‘interactive video’, the real interactivity will still be on the overlay slides. Jumping to a bookmark is great, but not so interactive. Being able to branch to a bookmark is lot better, but that will be done on the overlay slides.Interesting discussion…. wished we had more like that in this community.
Adam, thanks for the overview. Just one question: why do you say that ‘Interactive video’ is not new in Captivate? I had some workflows to use advanced/shared actions and variable to mimick an interactive video with a lot of issues (timing). Personally I find the Interactive video in CP2019 really new, innovative and it is even for me the number 1 feature of this release. The use of overlay slides with no limitations makes creating an interactive video a breeze.
Thanks for the comment, Lieve. I couldn’t agree with you more, aside from the fact that the capability to create Interactive Video experiences has been a part of Captivate since at least version 9, without the use of variables, advanced actions, etc.First generation interactive video capabilities are rather easy to incorporate into Captivate 2017. Just follow these steps:Click on ‘Media’ and choose ‘Video’Select ‘Multi-Slide Synchronized Video’Browse for your video to add it to your projectSelect ‘Distribute video across slides’Adjust the from and to slides to your likingAdd quiz slides and place them wherever you choose!You can even adjust at what point in the timeline questions present themselves by selecting the video, then choosing ‘Edit Video Timing…’ from the Properties panel.Voila!And you are right that the 2019 Interactive Videos feature is certainly more robust and streamlined, but nonetheless, it is a enhancement (and a monumental on at that) to what could have previously been accomplished in other versions, which is why I referred to it as an enhancement. I wish we would had this conversation much earlier, as it sounds like you’ve struggled a bit with timing issues. I’ve included a sample file I made for you to reference and play with to better clarify my use of the labels of Enhancement and New Feature (The attached was created in Cp2017).In the future, I look to embark on conversations that help motivate and inspire fellow users, strike up meaningful conversation within the Community, and to find common positive ground upon which to stand together, rather than apart.


