 Master
55 posts
Master
55 posts

In the latest release of Adobe Captivate 2019, the Virtual Reality feature is included. With this feature, one can provide a low cost and high performance courses. In this blog, we are going to see how to create a virtual reality project in Adobe Captivate 2019.
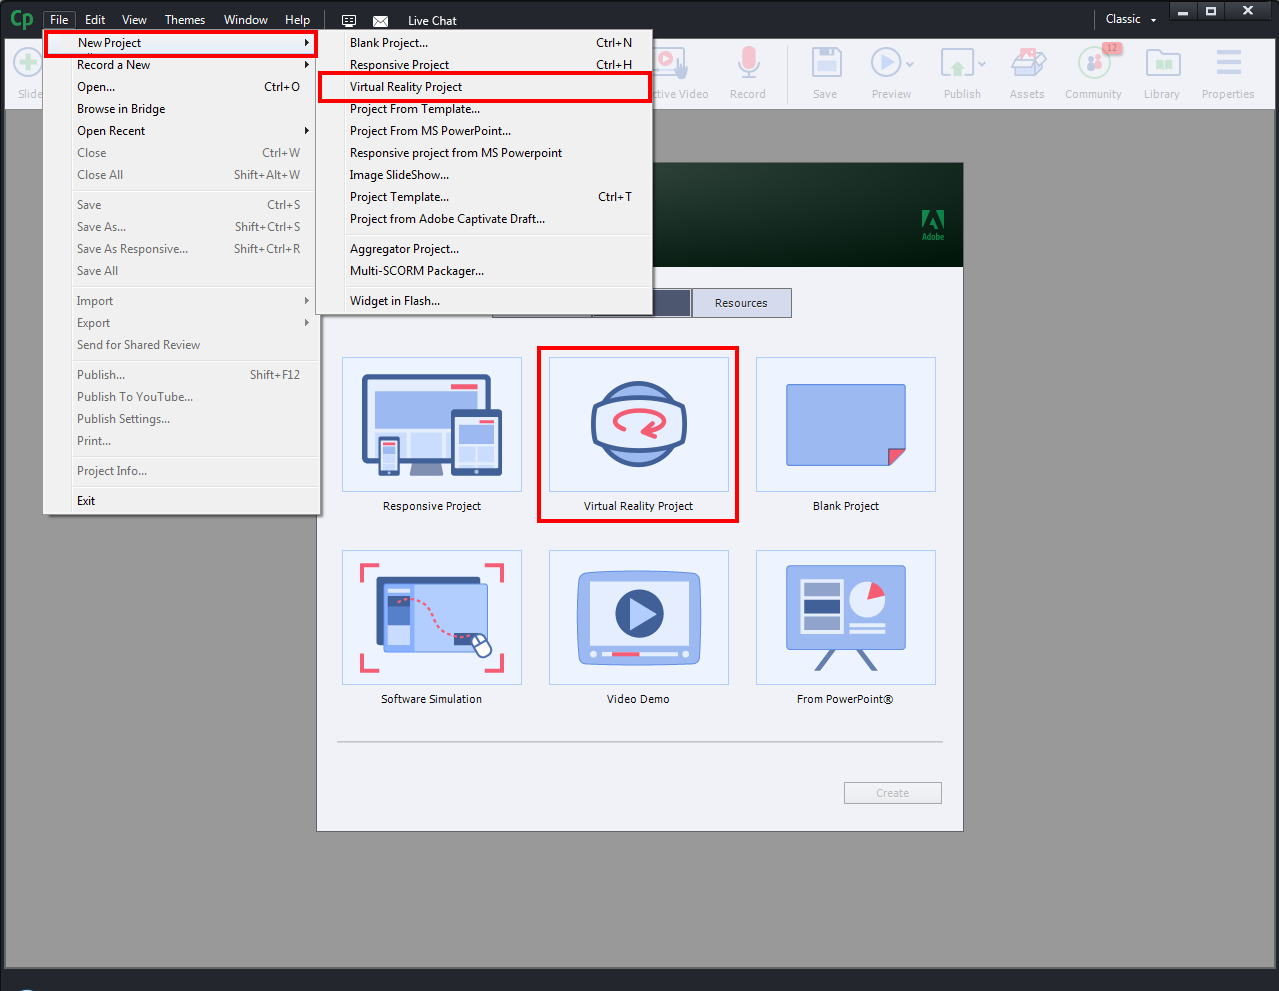
You can open virtual reality project in two ways:
- New > Virtual Reality Project
- File > New Project > Virtual Reality Project

- To add a 360 image or video, click + icon on the screen.
- A popup window will appear on the screen. Navigate to your local drive and select 360 image or video
- You can see this popup window from the second time when you import 360 image/video.
- You can add interactive elements like Hotspots on the image. To do so, click on Hotspots option in the menu bar and select any hotspot from the drop-down list.
- Then assign interaction to the Hotspot. For this, double-click on the Hotspot, and choose an action under On Click drop-down list from the properties inspector. Here, we have taken Display Text action.Note: You can assign more actions by adding more hotspots.
- You can develop project in two ways – Guided and Exploratory.
Guided: Screen rotation will be navigated automatically in the sequence that you had added the hotspots, when you preview the project.
Exploratory: User should explore the screen and identify the hotspots. As default, the focus of the screen remains same as in the editing stage when you preview or publish the project. - Once you’ve selected Guided or Exploratory option, you can see Display Duration where you can increase or decrease the time of the text that is displayed on the screen.
- Then assign a text label to the hotpot. To do so, click on Text on the Menu bar and select Label option from the drop-down.

- Type the caption text in the label field given under properties panel. You can also make necessary changes to the text.
- Click Publish to preview the project. Then, click on hotspot in runtime to check the interactivity.
- The text appears as shown below.
- You can see a visited tick mark once you click the hotspot.


 Note: You can assign more actions by adding more hotspots.
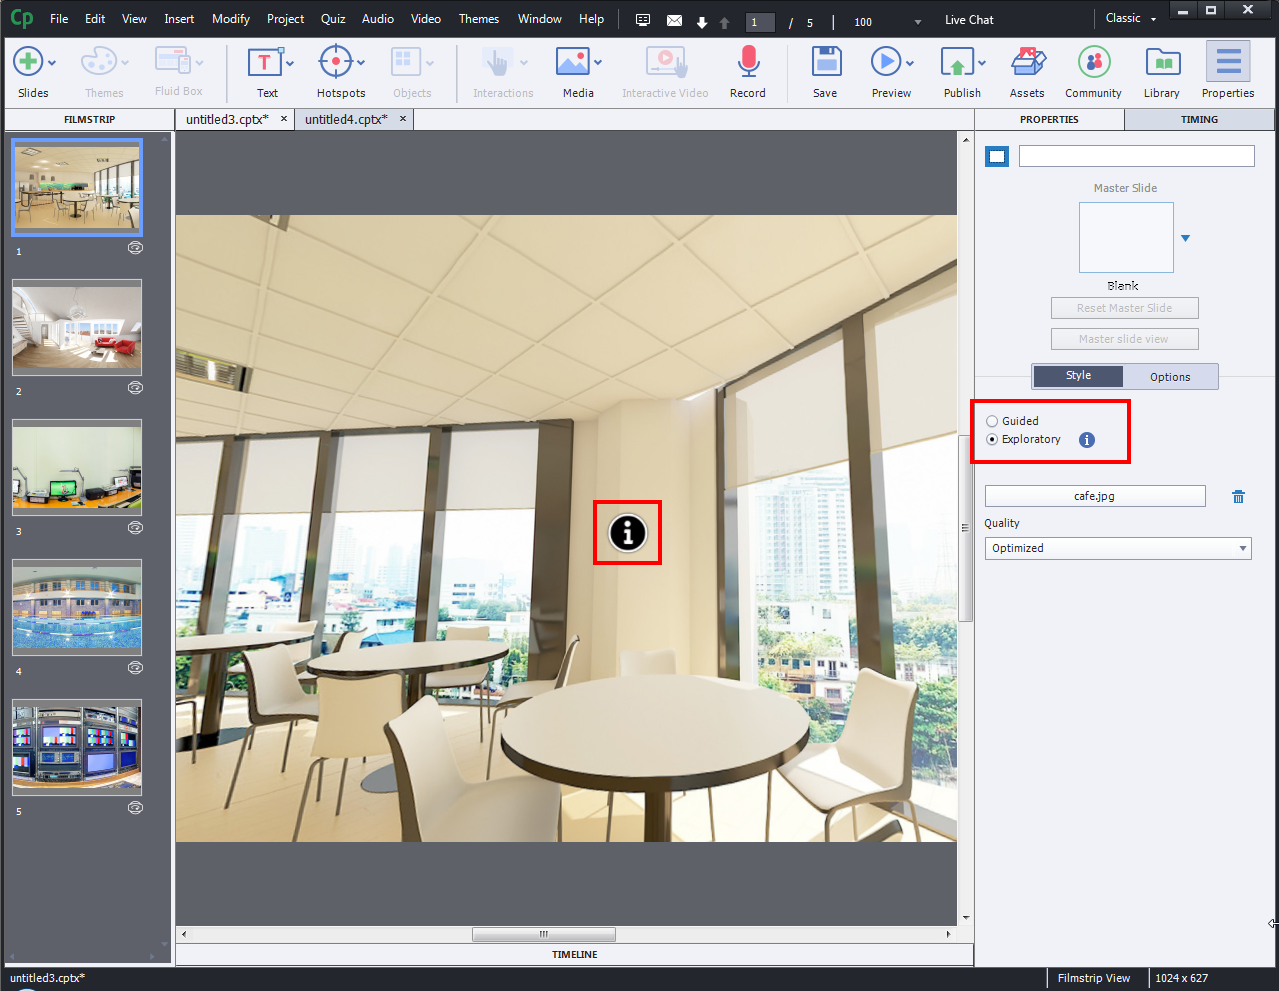


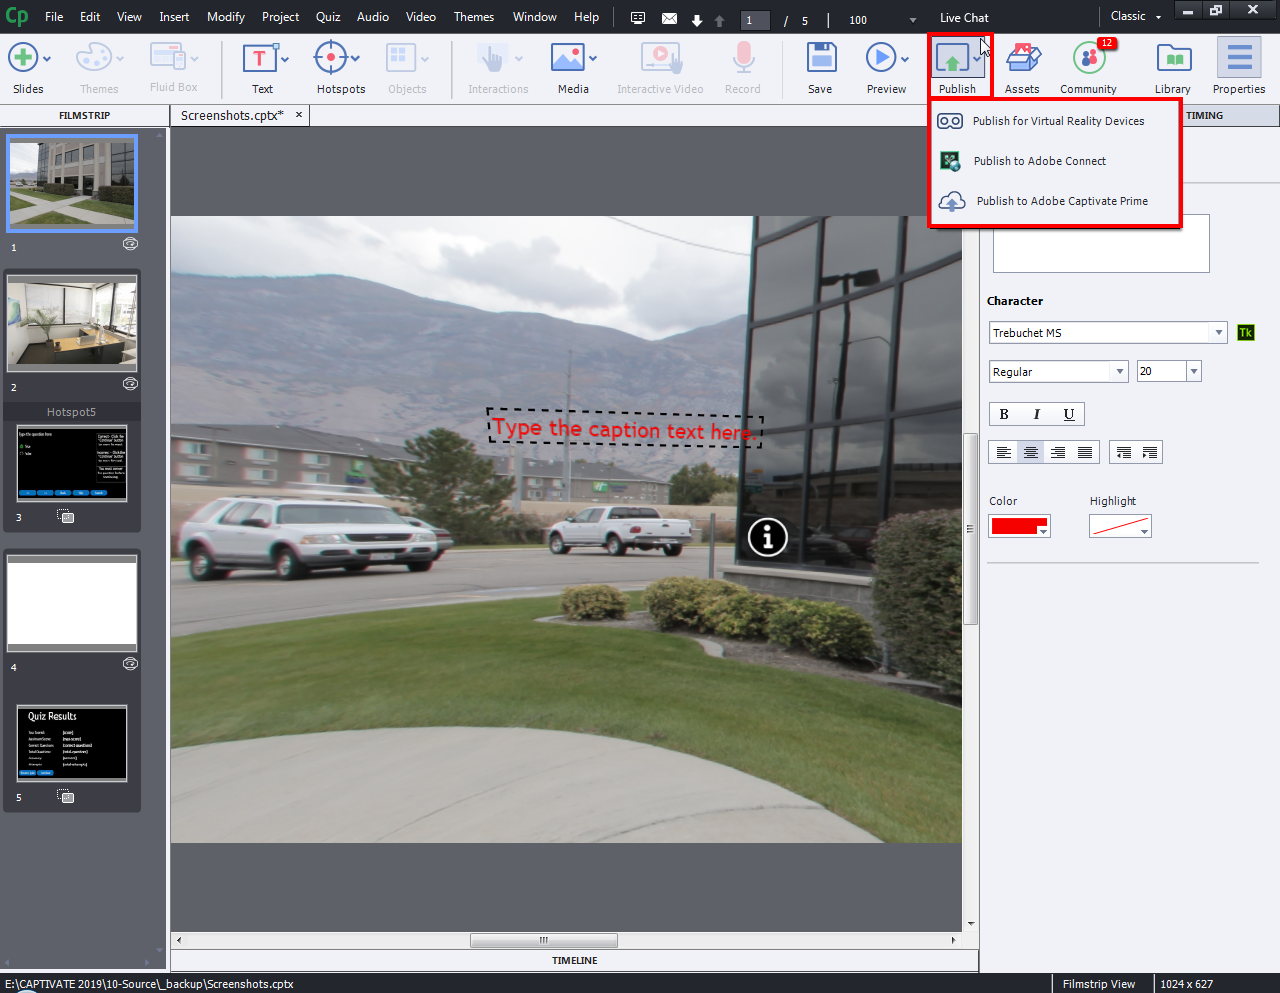
Publish settings of Virtual Reality Devices:
- Click Publish > Publish for Virtual Reality Devices

- Enter the project title and the location. In the publishing options, see Publish project as HTML5.
- After publishing your project, upload your project assets on a web server. The assets are in folders which are as follows:

- vr
- dr
- callers
- assets
- art
- project.txt
- index.html
- goodbye.html

By adapting this feature in Adobe Captivate 2019, you can create immersive learning experience taking learner engagement to the next level.
We have created a sample demo course on “Adobe Captivate 2019” for your reference. Click the below buttons to access the course.
Source Link: http://www.swiftelearningservices.com/adobe-captivate-2019-virtual-reality-project/
In the latest release of Adobe Captivate 2019, the Virtual Reality feature is included. With this feature, one can provide a low cost and high performance courses. In this blog, we are going to see how to create a virtual reality project in Adobe Captivate 2019.
You can open virtual reality project in two ways:
- New > Virtual Reality Project
- File > New Project > Virtual Reality Project
- To add a 360 image or video, click + icon on the screen.
- A popup window will appear on the screen. Navigate to your local drive and select 360 image or video
- You can see this popup window from the second time when you import 360 image/video.
- You can add interactive elements like Hotspots on the image. To do so, click on Hotspots option in the menu bar and select any hotspot from the drop-down list.
- Then assign interaction to the Hotspot. For this, double-click on the Hotspot, and choose an action under On Click drop-down list from the properties inspector. Here, we have taken Display Text action.Note: You can assign more actions by adding more hotspots.
- You can develop project in two ways – Guided and Exploratory.
Guided: Screen rotation will be navigated automatically in the sequence that you had added the hotspots, when you preview the project.
Exploratory: User should explore the screen and identify the hotspots. As default, the focus of the screen remains same as in the editing stage when you preview or publish the project. - Once you’ve selected Guided or Exploratory option, you can see Display Duration where you can increase or decrease the time of the text that is displayed on the screen.
- Then assign a text label to the hotpot. To do so, click on Text on the Menu bar and select Label option from the drop-down.
- Type the caption text in the label field given under properties panel. You can also make necessary changes to the text.
- Click Publish to preview the project. Then, click on hotspot in runtime to check the interactivity.
- The text appears as shown below.
- You can see a visited tick mark once you click the hotspot.
Publish settings of Virtual Reality Devices:
- Click Publish > Publish for Virtual Reality Devices
- Enter the project title and the location. In the publishing options, see Publish project as HTML5.
- After publishing your project, upload your project assets on a web server. The assets are in folders which are as follows:
- vr
- dr
- callers
- assets
- art
- project.txt
- index.html
- goodbye.html
By adapting this feature in Adobe Captivate 2019, you can create immersive learning experience taking learner engagement to the next level.
We have created a sample demo course on “Adobe Captivate 2019” for your reference. Click the below buttons to access the course.
Source Link: http://www.swiftelearningservices.com/adobe-captivate-2019-virtual-reality-project/


You must be logged in to post a comment.
- Most Recent
- Most Relevant
