 Newbie
12 posts
Newbie
12 posts
Earlier this month, I gave a presentation on Creating Custom Themes at our local Adobe Captivate User Group. As I was going through the step-by-step process of creating a theme, I found myself reflecting on my experience over the years – what worked, what didn’t work, and how to save time. In this article, I will share some of those lessons learned – as opposed to the step-by-step technique of creating a theme.
Earlier this month, I gave a presentation on Creating Custom Themes at our local Adobe Captivate User Group. As I was going through the step-by-step process of creating a theme, I found myself reflecting on my experience over the years – what worked, what didn’t work, and how to save time. In this article, I will share some of those lessons learned – as opposed to the step-by-step technique of creating a theme.
This article is aimed at intermediate Adobe Captivate users who have already created a few projects and are now ready to create a theme that reflects their client’s or company’s brand and/or ensures visual consistency across related e-learning modules.
Preparation is Key
“Begin with the end in mind.” ~ Stephen Covey’s 7 Habits of Highly Effective People
I find that careful planning and a little research before starting to create a custom theme saves a lot of development time.
According to the online Help (helpx.adobe.com/captivate/using/themes.html), a theme consists of the following components:
- Master slides,
- Object styles,
- Skin and TOC (table of contents) settings,
- and recording defaults.
Planning helps to determine which of these components will need to be customized in the theme, as well as how they should be customized.
For example, it is not essential to customize the skin and TOC if they are never going to be used.
So, how do we know what to include in a theme?
How to Determine What to Include
Visual Elements
Determining the look and feel of the theme is easier if the client has is a Style Guide or similar document which defines their company’s brand as this becomes the definitive guide for visual elements.
However, there have been many occasions when I have had the pleasure of creating the visual style from scratch. If this is the case, and there is a graphic designer or UI designer on the team, I use them as a resource. Frequently though, the budget does not include such a wonderful resource. In these situations, my primary concern is to start from a cohesive color palette that will help project a professional, polished finish.
To accomplish this, I either:
- Use a color generating/matching tool. Or…
- Take advantage of resources that supply cohesive color palettes. Or…
- Consider paying for images in order to get access to additional configurations and assets.
Using a Color-Matching Tool
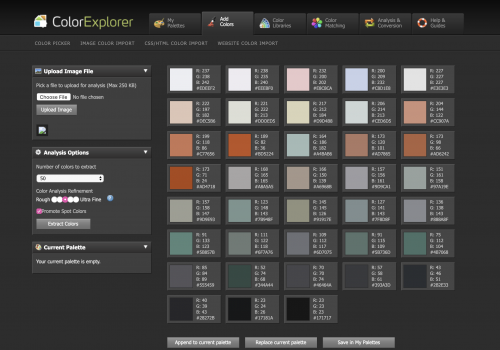
My favorite tool is ColorExplorer.com. Using the color picker, I can start from a color I like and the tool will generate complimentary colors. I can also upload an image, and it will extract a color palette from that. Any color palettes generated can be exported as an Adobe Swatch Exchange (ASE) file that can be exported into Captivate using the Swatch Manager. The image below shows a color palette generated from an image in Color Explorer. Options are available to extract up to 50 colors from an image in a single process.
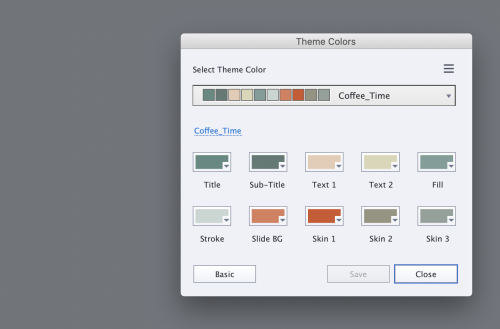
Adobe Color CC has similar functionality (https://color.adobe.com/create/color-wheel/) and provides greater control over the colors generated from imported images. However, I find it less intuitive. The image below shows a color palette generated from an image in Adobe Color CC.

Using Color Palette Resources
Another resource I like to use for inspirational color palettes is veerle.duoh.com/inspiration. Veerle (whom I do not know personally) generates color palettes from images people share with her and makes these available to download for free!
Purchasing Images
When my budget allows, I find that purchasing non-exclusive royalty rights to the images that inspire me often provides access to the PSD, AI or other vector image source files. In this way I can go beyond just using the colors, and also extract elements of the image to use as buttons and other key elements to maintain the cohesive theme. This is often very inexpensive. I usually spend between $35 – $80 on an image and reuse its assets over and over again –guilt-free!
Functional Elements
Identifying which functional elements are necessary for a theme and which are not, can be a great time saver – both when creating the theme, and down the road as the theme will not need to undergo constant updates in order to provide Objects and functionality that are needed in the courses.
For example, in an Accessible course, the Matching Question type will not be used in a quiz, so there is no need to spend time customizing it or similar Quiz Master slides.
Another common example the use of custom navigation buttons. Although buttons cannot be defined in Master slides, Smart Shapes can. So, in this case I would add Smart Shapes as buttons to the appropriate Master slides when creating or customizing any standard layouts.
Yet another example would be simulations. If no simulations will be recorded, time can be saved by not customizing the Recording Defaults.
Depending on how my team is structured, and my specific role within the team, I use one of the following methods to identify key functional elements:
- Create or obtain an approved wire frame, or storyboard of a course that will be typical within the series;
- Build the first course and use the functionality within the course as the template for the theme;
- Build a rough prototype of the course (in PowerPoint or Keynote) and use this to get buy-in from stakeholders around the key functionality that will implemented across the series of courses.
Building Systematically
1. Choose the Base Theme Carefully
In order to create a theme, we have to start somewhere. The documentation recommends starting from the theme that is closest to the look and feel we want to achieve and customize it.
However, I find that starting from a theme that has very little formatting such Pearl or White and adding the styling needed can save time and effort. In my experience it can take a lot more time to locate and undo changes I don’t need. Additionally, if I am going to share the theme with other team members, I don’t want any hidden surprises.
2. Start with the Theme Colors
The theme colors are used throughout the theme in myriad locations – text, backgrounds, slide colors, and so on. I’ve learned to customize the theme colors (using the desired color palette) as early as possible to ensure consistency across all elements within the project.
3. Next, Create the Master Slides
3.1 Customize Layouts and Add Graphical Elements
Obviously, we need to customize the Master slide layouts to reflect the layouts being used in the course and add any commonly used “buttons” as smart shapes. Here, I’ve learned to:
- Start building from the background up.
Applying background elements before adding those that will be in the foreground helps to create visual anchors that can be used to determine where to situate the elements that are added later. - Test incrementally.
As new elements are added, creating test slides using the new Master slides helps to get a good idea of how the Master slide will function in practice and tweaks can be made, if necessary. - Remember to add non-static elements as “placeholders”.
Placeholders can only be added while in the Master Slide View. Insert them by selecting the appropriate option from the Insert > Placeholder Objects sub-menu. - Take advantage of Smart Shapes to add custom buttons.Store commonly-used graphic elements for easy access.
In my opinion, the Master slides are a good place to put any graphic elements that will be used consistently throughout the course.For example, if I have six approved images of people that can be used to represent clients within scenarios. I might add these images to one or more of the Master slides so that they are immediately available to anyone who applies the theme.I believe this is a smart way to add a base set of images to the library to ensure consistency, but I’m not certain that it’s conventional (I’d be interested to know what others think).
3.2 Begin Customizing Text and Object Styles
I’ve learned that there are a couple of advantages to starting the customization of Object Styles from within the Master Slide view:
- I can see the effect of any changes as I make them and make any necessary adjustments.
- I can save time by applying the same change to multiple styles using the Properties > Style Name submenu (see image below).
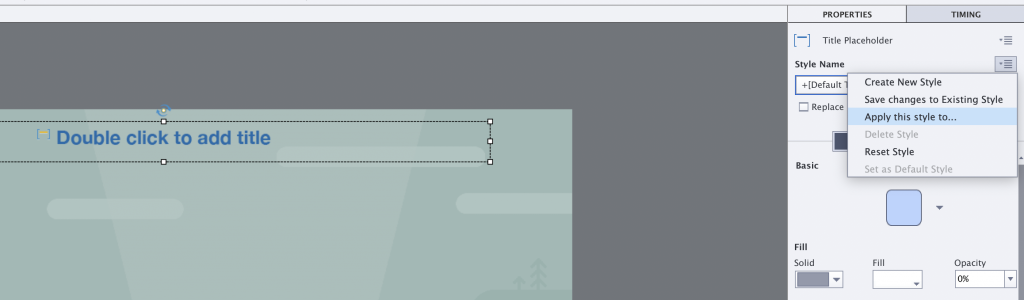
The down side to this is that changes to multiple styles seems to be hit and miss. Sometimes the effect sticks, sometimes it doesn’t. But when it does work, it’s great!
3.3 Double-Check and Finish Customizing Text and Object Styles
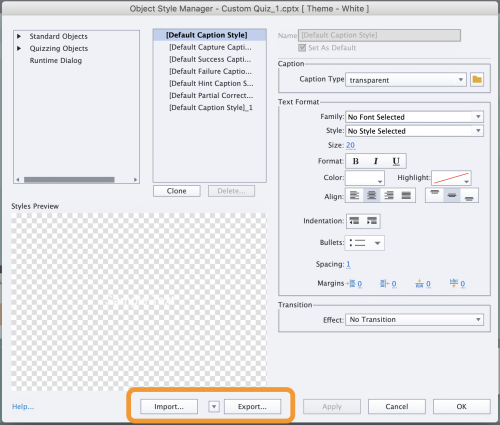
After I’ve made the preliminary changes to text and object styles, I use the Object Style Manager to ensure that all the changes I defined in the Master Slide view have been applied. I also customize any object styles I may have missed, or I think might be useful later at a later date.
The Object Style Manager includes functionality to Export and Import Object Styles, so after making modifications, it is possible to save those changes in an external file which can be imported into other themes down the road – or so I have heard. I haven’t had the opportunity to do this in practice .
Finishing Up!
Don’t forget to customize the Skin and TOC Settings as well as the Recording Defaults if your projects require them. And then save the theme!
Save the Theme
Themes can be saved in any desired location. Wherever you save them, they will still become immediately available within the Themes palette so be sure to pick a location you can easily find if you need to share copies of the theme with other team members.
Those are my tips and take-aways. What are yours? Please feel free to share them in the comments.
Earlier this month, I gave a presentation on Creating Custom Themes at our local Adobe Captivate User Group. As I was going through the step-by-step process of creating a theme, I found myself reflecting on my experience over the years – what worked, what didn’t work, and how to save time. In this article, I will share some of those lessons learned – as opposed to the step-by-step technique of creating a theme.
This article is aimed at intermediate Adobe Captivate users who have already created a few projects and are now ready to create a theme that reflects their client’s or company’s brand and/or ensures visual consistency across related e-learning modules.
Preparation is Key
“Begin with the end in mind.” ~ Stephen Covey’s 7 Habits of Highly Effective People
I find that careful planning and a little research before starting to create a custom theme saves a lot of development time.
According to the online Help (helpx.adobe.com/captivate/using/themes.html), a theme consists of the following components:
- Master slides,
- Object styles,
- Skin and TOC (table of contents) settings,
- and recording defaults.
Planning helps to determine which of these components will need to be customized in the theme, as well as how they should be customized.
For example, it is not essential to customize the skin and TOC if they are never going to be used.
So, how do we know what to include in a theme?
How to Determine What to Include
Visual Elements
Determining the look and feel of the theme is easier if the client has is a Style Guide or similar document which defines their company’s brand as this becomes the definitive guide for visual elements.
However, there have been many occasions when I have had the pleasure of creating the visual style from scratch. If this is the case, and there is a graphic designer or UI designer on the team, I use them as a resource. Frequently though, the budget does not include such a wonderful resource. In these situations, my primary concern is to start from a cohesive color palette that will help project a professional, polished finish.
To accomplish this, I either:
- Use a color generating/matching tool. Or…
- Take advantage of resources that supply cohesive color palettes. Or…
- Consider paying for images in order to get access to additional configurations and assets.
Using a Color-Matching Tool
My favorite tool is ColorExplorer.com. Using the color picker, I can start from a color I like and the tool will generate complimentary colors. I can also upload an image, and it will extract a color palette from that. Any color palettes generated can be exported as an Adobe Swatch Exchange (ASE) file that can be exported into Captivate using the Swatch Manager. The image below shows a color palette generated from an image in Color Explorer. Options are available to extract up to 50 colors from an image in a single process.
Adobe Color CC has similar functionality (https://color.adobe.com/create/color-wheel/) and provides greater control over the colors generated from imported images. However, I find it less intuitive. The image below shows a color palette generated from an image in Adobe Color CC.
Using Color Palette Resources
Another resource I like to use for inspirational color palettes is veerle.duoh.com/inspiration. Veerle (whom I do not know personally) generates color palettes from images people share with her and makes these available to download for free!
Purchasing Images
When my budget allows, I find that purchasing non-exclusive royalty rights to the images that inspire me often provides access to the PSD, AI or other vector image source files. In this way I can go beyond just using the colors, and also extract elements of the image to use as buttons and other key elements to maintain the cohesive theme. This is often very inexpensive. I usually spend between $35 – $80 on an image and reuse its assets over and over again –guilt-free!
Functional Elements
Identifying which functional elements are necessary for a theme and which are not, can be a great time saver – both when creating the theme, and down the road as the theme will not need to undergo constant updates in order to provide Objects and functionality that are needed in the courses.
For example, in an Accessible course, the Matching Question type will not be used in a quiz, so there is no need to spend time customizing it or similar Quiz Master slides.
Another common example the use of custom navigation buttons. Although buttons cannot be defined in Master slides, Smart Shapes can. So, in this case I would add Smart Shapes as buttons to the appropriate Master slides when creating or customizing any standard layouts.
Yet another example would be simulations. If no simulations will be recorded, time can be saved by not customizing the Recording Defaults.
Depending on how my team is structured, and my specific role within the team, I use one of the following methods to identify key functional elements:
- Create or obtain an approved wire frame, or storyboard of a course that will be typical within the series;
- Build the first course and use the functionality within the course as the template for the theme;
- Build a rough prototype of the course (in PowerPoint or Keynote) and use this to get buy-in from stakeholders around the key functionality that will implemented across the series of courses.
Building Systematically
1. Choose the Base Theme Carefully
In order to create a theme, we have to start somewhere. The documentation recommends starting from the theme that is closest to the look and feel we want to achieve and customize it.
However, I find that starting from a theme that has very little formatting such Pearl or White and adding the styling needed can save time and effort. In my experience it can take a lot more time to locate and undo changes I don’t need. Additionally, if I am going to share the theme with other team members, I don’t want any hidden surprises.
2. Start with the Theme Colors
The theme colors are used throughout the theme in myriad locations – text, backgrounds, slide colors, and so on. I’ve learned to customize the theme colors (using the desired color palette) as early as possible to ensure consistency across all elements within the project.
3. Next, Create the Master Slides
3.1 Customize Layouts and Add Graphical Elements
Obviously, we need to customize the Master slide layouts to reflect the layouts being used in the course and add any commonly used “buttons” as smart shapes. Here, I’ve learned to:
- Start building from the background up.
Applying background elements before adding those that will be in the foreground helps to create visual anchors that can be used to determine where to situate the elements that are added later. - Test incrementally.
As new elements are added, creating test slides using the new Master slides helps to get a good idea of how the Master slide will function in practice and tweaks can be made, if necessary. - Remember to add non-static elements as “placeholders”.
Placeholders can only be added while in the Master Slide View. Insert them by selecting the appropriate option from the Insert > Placeholder Objects sub-menu. - Take advantage of Smart Shapes to add custom buttons.Store commonly-used graphic elements for easy access.
In my opinion, the Master slides are a good place to put any graphic elements that will be used consistently throughout the course.For example, if I have six approved images of people that can be used to represent clients within scenarios. I might add these images to one or more of the Master slides so that they are immediately available to anyone who applies the theme.I believe this is a smart way to add a base set of images to the library to ensure consistency, but I’m not certain that it’s conventional (I’d be interested to know what others think).
3.2 Begin Customizing Text and Object Styles
I’ve learned that there are a couple of advantages to starting the customization of Object Styles from within the Master Slide view:
- I can see the effect of any changes as I make them and make any necessary adjustments.
- I can save time by applying the same change to multiple styles using the Properties > Style Name submenu (see image below).
The down side to this is that changes to multiple styles seems to be hit and miss. Sometimes the effect sticks, sometimes it doesn’t. But when it does work, it’s great!
3.3 Double-Check and Finish Customizing Text and Object Styles
After I’ve made the preliminary changes to text and object styles, I use the Object Style Manager to ensure that all the changes I defined in the Master Slide view have been applied. I also customize any object styles I may have missed, or I think might be useful later at a later date.
The Object Style Manager includes functionality to Export and Import Object Styles, so after making modifications, it is possible to save those changes in an external file which can be imported into other themes down the road – or so I have heard. I haven’t had the opportunity to do this in practice .
Finishing Up!
Don’t forget to customize the Skin and TOC Settings as well as the Recording Defaults if your projects require them. And then save the theme!
Save the Theme
Themes can be saved in any desired location. Wherever you save them, they will still become immediately available within the Themes palette so be sure to pick a location you can easily find if you need to share copies of the theme with other team members.
Those are my tips and take-aways. What are yours? Please feel free to share them in the comments.


You must be logged in to post a comment.
- Most Recent
- Most Relevant
Thank you for taking the time to share your experiences. It’s greatly appreciated.
I was wondering if you could comment on what circumstances would prompt you to use PowerPoint (or Keynote) to build a rough prototype? When you get buy-in, do you then rebuild from scratch in Captivate? How much would a PowerPoint presentation differ from a storyboard if you used that method?
Sorry about all the questions, but I’m curious.
Hello Todd,
I have used prototyping in situations where my client is in a non-L&D-related function but is going to be heavily affected by the new Learning initiative, and I want to involve them in the process – even though I do not actually require their sign-off, I need their buy-in in order for the initiative to be successful. Many of my projects have been change-related: there’s a huge paradigm shift within an organization and I’ve found that prototyping opens a dialog where I can include people in the process at a level that they can understand and make some fun decisions, like choosing images for characters, or having some input into the color palette. I’ve even ran a competition to get people to be more involved in this process. For me, it’s just part of helping people through the transition and preparing them for what to expect.
For me, a prototype differs from a storyboard in that a storyboard would contain the entire script along with a description of the key elements in the visual layout, while the prototype would show the layout but not include the full script.
Neither prototype nor script would have any working functionality, so yes, when some decisions have been made, I do build the actual e-learning modules in Captivate.
I hope this answers your questions. Sorry for the delay in responding.
That was great! Thanks for taking the time.
You’re welcome!
Here are some links (I mostlly use CC Color to create the theme, also can be created from several Adobe mobile apps). It is such a pity that CC Libraries are not available to Captivate (they are to Draft, which could be a workaround):
http://blog.lilybiri.com/theme-colors
http://blog.lilybiri.com/whats-in-a-theme-a-template
https://elearning.adobe.com/2019/01/themes-qa/
https://elearning.adobe.com/2017/09/use-guides-for-your-fluid-boxes-design/
http://blog.lilybiri.com/colorful-2015-with-adobe-captivate
You are missing some points but congratulations with nod doing what most manuals and training provide.
I have published several posts about Themes, and a basic training for me always includes Themes as a main topic. When providing a personalised intermediate or advanced training where I start by screening projects created by the trainees, it mostly ends up with starting to explain the power of Themes, and its time saving aspects.
I may heave missed it but did you emphasize the importance of the type of project to be created with that theme: non-responsive, responsive with Fluid boxes, responsive with Breakpoint views. Especially the components Object Styles and Master slides (I start with OSM, not with master slides, but mostly they will be done a lot simultaneously)?
The importance of not overriding a packaged theme by keeping its name and how you can reset the original themes?
BTW I never start with Pearl not White if it is a totally new custom theme but with Blank! That is the only theme with the minimum of master slides needed.
Will post some links in a next comment.
Thank you.
You’re welcome. Since I posted this answer, have published some blogs about the use of Object Styles and the Object Style Manager, which is an important part of the design process for a custom theme. You may have seen them, but for the sake of other users looking for documentation about theme creation:
https://elearning.adobe.com/2019/01/object-styles-pillars-themes/
https://elearning.adobe.com/2019/01/exploring-object-style-manager/
https://elearning.adobe.com/2019/02/object-styles-responsive-projects/
Maybe I’ll write some tips for the creation of maser slides, to have a completed series about Themes, mostly the first topic in any intermediate/advanced training I offer.
