Concluding post on the blinking character selection and editing.
This post wraps up some code related to two previous posts. In the first, you get to see how navigating left and right will give the appearance of changing a selected character. In the second, we introduce an up and down arrow and the ability to actually edit the characters.
In case you missed those posts, you can find them at the links below.
OK – let’s take a look at how this was built.
The Characters
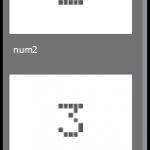
I built the “pixel style” characters using PowerPoint and saved each individual letter and number as an image. They are nothing more than a bunch of aligned squares. I created a 5 x 7 grid of squares and aligned them all from side to side and top to bottom. Then I grouped them and made a whole bunch of duplicates. Then, depending on the letter I wanted, I simply deleted the appropriate squares from the grid.
Then, in Captivate, I loaded them all up as states for a single character. Once I had them all loaded and looking the way I wanted, I duplicated it to make eight more. I like this because all of the states come as part of the duplication saving a ton of time – because, seriously, the most time consuming part of this project was making the characters and then making a total of 65 states.
After duplication, I spaced them on the stage underneath the nine masks that I already had out there. The masks are nothing more than boxes which are the same color as the background and sized to cover each character.
Refer to the first link above for the code on the left/right movement and getting the masks to blink.
The Up and Down Arrows
These are used to change the states of the characters. The concept is simple and there is a block of code for each of the nine character locations. The only difference is the reference to the image that needs changing. I will show just one as the other eight are setup the same. This is for the Up arrow.
if (window.step==1) {
cp.goToPreviousState(“pos1”);
–val1;if (window.val1==0) {
val1=65;
}}
Ok – so first of all, I have some variables in play here – one for each of the nine characters. They are named val1 thru val9. These are tracking the value of each of the characters 1 thru 65. I also have a variable called step which tracks the location of the selected character position.
So here is how we might read this when someone presses the up arrow. If we are at step 1 – which is the first position that defaults to a capital ‘C’ – we are going to simply go to the previous state for the selected character (pos1 for position 1)- which would be a capital ‘B’ in this case and then decrement the val1 variable by one. This will change the variable value to a 2. I have the default value of capital ‘C’ as 3.
After that, we are going to do a quick check of the value of the val1 variable. If we have decremented to the point that val1 is equal to zero, then change it to 65. This is what is used to allow the characters to scroll around in a loop.
That’s it! Just rinse and repeat this code for the other eight characters and change the step value, pos value, and val1 value accordingly. The code is the same for the down arrow except for two things.
- I am incrementing the val1 variable instead of decrementing it.
- I am going to the Next State instead of the Previous
The Submit Button
The submit button is where we take it all and make it a usable variable. I placed all of the character choices into an array. The trick here is to match the position of each character in the array with the value that gets assigned to each character’s tracking variable (val1, val2, etc.) So the capital ‘C’ which has a value of 3 needs to be number 4 in the array because the array is zero indexed. This is what helps to “pull the letters out” of the editing done with images. Here is a look at the code.
var letters = [“-“, “A”, “B”, “C”, “D”, “E”, “F”, “G”, “H”, “I”, “J”, “K”, “L”, “M”, “N”, “O”, “P”, “Q”, “R”, “S”, “T”, “U”, “V”, “W”, “X”, “Y”, “Z”, “a”, “b”, “c”, “d”, “e”, “f”, “g”, “h”, “i”, “j”, “k”, “l”, “m”, “n”, “o”, “p”, “q”, “r”, “s”, “t”, “u”, “v”, “w”, “x”, “y”, “z”, ” “, “&”, “.”, “0”, “1”, “2”, “3”, “4”, “5”, “6”, “7”, “8”, “9”];
yourName=letters[val1].concat(letters[val2]).concat(letters[val3]).concat(letters[val4]).concat(letters[val5]).concat(letters[val6]).concat(letters[val7]).concat(letters[val8]).concat(letters[val9]);
cpAPIInterface.gotoSlide(1);
So you can see the big ugly array defined at the top followed by the big ugly concatenation being assigned to a variable I called yourName which is displayed on the next slide. Finally, we have the code to go to slide two (zero indexed).
Hopefully you have gained something useful out of this small project series. I would love to hear how you might use something like this in one of your own projects.
They were actually all PNG files that I saved out of PowerPoint.
I loaded them in bulk to the library and then duplicated my states and swapped them out with a new image in the same position.
Once the first one was complete with all of the states – I duplicated the original on the stage and all the states follow – it also allows the positioning of all the states to track as well.
You must be logged in to post a comment.


