 Master
55 posts
Master
55 posts

This article provides a step-by-step guide on how to add custom page numbers in Adobe Captivate 2019. The process involves creating a project variable, inserting a text caption, setting the timing, and adding actions. By following these steps, users can easily add custom page numbers to their Adobe Captivate projects.
Step 1:
Insert custom Next and Back buttons on every screen.

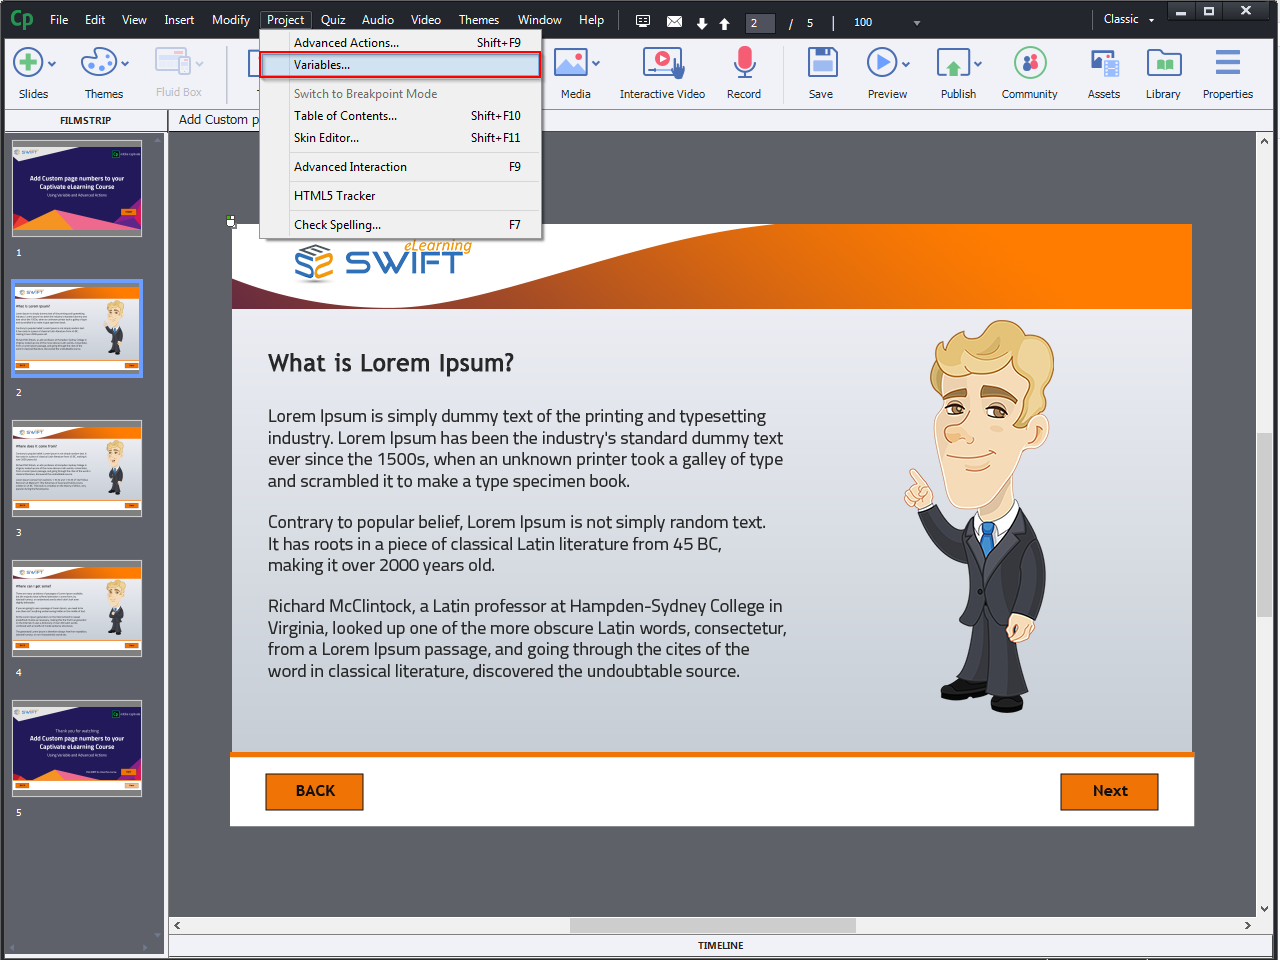
Step 2:
Now, go to the Project menu and select Variables….
Step 2:
Select Add New button.

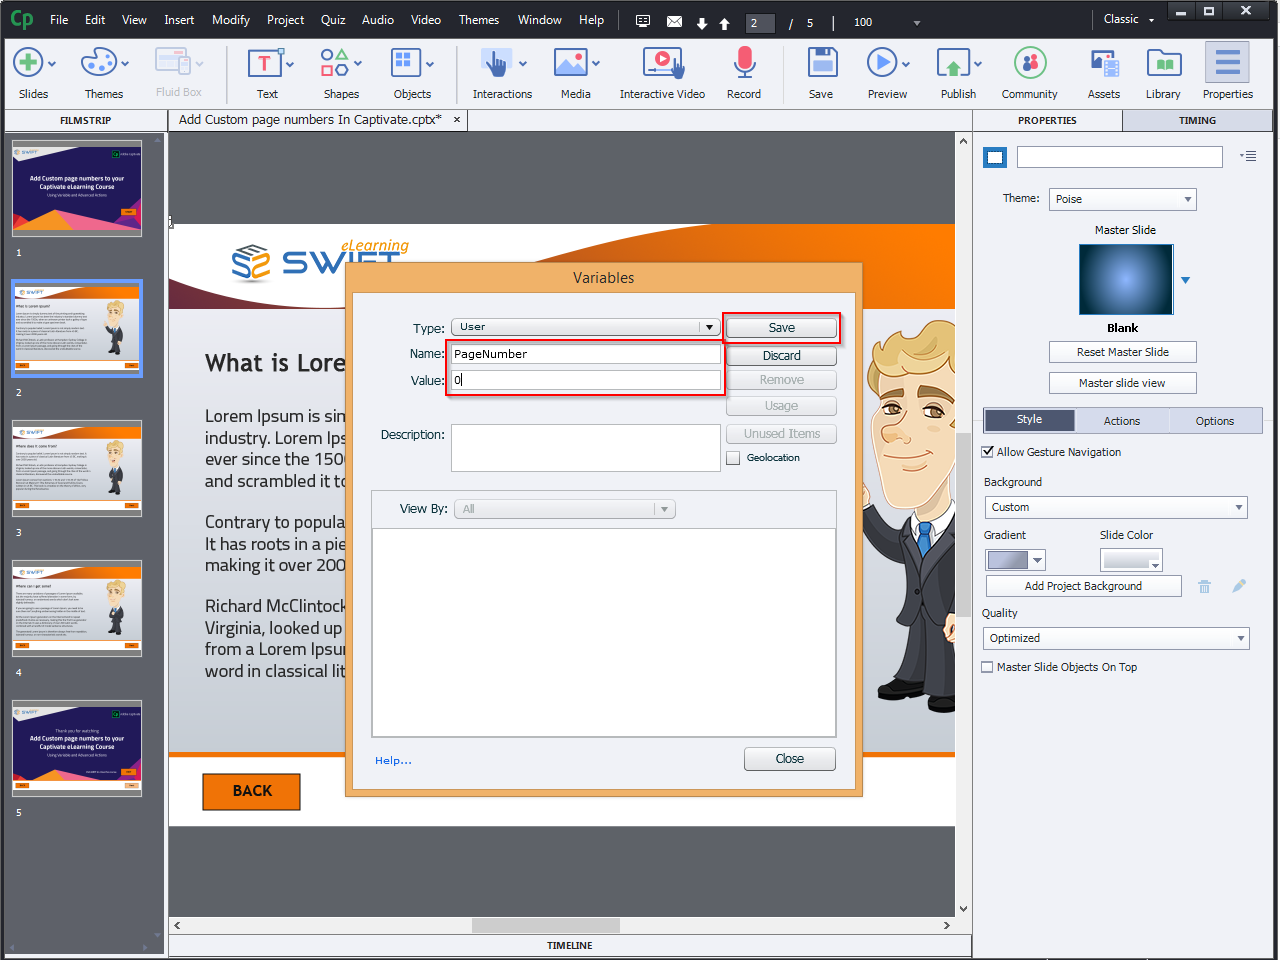
Step 3:
Enter the following details:
Name: PageNumber
Value: 0
And click Save.
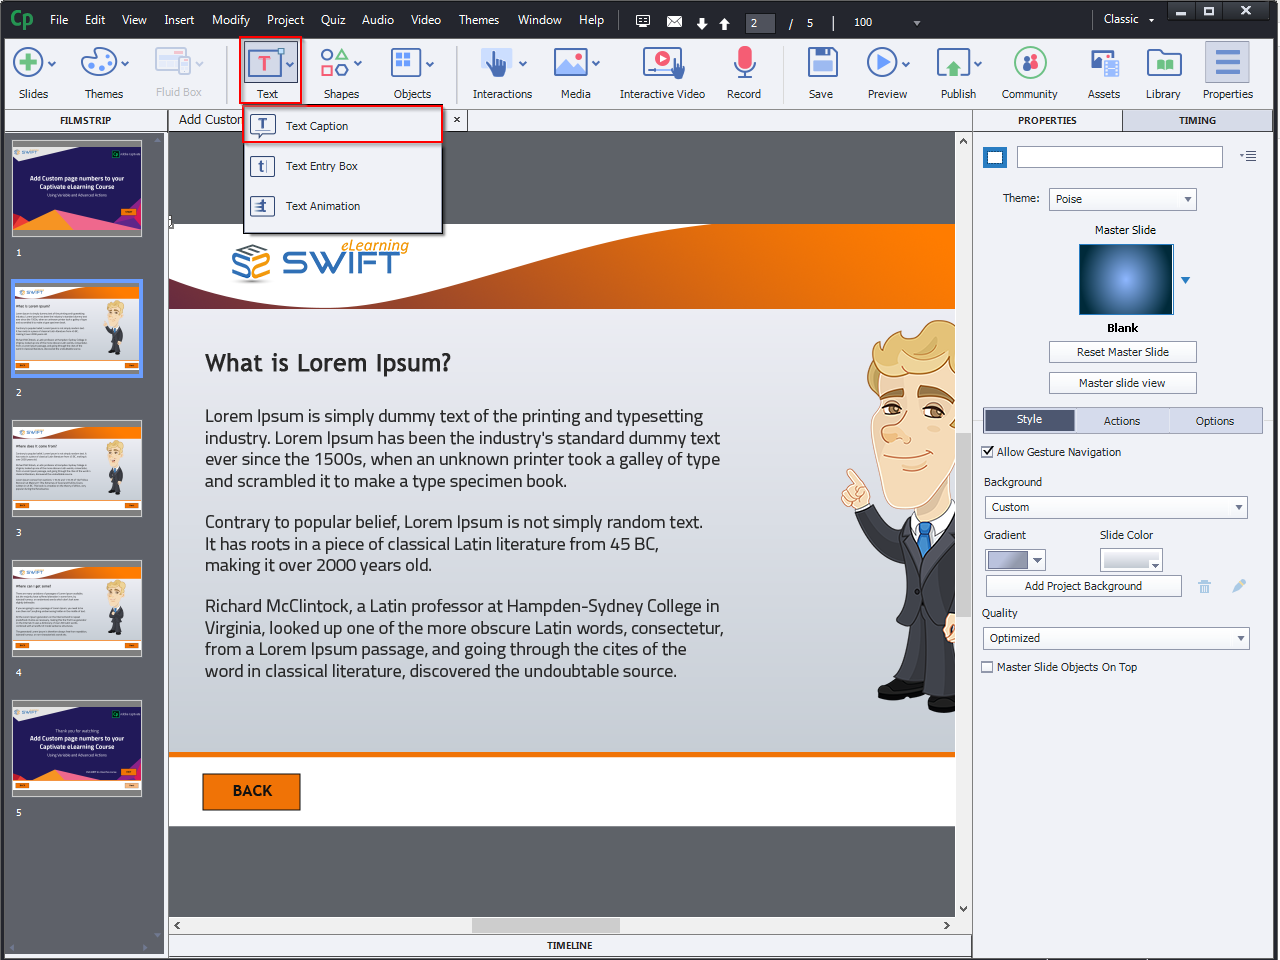
Step 4:
Now add a new Text Caption.
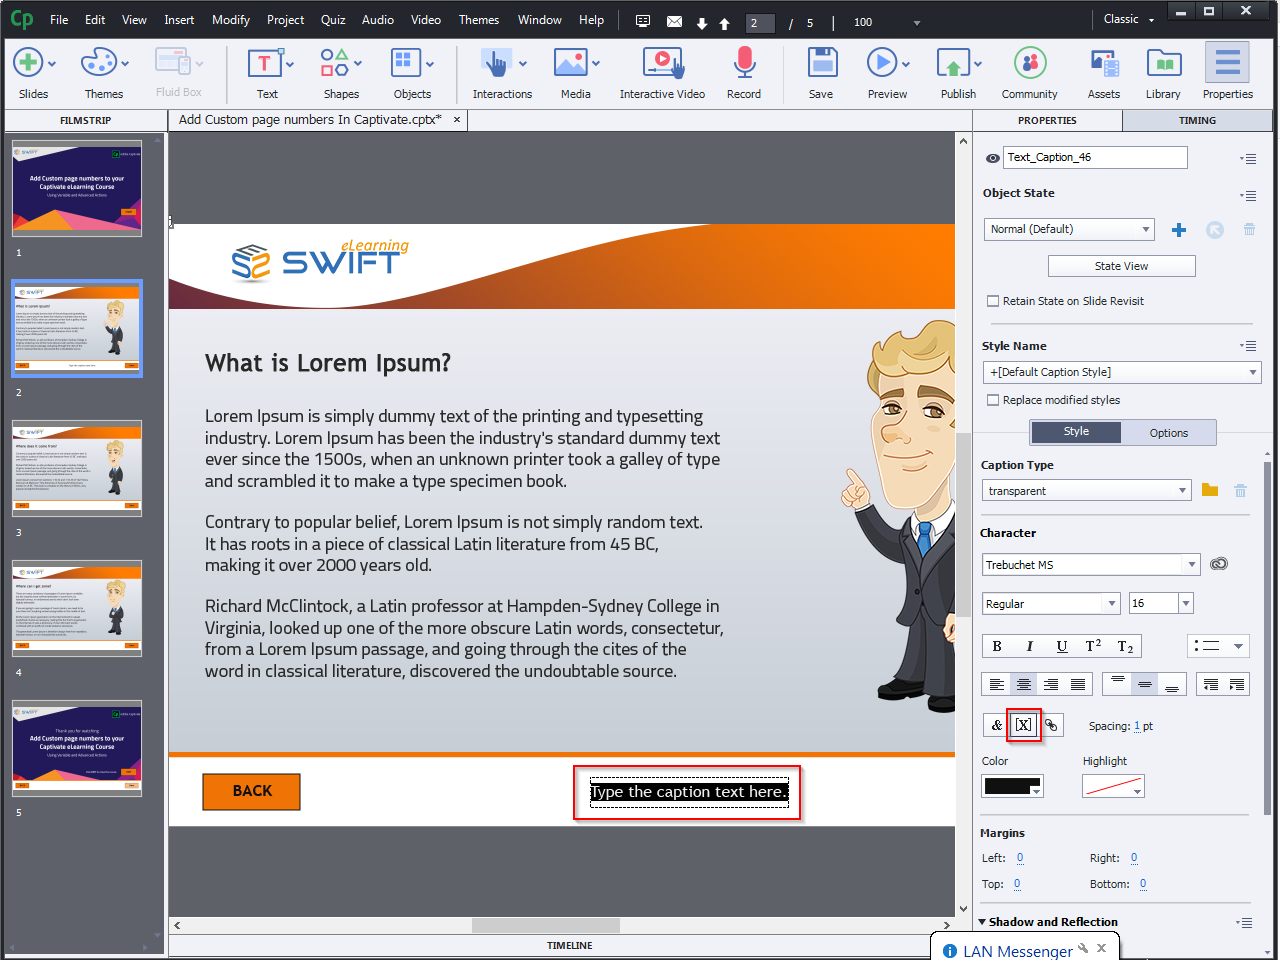
Step 5:
Select Text Caption and Click on Insert variable icon “X” to create a variable.
Step 6:
The Insert Variable window appears on the screen.
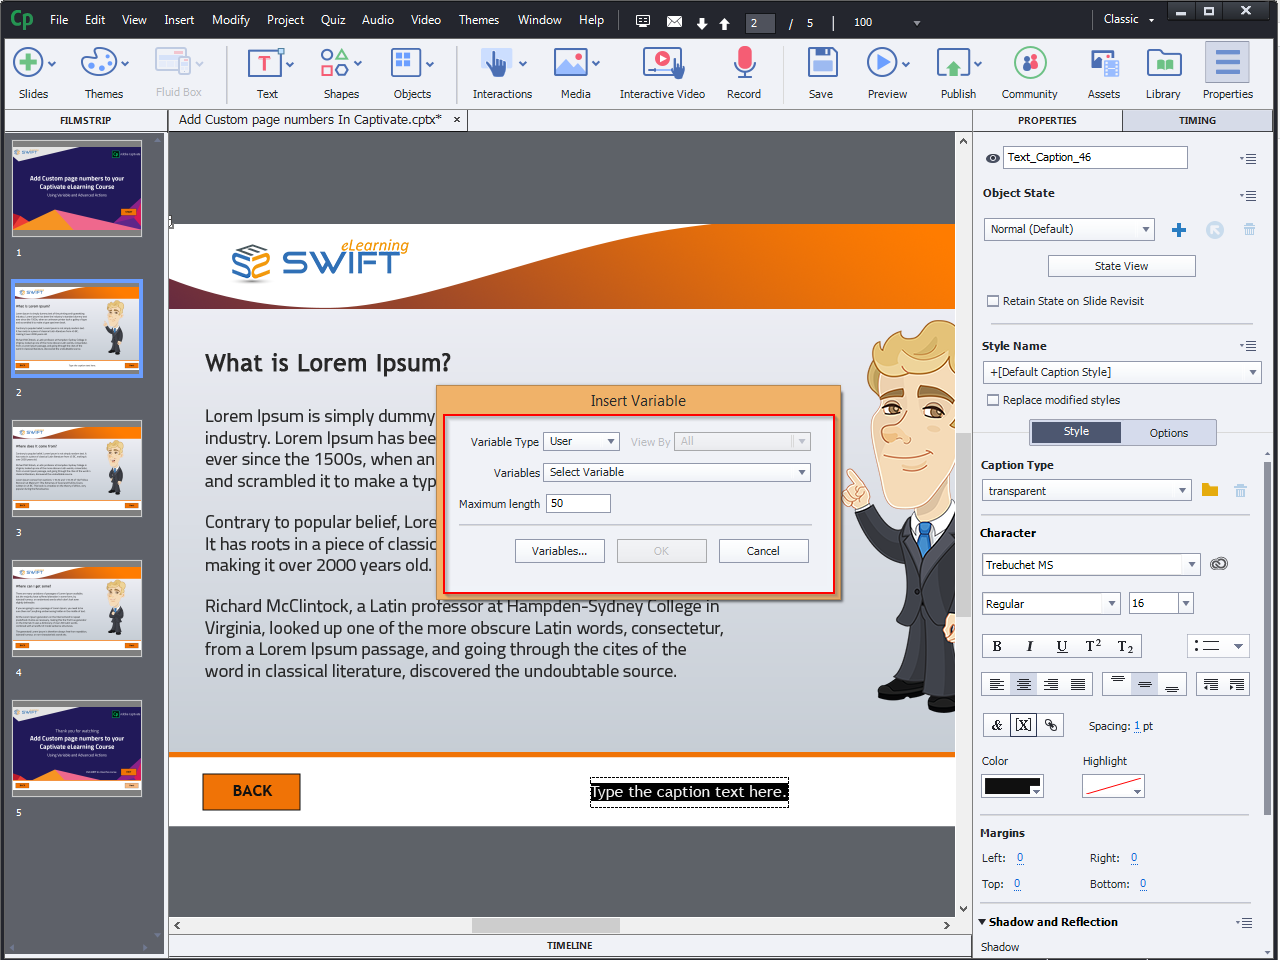
Step 7:
Click the Variable Dropdown arrow and select the PageNumber Variable that you initially created.
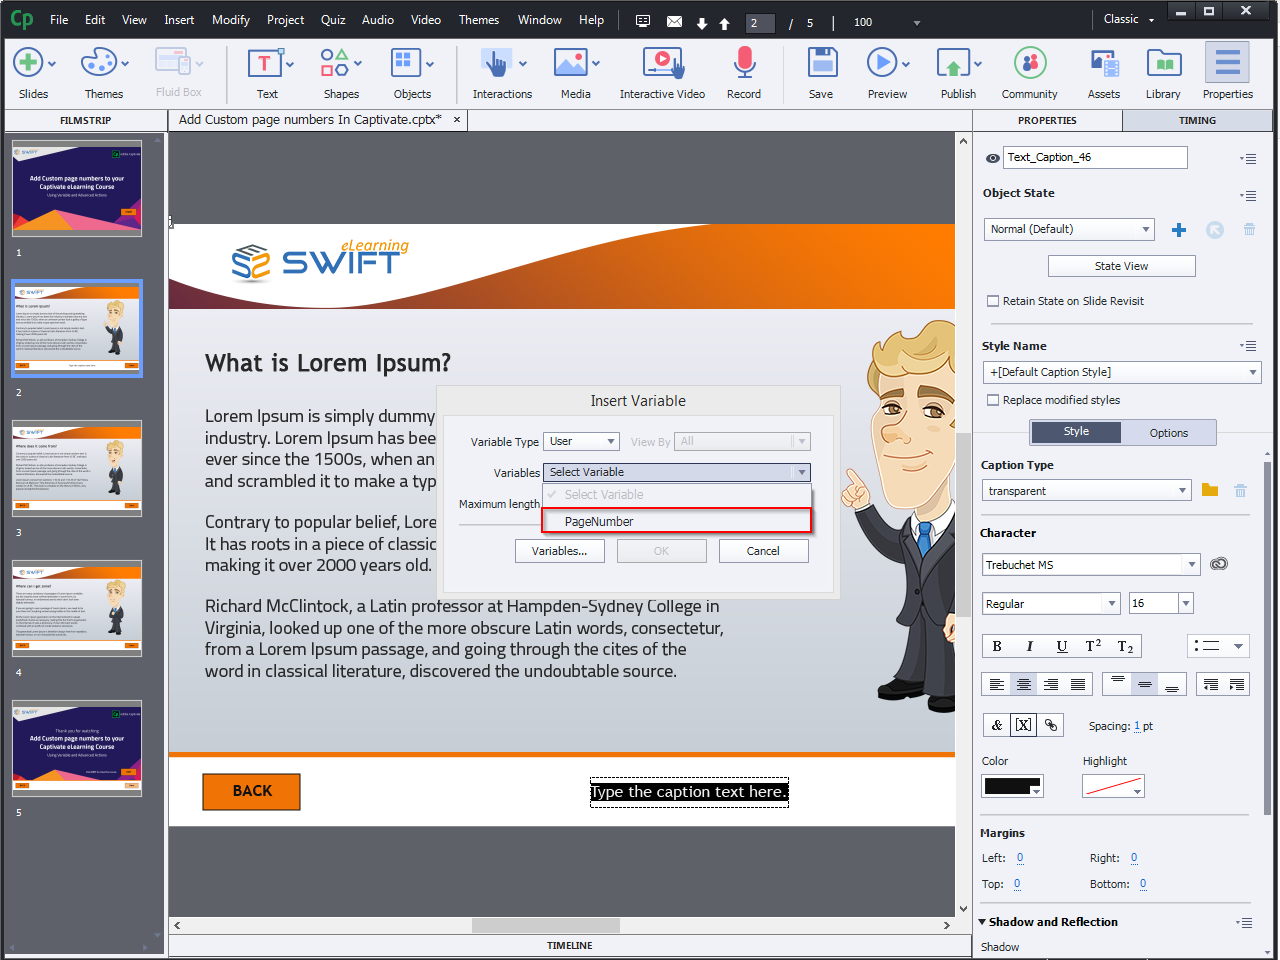
Step 8:
Click OK to create a variable

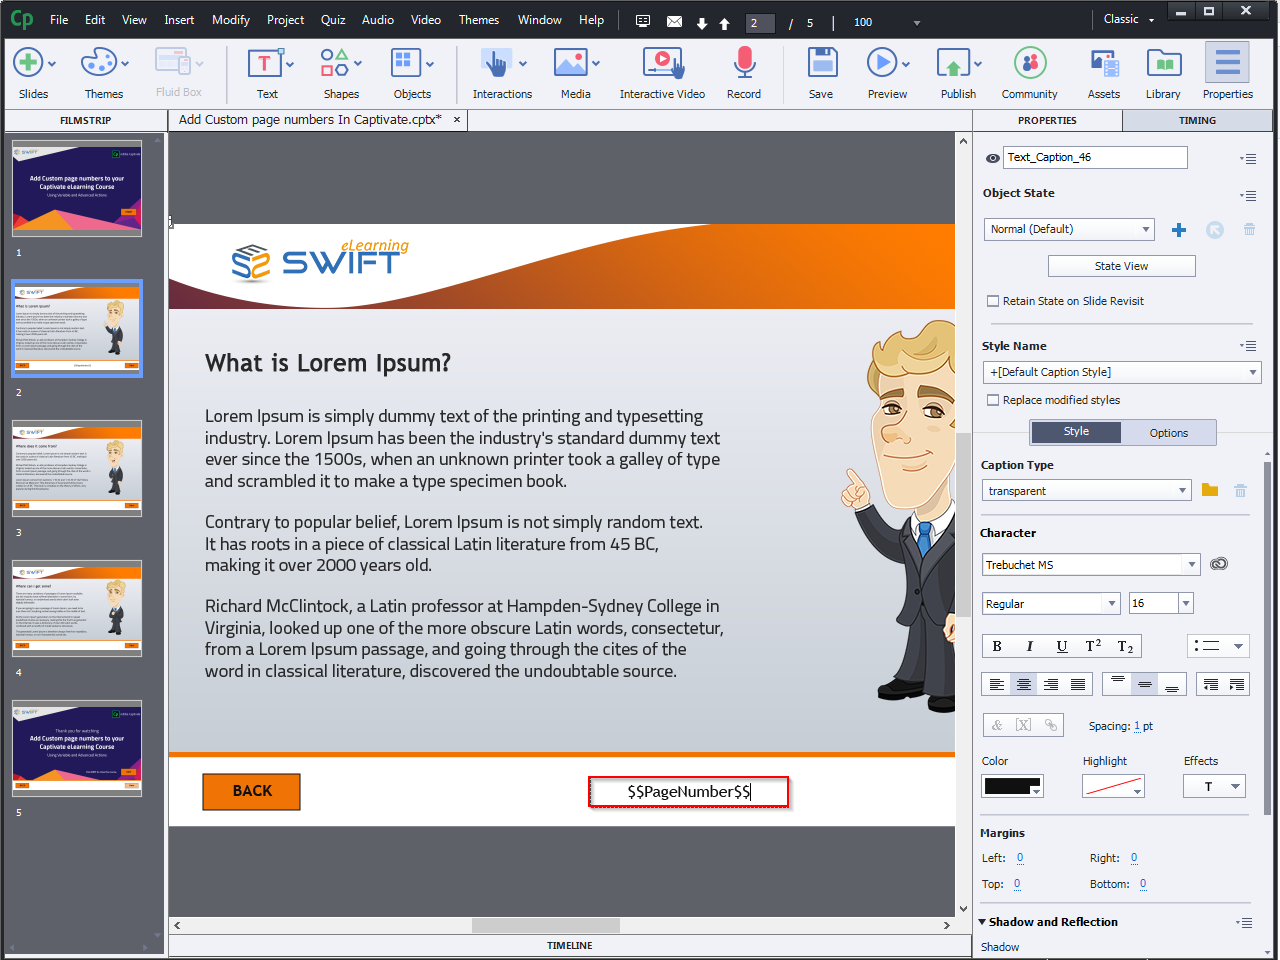
Step 9:
As shown below, a PageNumber variable is successfully created.
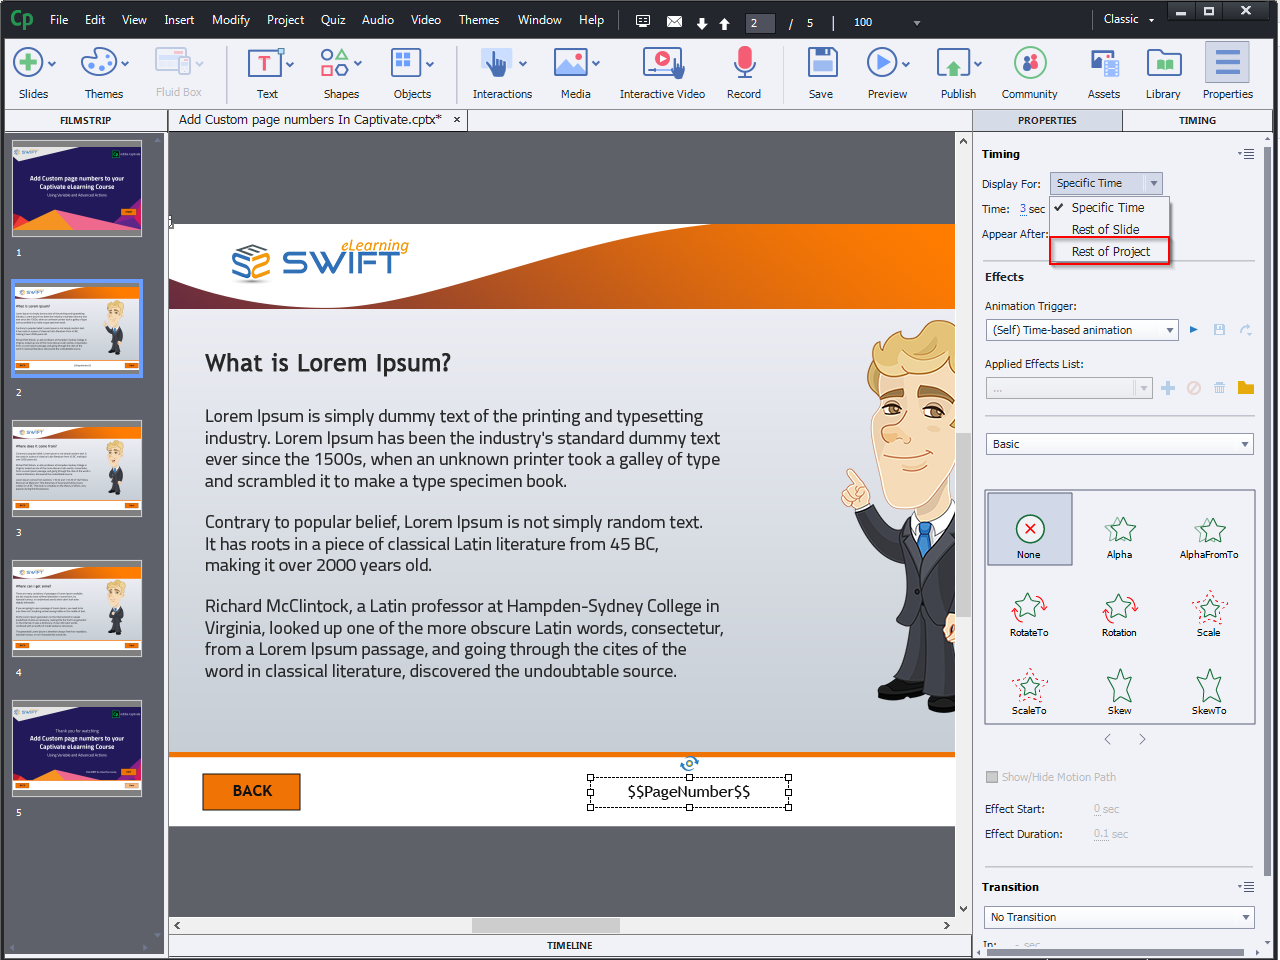
Step 10:
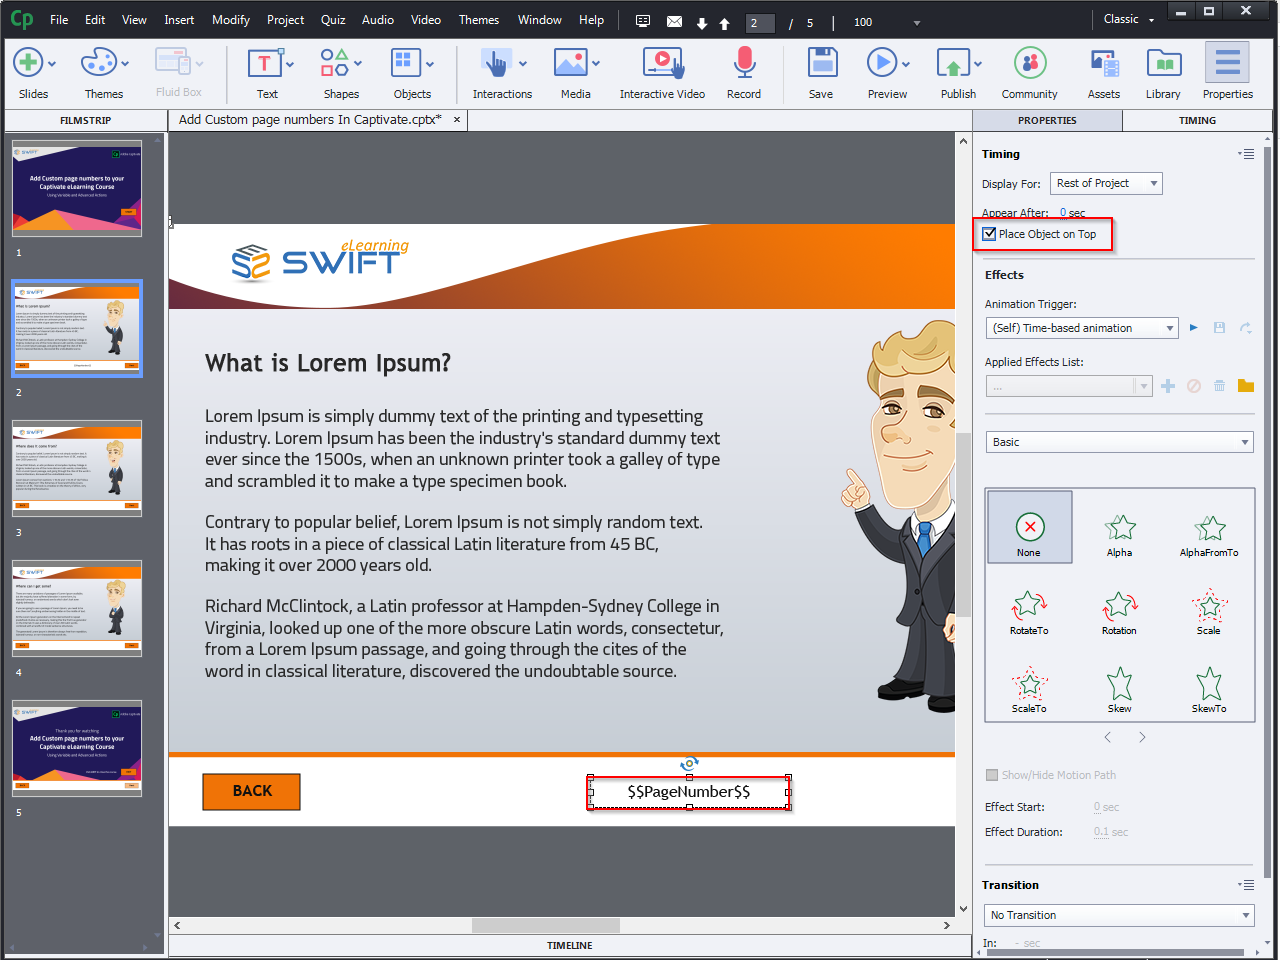
Go to the Timing window and select PageNumber Variable and apply “Rest of Project”.
Step 11:
Ensure that the option to Place Object on Top is selected.
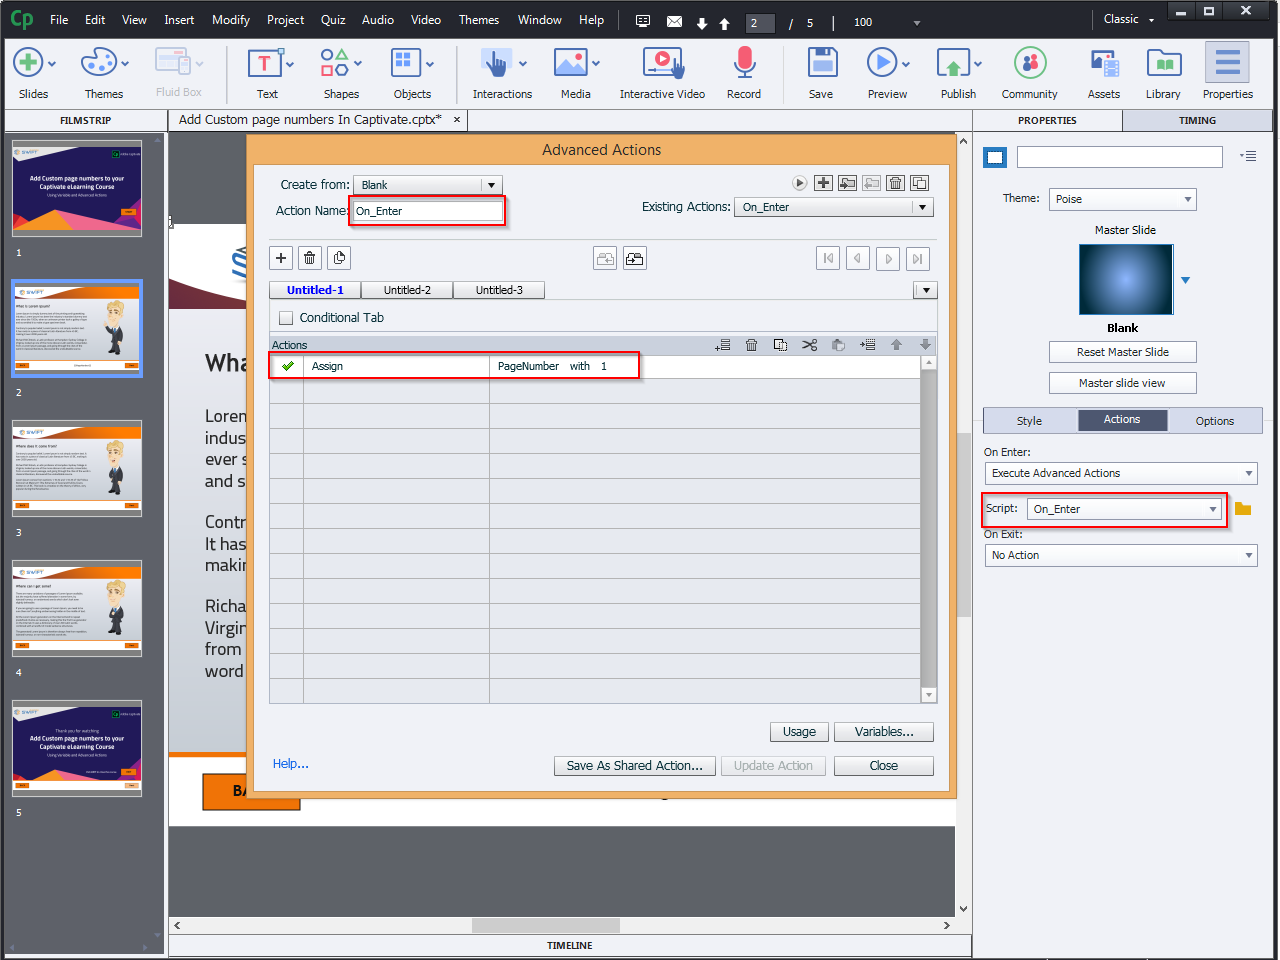
Step 12:
Now add actions on the first slide. Assign PageNumber with 1.
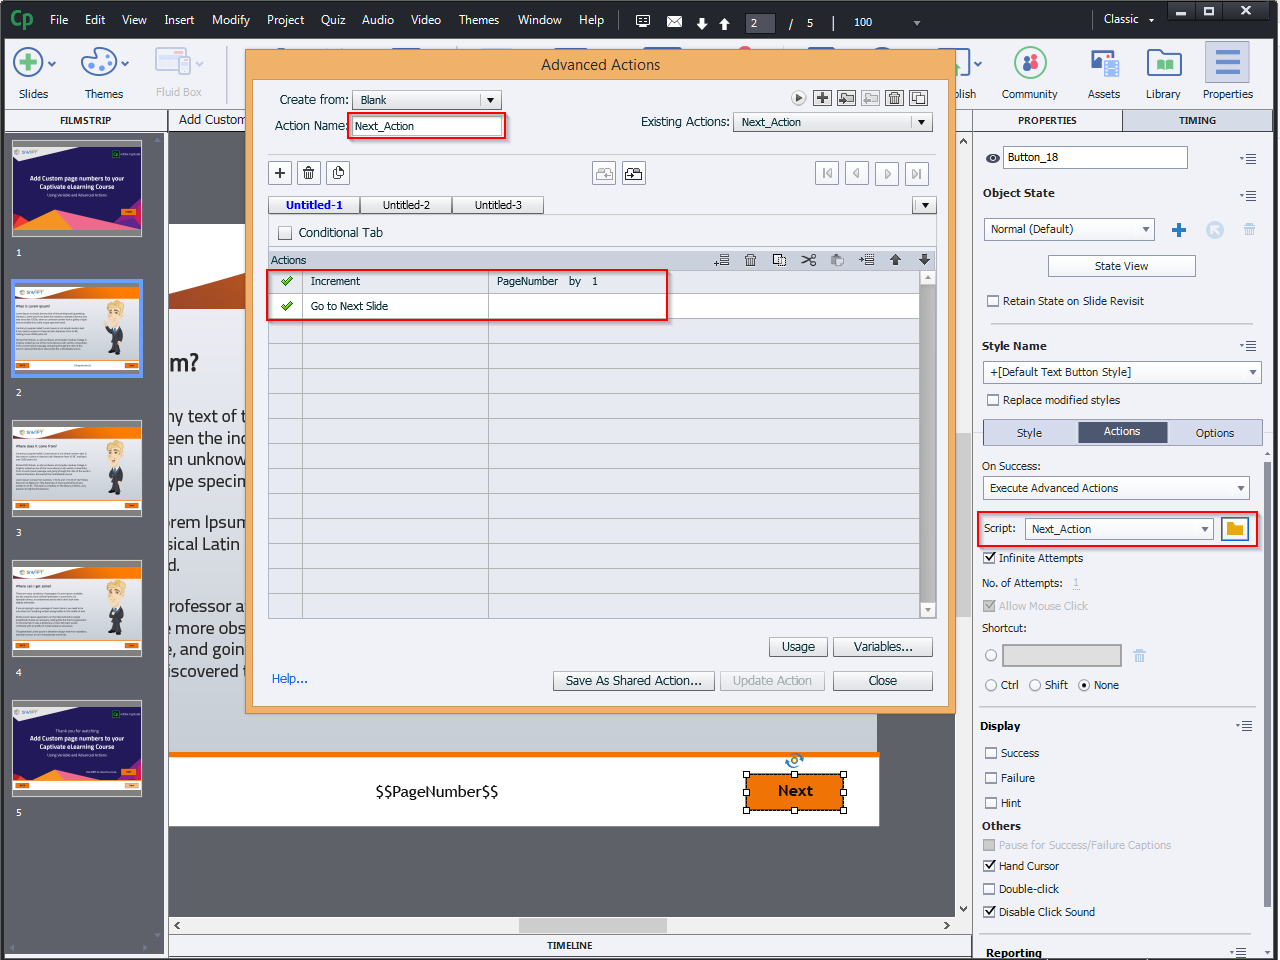
Step 13:
Next button Action:
Now select the Next button and add an action as shown below.
Increment – PageNumber by 1
Go to Next Slide
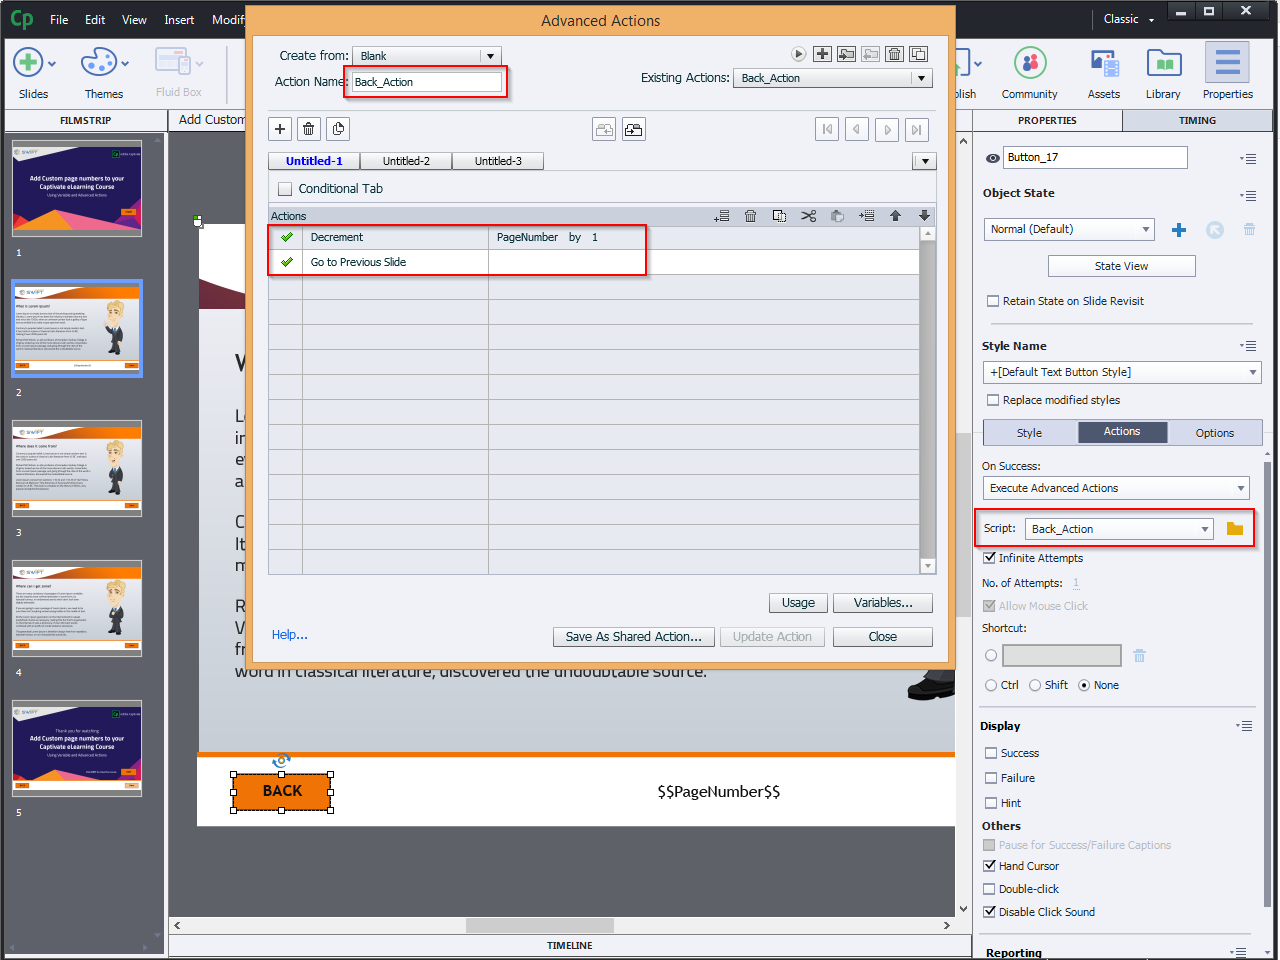
Step 14:
Back button Action:
Now select the Back button and add an action as shown below.
Decrement – PageNumber by 1
Go to the previous slide.
Step 15:
The Next and Back buttons on each slide should be used in the same way.
Visit our website for more insights: https://www.swiftelearningservices.com
This article provides a step-by-step guide on how to add custom page numbers in Adobe Captivate 2019. The process involves creating a project variable, inserting a text caption, setting the timing, and adding actions. By following these steps, users can easily add custom page numbers to their Adobe Captivate projects.
Step 1:
Insert custom Next and Back buttons on every screen.
Step 2:
Now, go to the Project menu and select Variables….
Step 2:
Select Add New button.
Step 3:
Enter the following details:
Name: PageNumber
Value: 0
And click Save.
Step 4:
Now add a new Text Caption.
Step 5:
Select Text Caption and Click on Insert variable icon “X” to create a variable.
Step 6:
The Insert Variable window appears on the screen.
Step 7:
Click the Variable Dropdown arrow and select the PageNumber Variable that you initially created.
Step 8:
Click OK to create a variable
Step 9:
As shown below, a PageNumber variable is successfully created.
Step 10:
Go to the Timing window and select PageNumber Variable and apply “Rest of Project”.
Step 11:
Ensure that the option to Place Object on Top is selected.
Step 12:
Now add actions on the first slide. Assign PageNumber with 1.
Step 13:
Next button Action:
Now select the Next button and add an action as shown below.
Increment – PageNumber by 1
Go to Next Slide
Step 14:
Back button Action:
Now select the Back button and add an action as shown below.
Decrement – PageNumber by 1
Go to the previous slide.
Step 15:
The Next and Back buttons on each slide should be used in the same way.
Visit our website for more insights: https://www.swiftelearningservices.com


You must be logged in to post a comment.
- Most Recent
- Most Relevant
Hmmm…. why complicate this? Just insert cpIndoCurrentSlide, it will always be the correcct slide number. What is the advantage of this very long workflow? You can even insert the total number of slides, it will look like:
Slide $$cpInfoCurrent$$/$$cpInfoSlideCount$$
Both variables belong to the Movie Control category.
