 Master
55 posts
Master
55 posts
In this blog, we will demonstrate how to avoid slide audio from replaying on subsequent visits. We will be using a variable and an advanced action to control the audio.
https://www.swiftelearningservices.com/how-to-add-custom-page-numbers-adobe-captivate-2019/
Step 01:
Go to the “Project” menu and select “Variables” from the dropdown.

Step 02:
For creating new variables click Add New button.

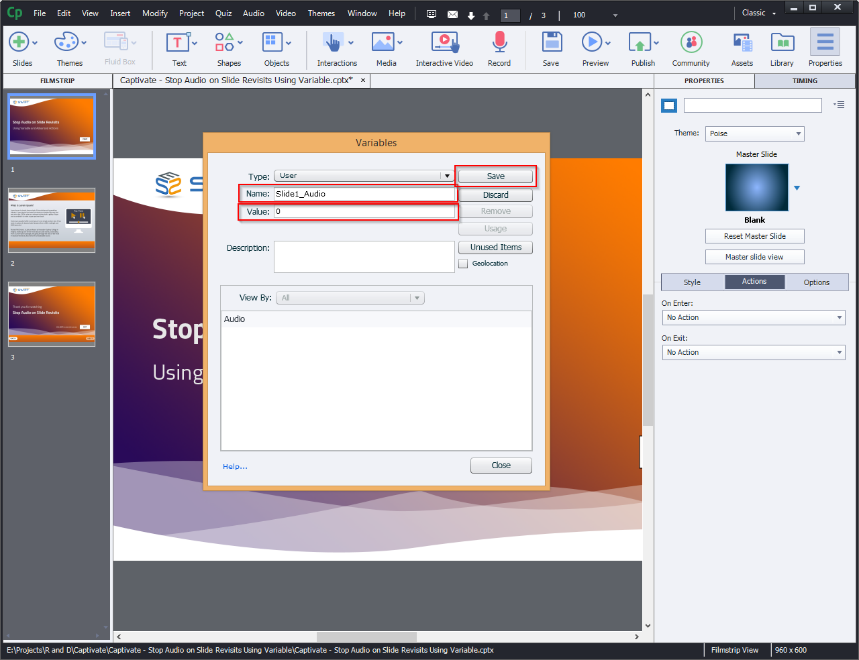
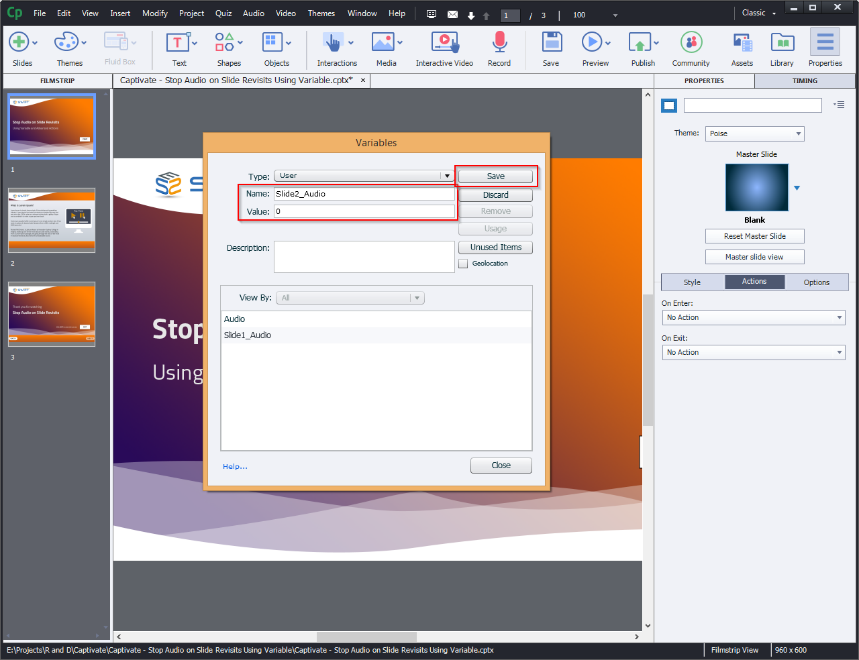
Step 03:
Give a unique name (Slide1_Audio, Slide2_Audio, etc.) and value field as (0) and click Save.
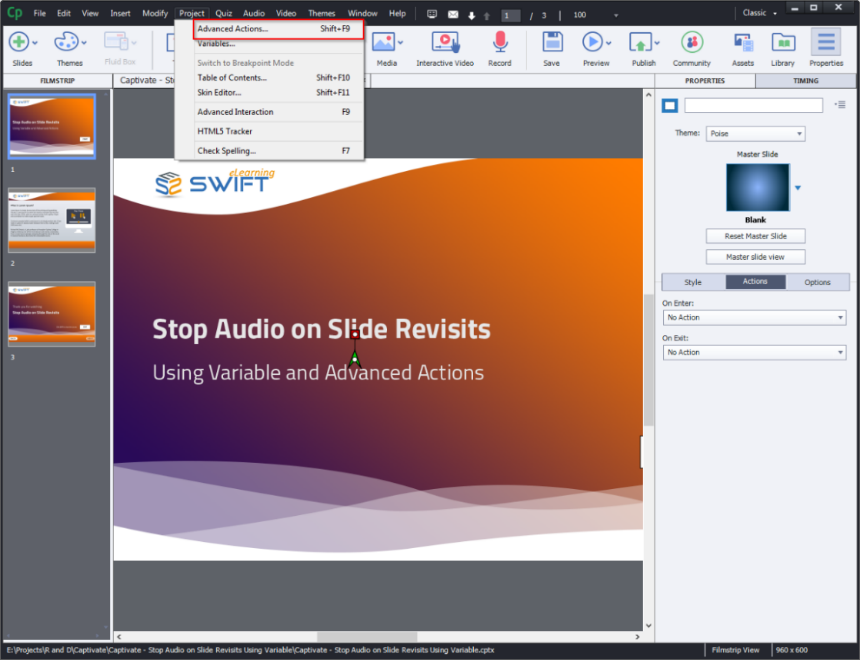
Step 04:
From the “Project” menu, go to “Advanced Actions”.
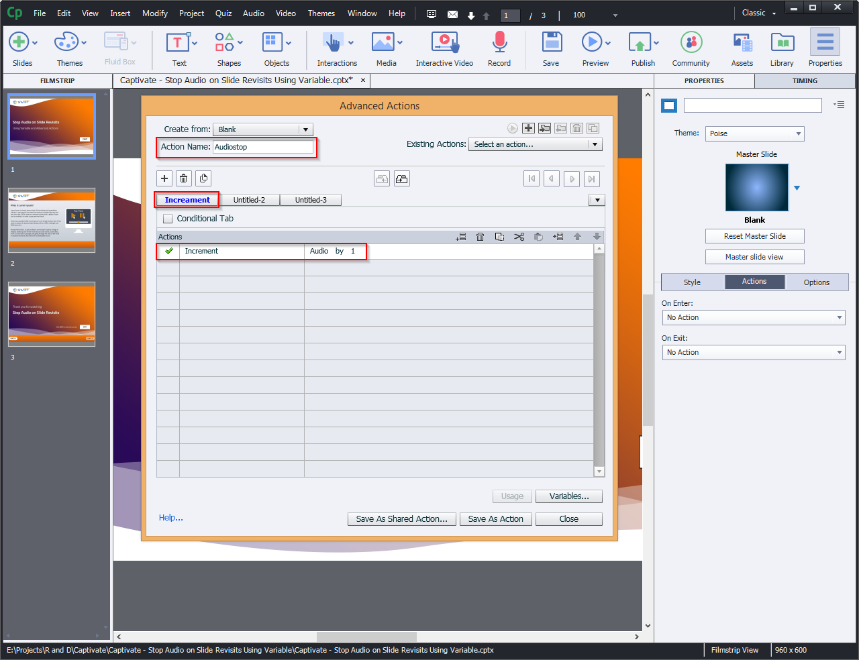
Step 05:
Define an action name (Ex: Audiostop) and then follow the variables as shown in the screen below.
Increment – Audio – 1
Step 06:
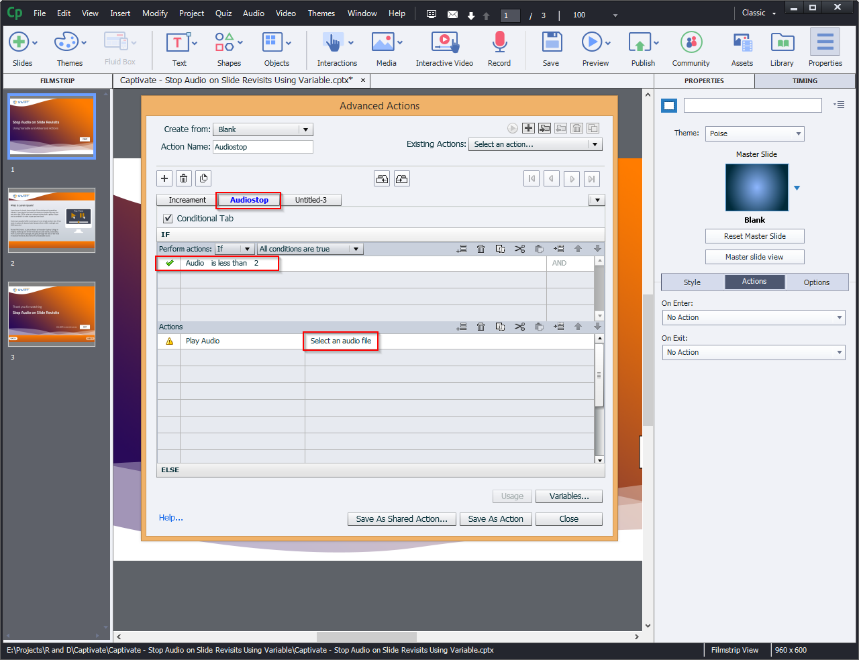
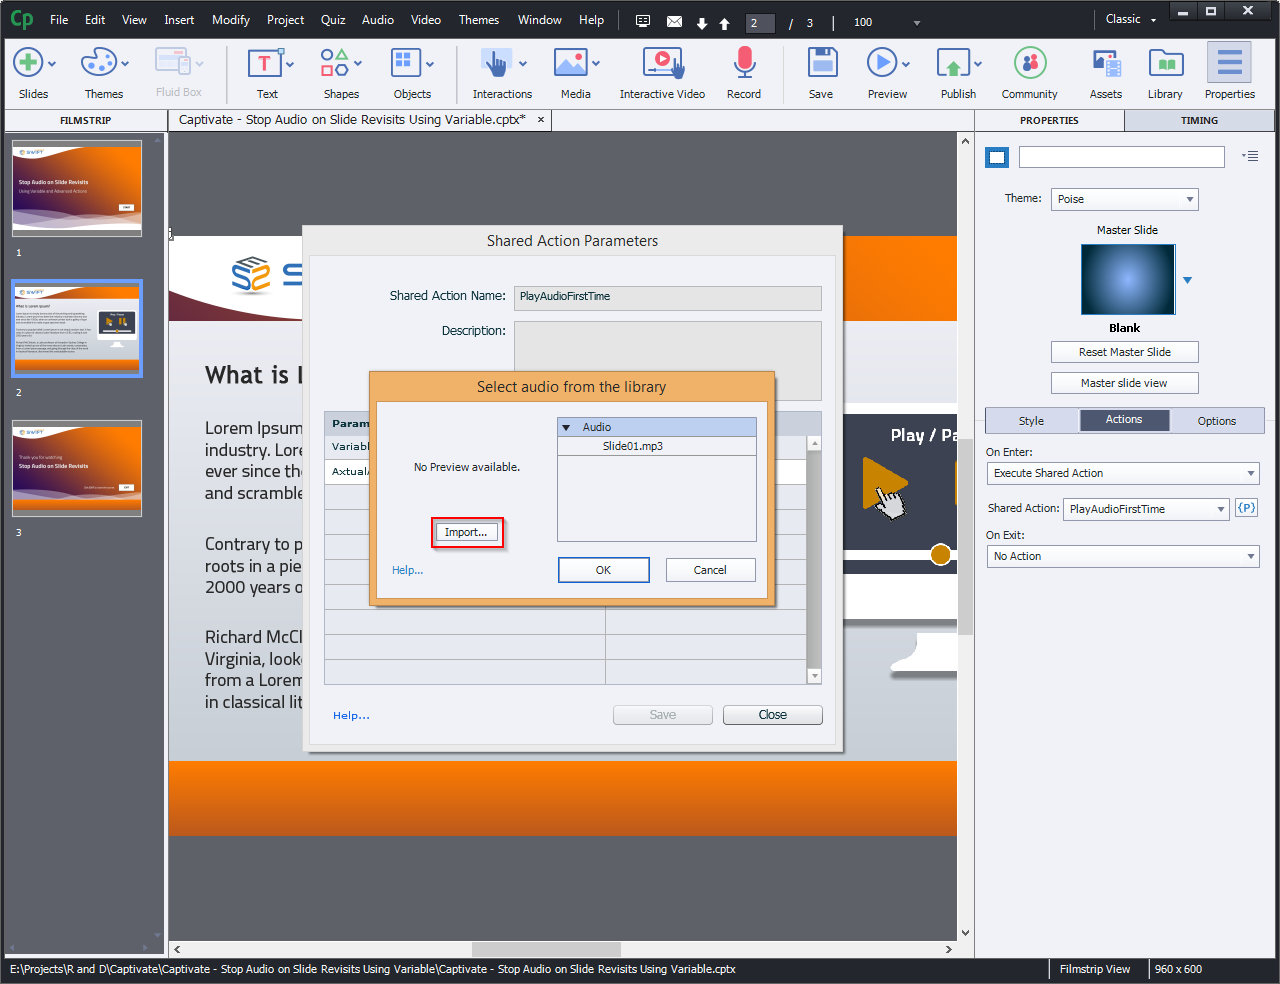
Apply the conditional action as shown in the screenshot below and choose an audio file from your local machine. Click Save As Action.
In Conditional Tab:
Variable: Audio
Select comparison operator…: less than
Literal Value: 2
Actions:
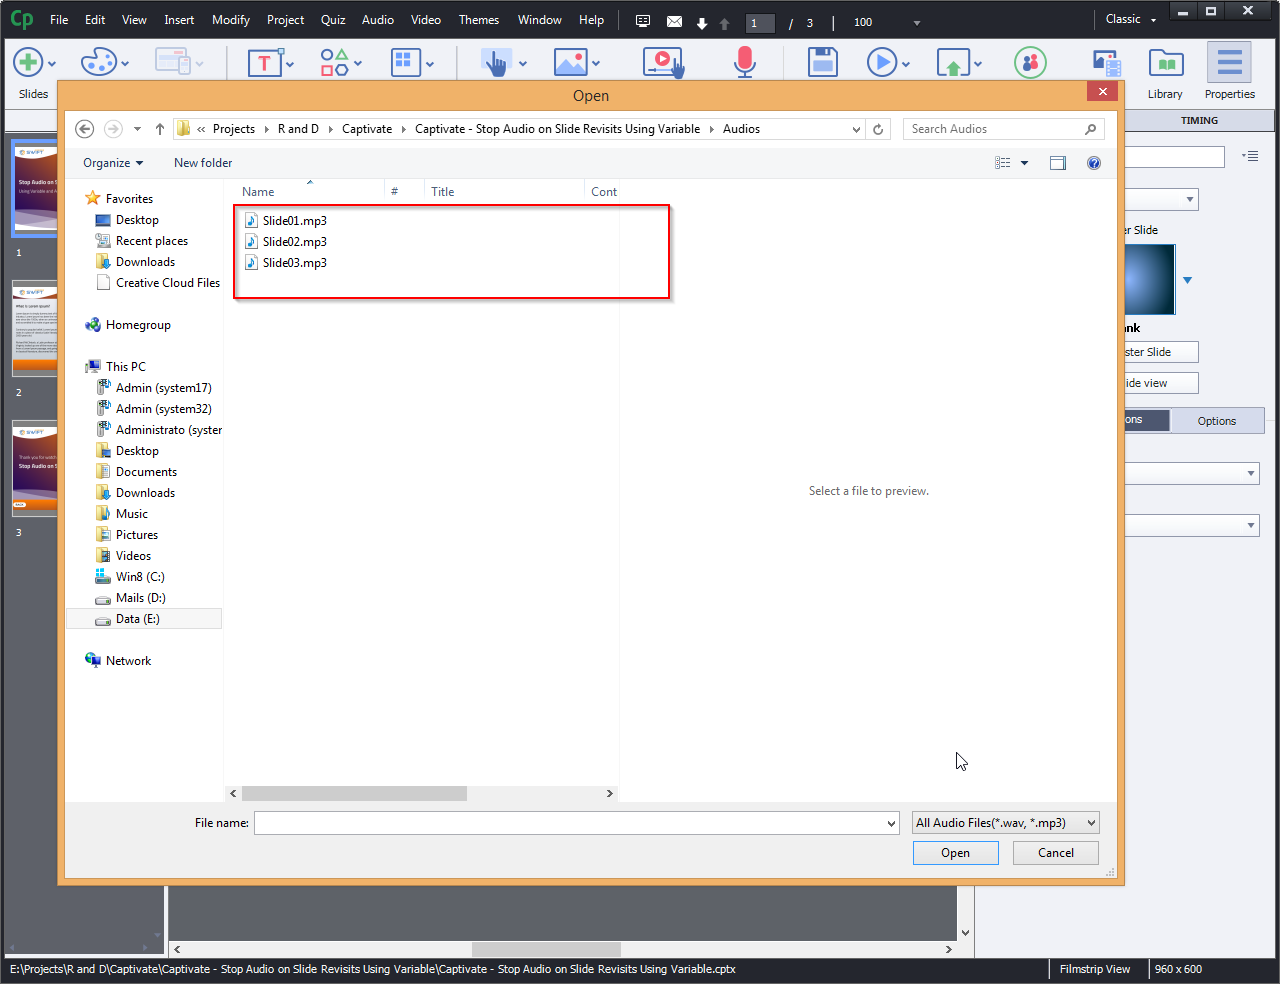
Play Audio: Select screen audio File from your local drive.
Step 07:
Click Save As Action.
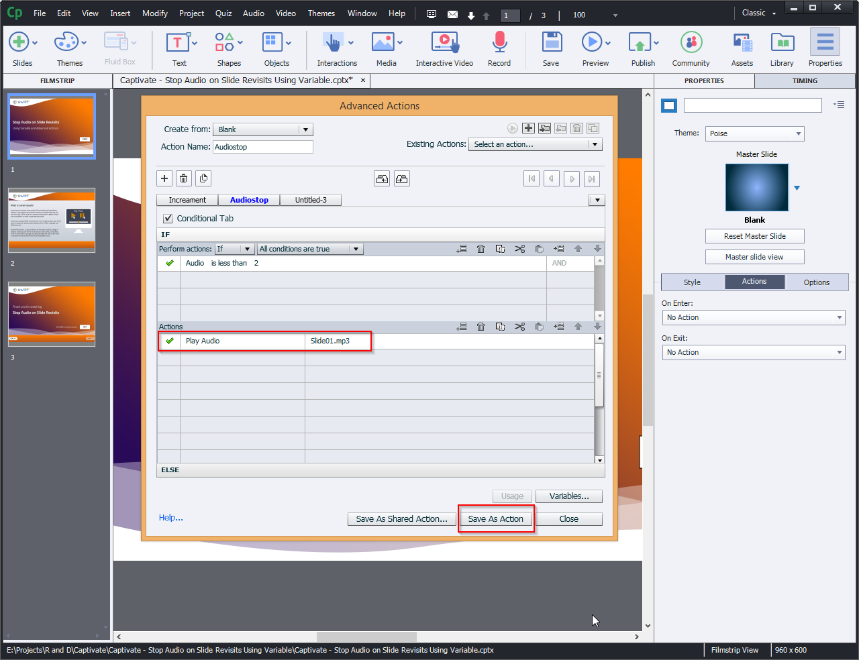
Step 08:
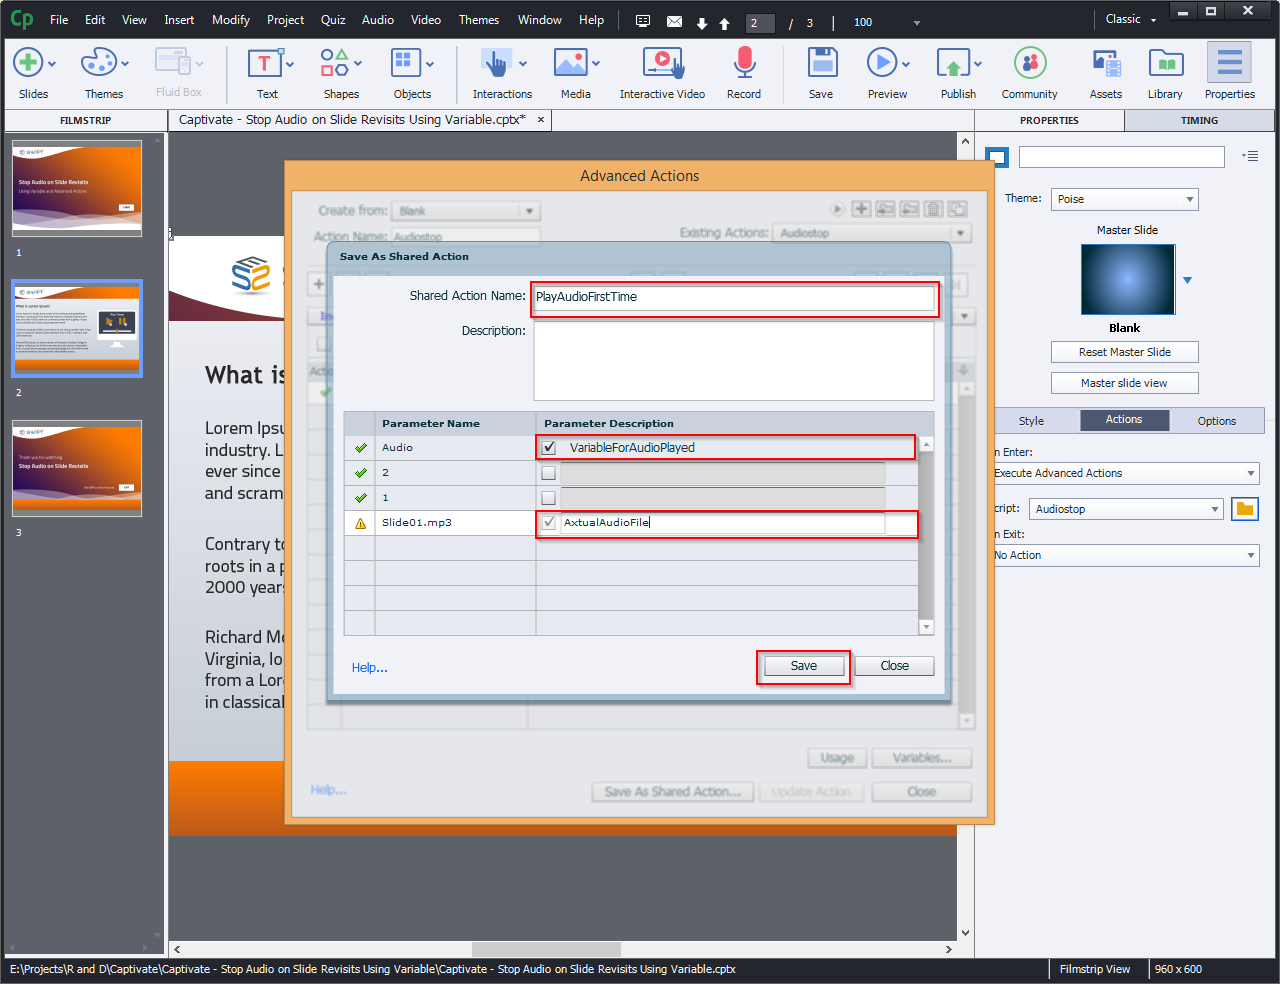
We can save this action by selecting Save As Shared Actions….
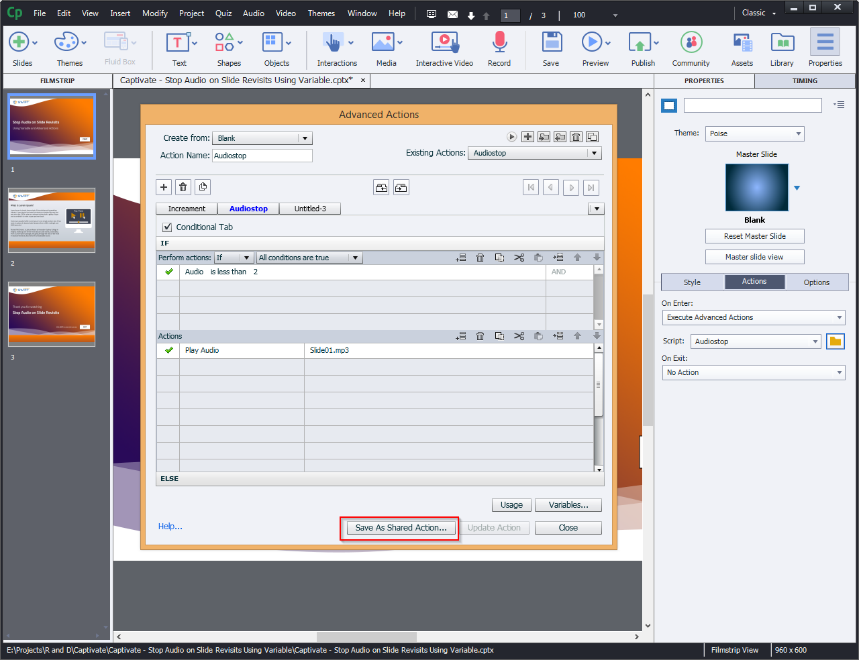
Step 09:
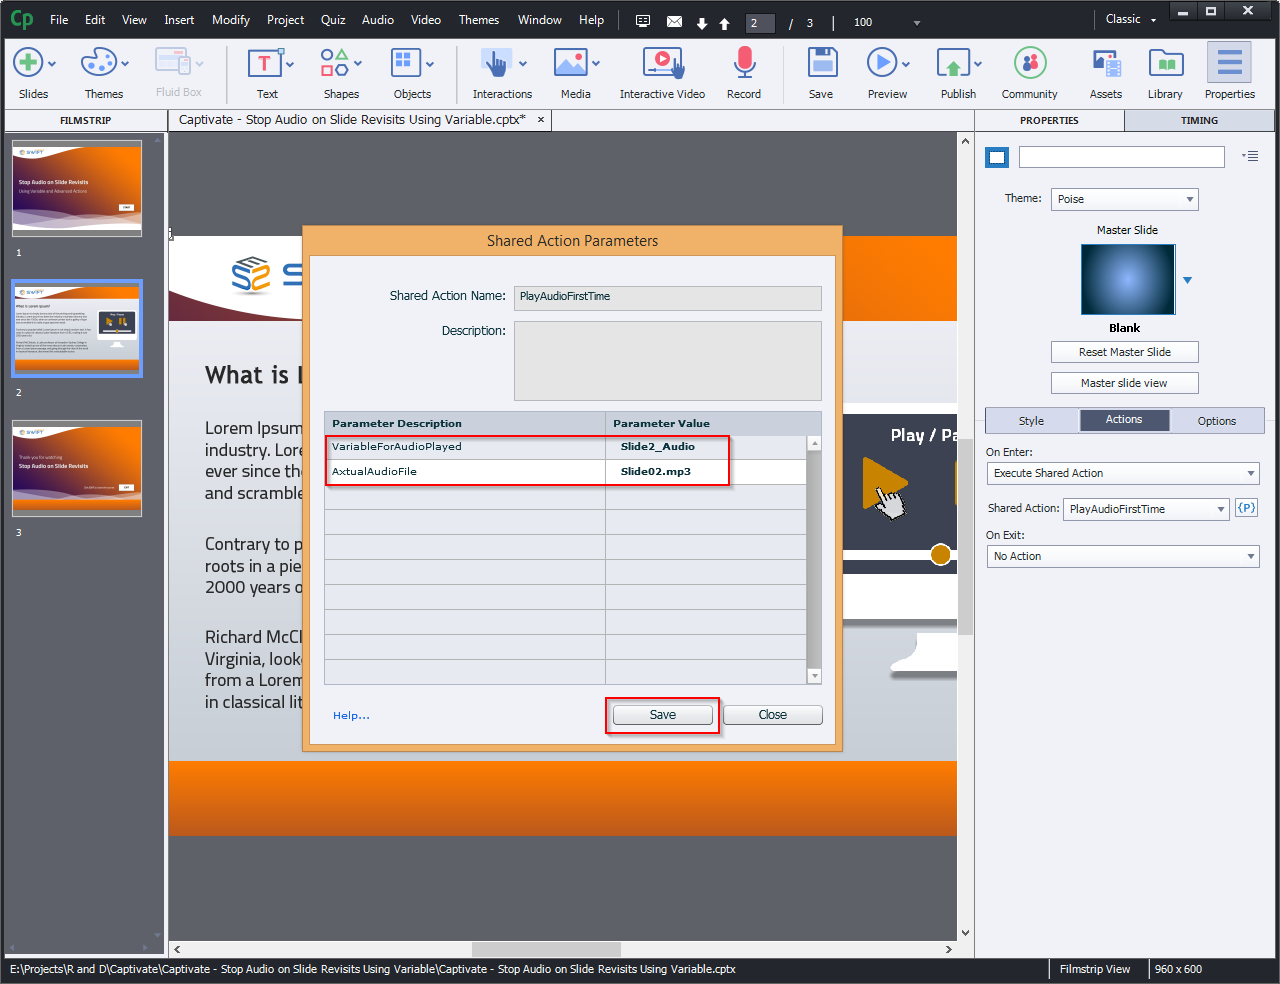
Give the action a unique name and enter the parameter Descriptions, then select Save.
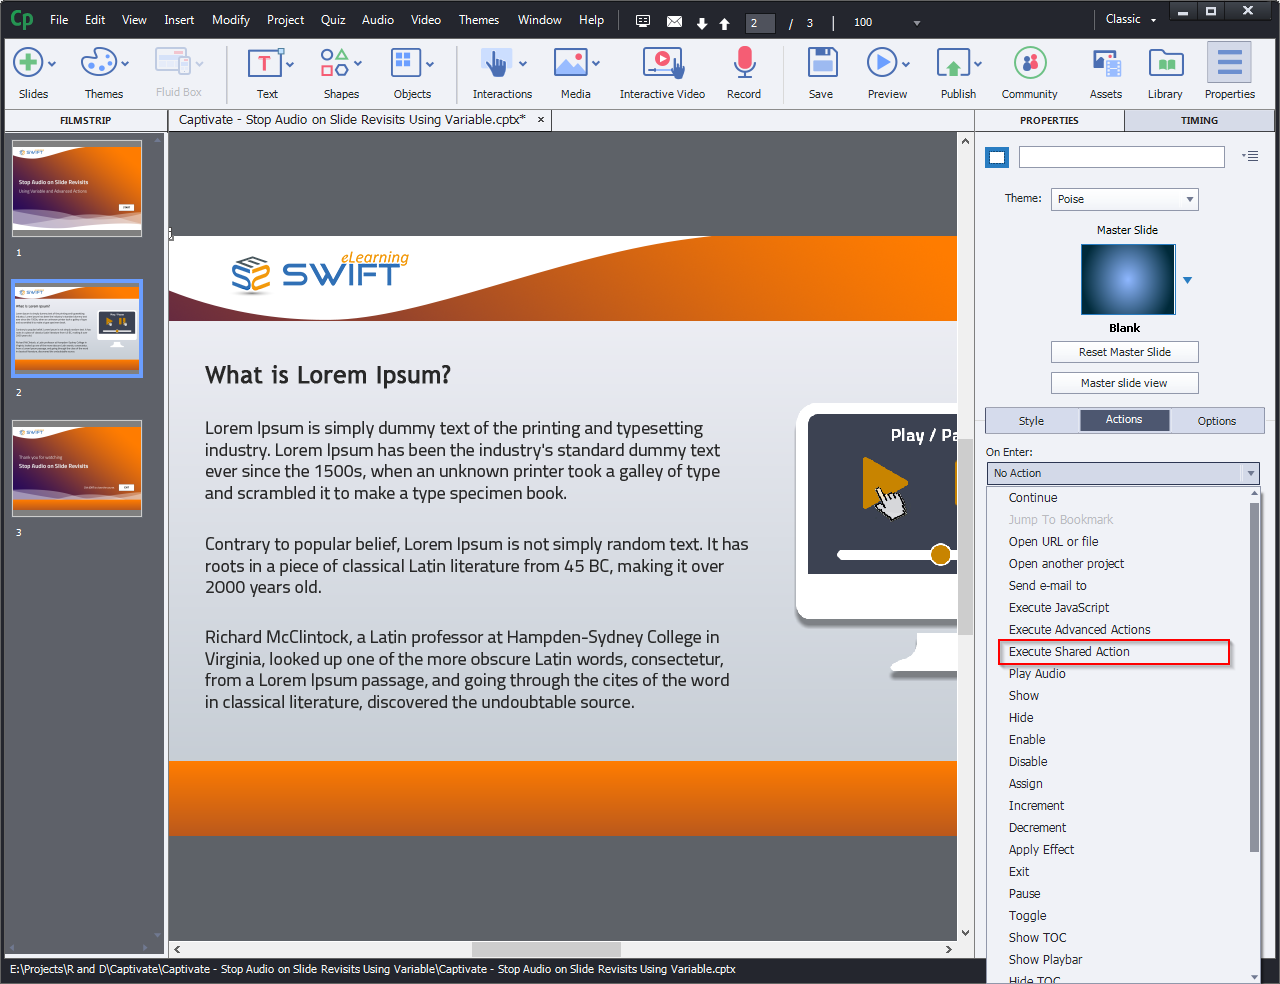
Step 10:
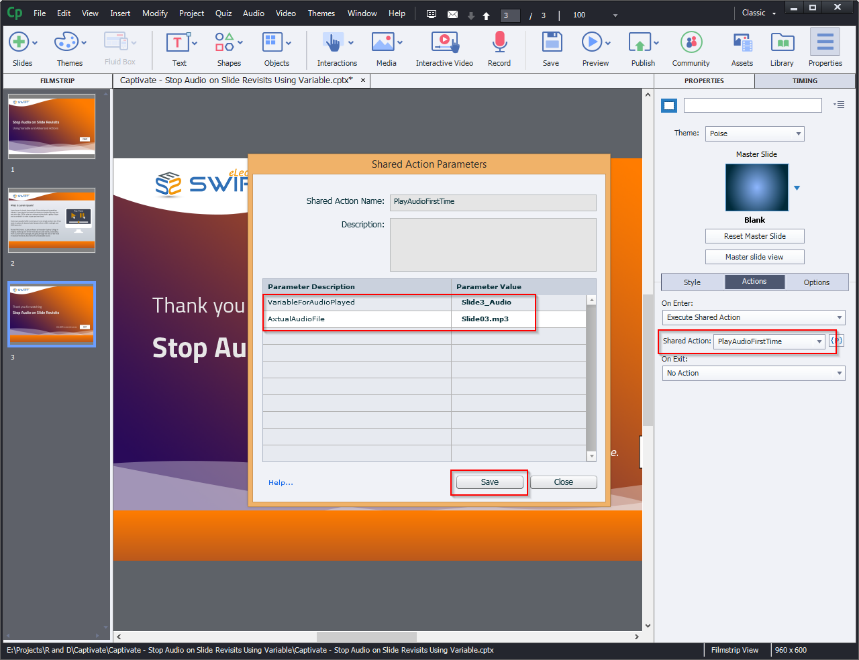
Now, go to the next slide and pick Shared Actions from the dropdown actions.

Step 10:
As shown below, choose the appropriate parameter value.
1. Slide variable (EX: Slide2_Audio, or Slide3_Audio, etc.)
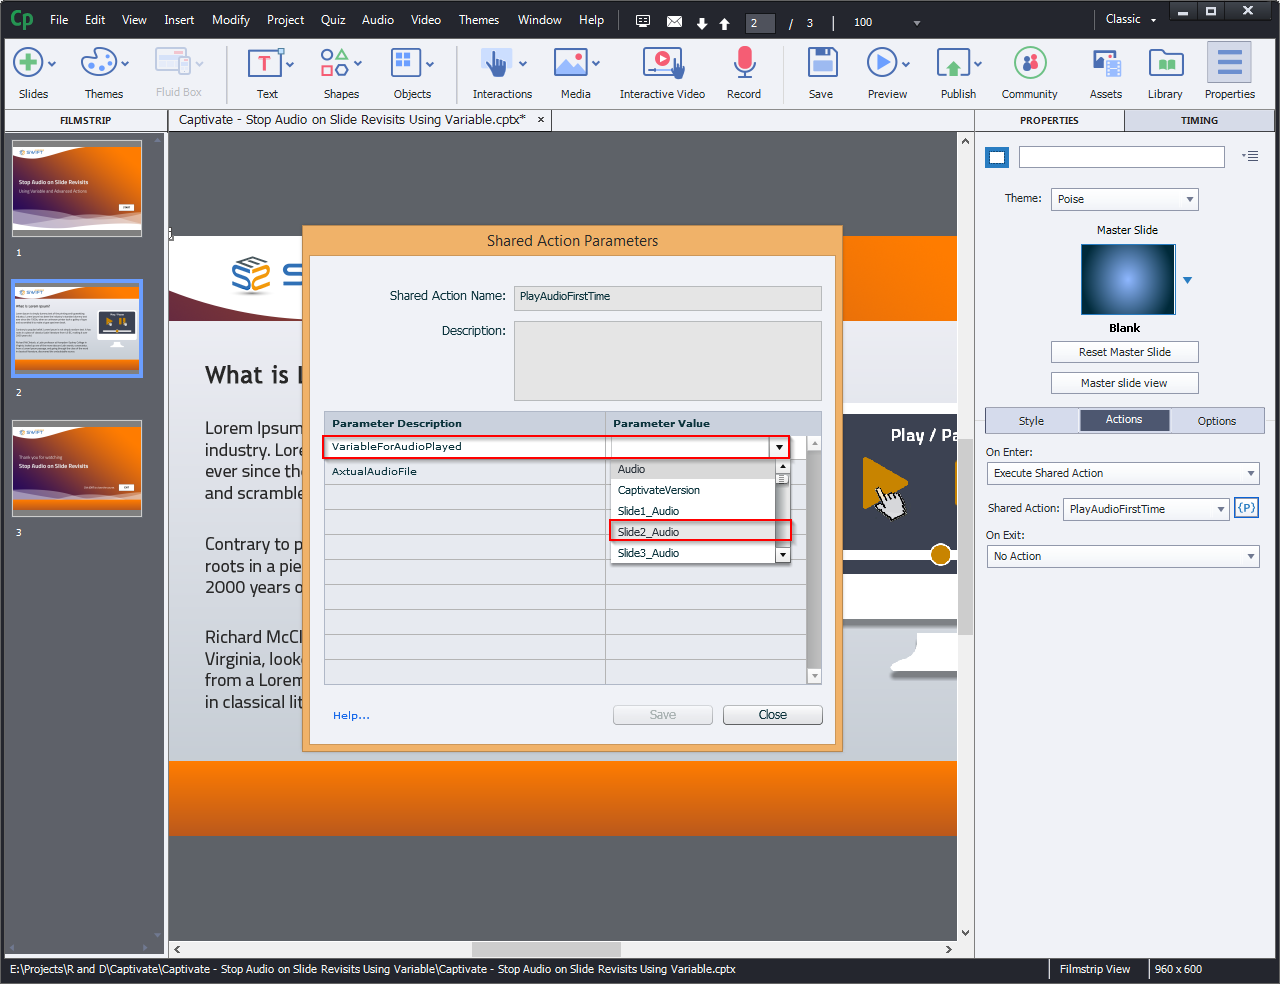
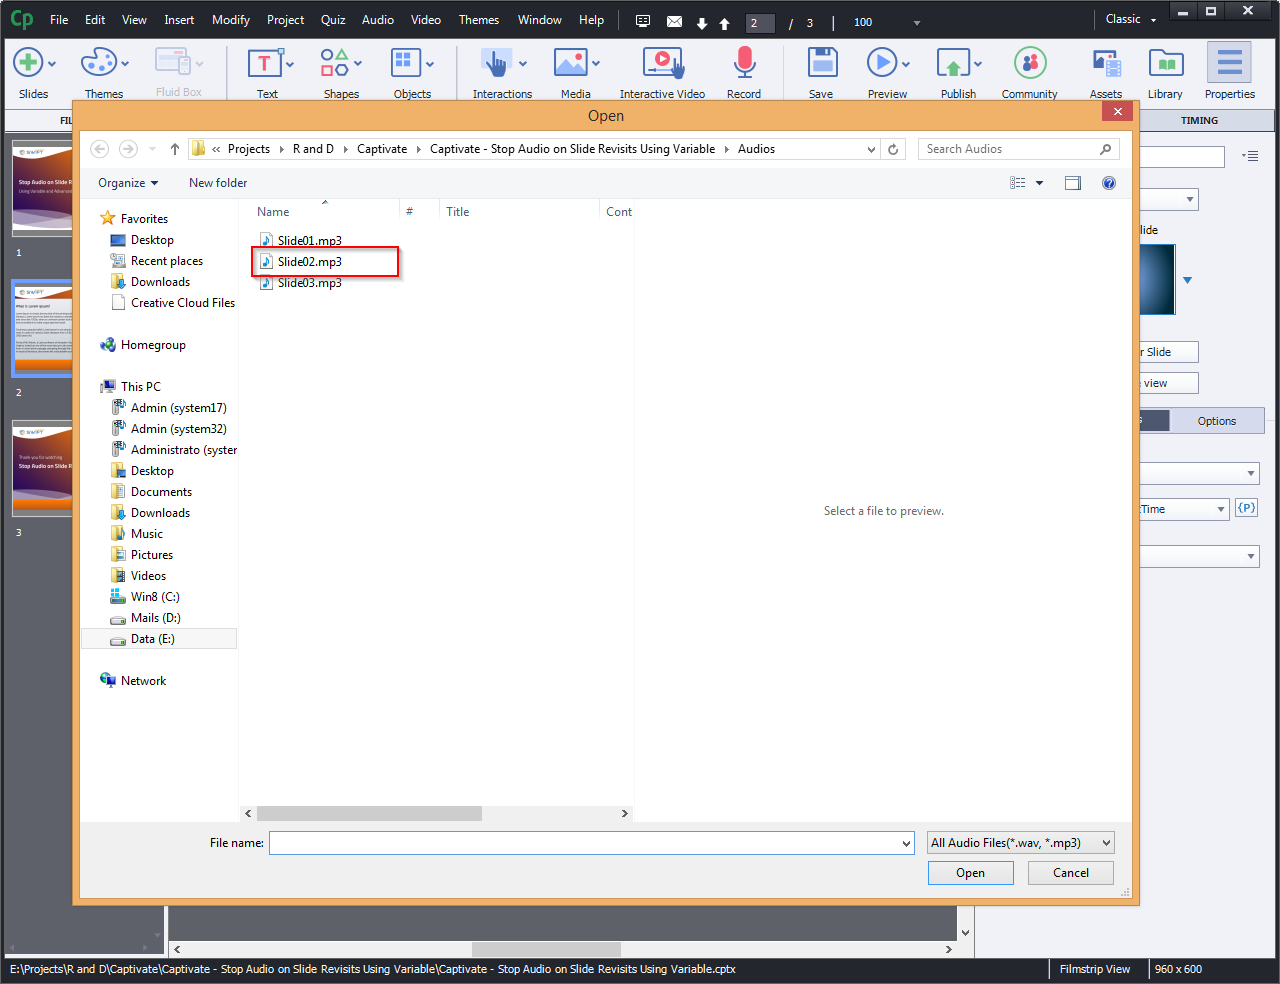
2. Choose the appropriate audio for the required slide from your local drive.
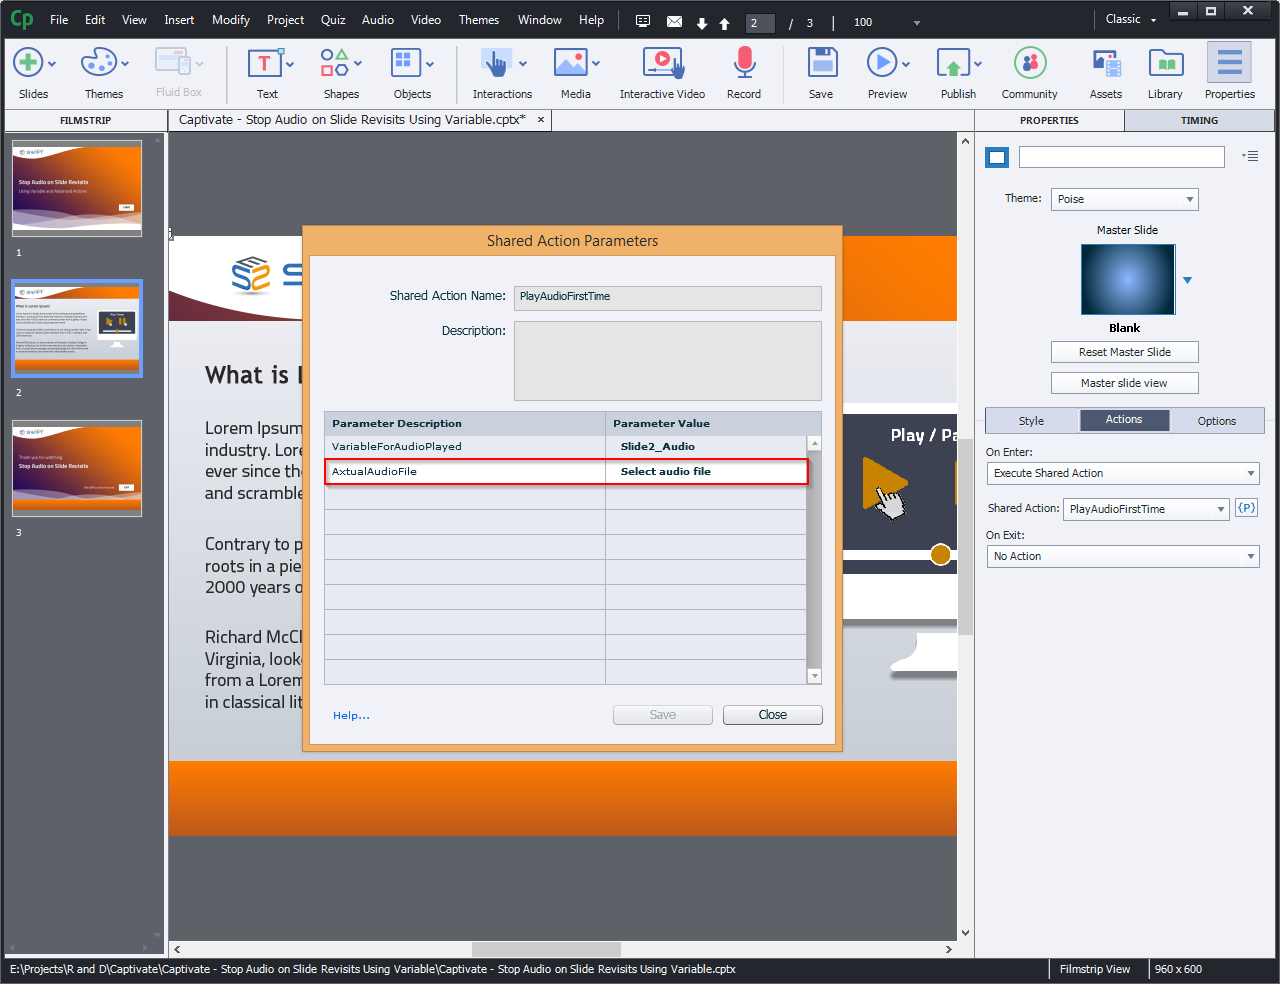
3. Click Save.
Visit our website for more insights: https://www.swiftelearningservices.com
In this blog, we will demonstrate how to avoid slide audio from replaying on subsequent visits. We will be using a variable and an advanced action to control the audio.
https://www.swiftelearningservices.com/how-to-add-custom-page-numbers-adobe-captivate-2019/
Step 01:
Go to the “Project” menu and select “Variables” from the dropdown.
Step 02:
For creating new variables click Add New button.
Step 03:
Give a unique name (Slide1_Audio, Slide2_Audio, etc.) and value field as (0) and click Save.
Step 04:
From the “Project” menu, go to “Advanced Actions”.
Step 05:
Define an action name (Ex: Audiostop) and then follow the variables as shown in the screen below.
Increment – Audio – 1
Step 06:
Apply the conditional action as shown in the screenshot below and choose an audio file from your local machine. Click Save As Action.
In Conditional Tab:
Variable: Audio
Select comparison operator…: less than
Literal Value: 2
Actions:
Play Audio: Select screen audio File from your local drive.
Step 07:
Click Save As Action.
Step 08:
We can save this action by selecting Save As Shared Actions….
Step 09:
Give the action a unique name and enter the parameter Descriptions, then select Save.
Step 10:
Now, go to the next slide and pick Shared Actions from the dropdown actions.
Step 10:
As shown below, choose the appropriate parameter value.
1. Slide variable (EX: Slide2_Audio, or Slide3_Audio, etc.)
2. Choose the appropriate audio for the required slide from your local drive.
3. Click Save.
Visit our website for more insights: https://www.swiftelearningservices.com


You must be logged in to post a comment.
- Most Recent
- Most Relevant
This workflow has been posted multiple times everywhere.
However you should mention the drawbacks of using the Play audio command for narration instead of Slide audio:
- If you have a slide with interactions triggered by buttons or other interactive objects, there is no way to pause the audio clip. If you use Slide audio that is possible.
- If you need Closed Captioning using the synchronizing workflow in Captivate, that is impossible with Play Audio.
From a pedagogical viewpoint, the Shared action needs a description, not an empty box. At least explain what the action is doing and specify the full meaning of the parameters to be defined.
I have several blog posts about this situation. Here is one with a Shared action which also allows to skip part of the slide on revisit to avoid having to look at all the effects:
https://blog.lilybiri.com/play-audio-once-on-first-visit
This one includes your workflow, but explains the drawback. It has an alternative where Slide audio is used. THe conversion of both skipping part of the slide and audio narration by a shared action is in:
https://blog.lilybiri.com/advanced-to-shared-action-step-by-step-micro-navigation-showcase
