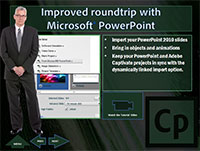
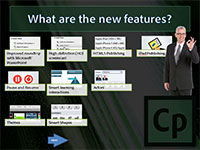
 After the two wonderful posts by Pooja and Allen, I thought of creating one more eLearning module explaining the new features of Adobe Captivate 6. The question was, how do I make it interesting? My job became easier with enhanced Adobe Presenter 8. So I’ve used the features of Microsoft PowerPoint and Adobe Presenter to create this course… go ahead and view it on your iPad! Want to know how I achieved this? Read through the post… step-by-step…
Experience the course in your iPad using Presenter Mobile App: http://my.adobeconnect.com/cp6new2
 Step 1: Modify the Master Slides – An important part of this course is the consistent look and feel for the course screens. So, I created a background image using Adobe Photoshop and imported the JPEG into the Master Slide. This allowed me to have the same background image for all the screens. Next, I modified the text placeholders for fill/stroke and font settings.
 Step 2: Create the Slides – If you observe the course, there is a slide listing the key new features (Menu), there are slides explaining each feature and then there are question slides. For the Menu slide, I created thumbnails of the features and used the Text Box to add the headers. For the content slides, I created the images using Adobe Photoshop, and used the ‘Character’ feature of Adobe Presenter 8 to give the human touch to the slide, and added the feature description. By the way, if you have not used the built-in characters yet, please do try them… they are an amazing set of human and animated characters! For the questions slides, I used Multiple-choice and True/False question types. As of now, only these two types of questions are supported in Adobe Presenter Mobile App.
 Step 3: Add Audio and Animate – For the Menu Slide, I first added the animations from PowerPoint, and later recorded the audio. The enhanced UI for recording the audio makes it so easy to record and sync animations… Try it out! Same steps were applied for content slides as well. Did you know that we can view the slide notes during recording? So I don’t have to worry on missing out on those technical jargons 🙂
Step 4: Enable reporting and Publish – Now that the course is ready, I need to enable the reporting right? Did that through Manage Quiz > Reporting. In this case the distribution channel I’m using is Adobe Connect so enabled the reporting for Adobe Connect. Then, published it to Adobe Connect to view it on my iPad.
Hope you liked this course, please let me know your thoughts through the comments!


