March 3, 2018
Using PowerPoint Shapes in Captivate
Like
(6)
Comments
(2)
6
2
Using PowerPoint Shapes in Captivate
Captivate has come a long way in offering a good variety of shapes. However, sometimes there are some shapes that are in PowerPoint but not in Captivate. This blog will show you how to use those shapes in your course.
These examples use PowerPoint 365 and Captivate 2017.
Open a blank PowerPoint presentation and choose Insert–> Shapes
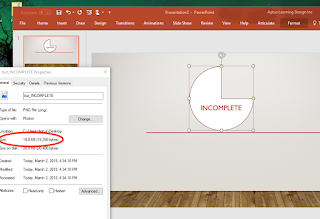
Let’s use this 3/4 circle for an “incomplete button.”
You can format the fill, stroke, and text to match your guidelines. There are lots of options to get the look you want.
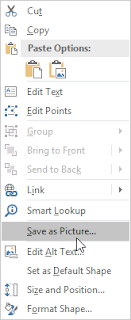
Right mouse click and save it as a picture. It’s that easy. And, look how small the file size is.
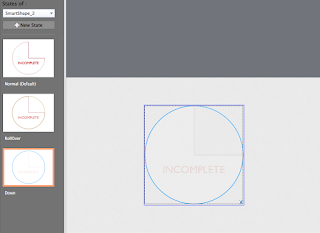
Now let’s import the shape into Captivate. You can use it like a Smart Shape. But, you won’t be able to add states unless you use your new shape as a button. Let’s do that.
Let’s start by creating a button. Here I have selected a circle since that is the the shape of the image I just created in Powerpoint.
Next, I checked “Use as Button.” For Fill, I selected “Image” and then I imported my but_INCOMPLETE.png. To get it looking its best, I deselected “tile.” I did keep “stretch” selected. You will have to experiment with what looks best with your image. Here’s the result.
To get the button to look differently in different state views, you can experiment with opacity and stroke color, or you can import different colored images from PowerPoint.
Remember, you don’t have to use the image for a button only. Buttons give you the opportunity to add states. If you want to just use your shape as a shape, you can do that to by choosing Media–> Image, and following the path.
Sometimes, your file size can bloat when you import images. We will cover a few ways to reduce image file size in the next blog post.
I hope this helps!
Alice


