This short tutorial is about inserting a graphic into a smart shape and using it as a button.
Introduction
I’ll try to make this tutorial short and sweet. The level is beginners to intermediate. ( And any other users who have never applied the described technique).
What you will learn:
- how to insert a picture into a smart shape.
- how to use a newly created design as a button.
Instruction.
1. Draw a smart shape. The color doesn’t matter, You are going to fill it with your picture in a while.
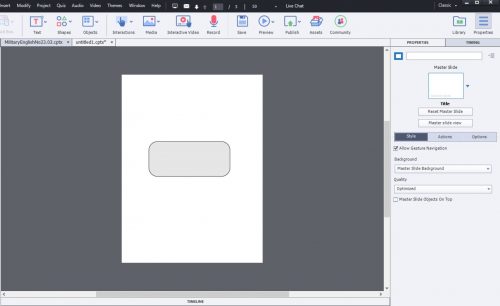
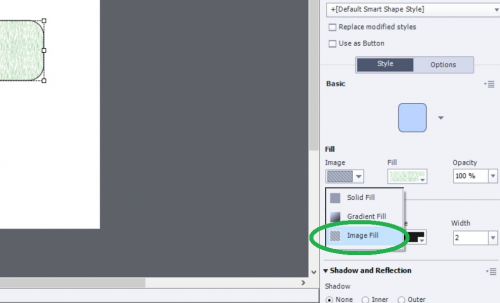
2. In the properties panel go to IMAGE>IMAGE FILL
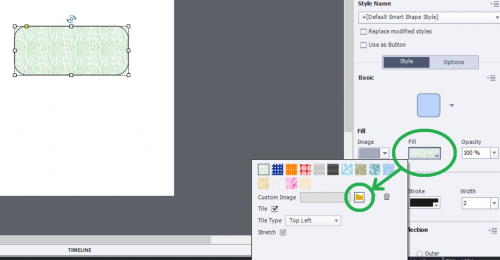
3. Now, move left in the properties panel and go to FILL>CUSTOM IMAGE. Find the yellow folder icon and press it.
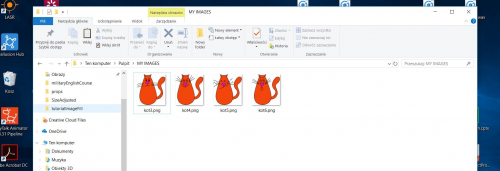
4. You know what to do now. Find the folder with the desired picture. If you want some background use jpg. If you want just a picture, use png. So nothing surprising here. In my case, I went to my fat-cat folder and chose one of the cats as a future fill for my button.
5. Now the picture you chose will open in an editing panel where you can make some corrections. Click OK button.

6. Now you will see the shape of your original button and inside there is usually a part of your picture (unless you make it the exact size of the button.). But don’t worry, we will fix it in a while. Simply, uncheck the tile box ( first click the fill box drop-down menu). If you are still unsure, look at the picture below.
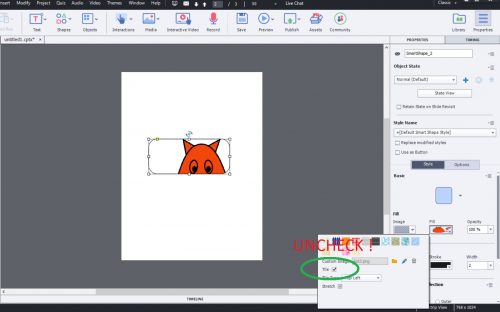
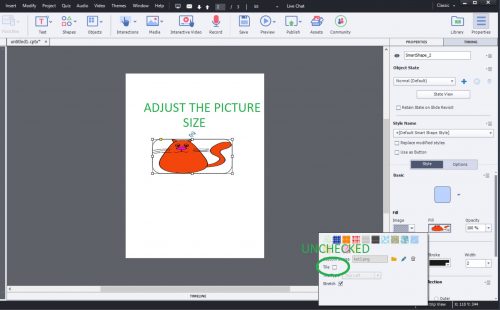
7. Now, adjust the size of the picture. If you want to have the button outline, go to the property’s panel and make it visible. If you just want to have your picture, make the width of the outline 0 px.
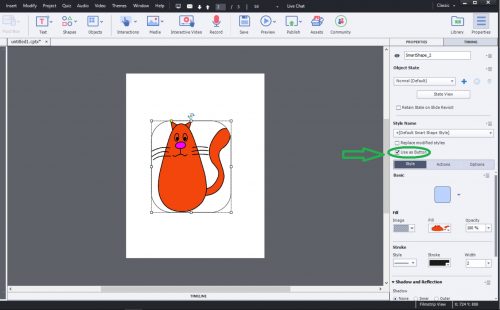
8. Now your smart shape is filled with your picture. You can make it a button by checking the USE AS BUTTON box in the property panel.
ADDITIONAL REMARKS
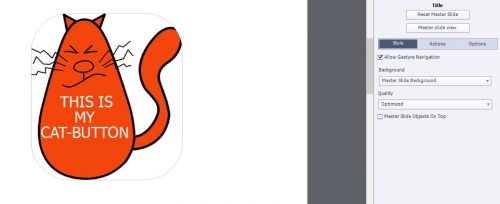
- You can add text to your newly created button by just clicking on it, typing a text and editing the it.
- Remember that the best way is to prepare a picture beforehand, having in mind the size of your button and its shape.
- Don’t forget state objects. You can change the state of a button (for example increase transparency on mouse hover)
I hope it was helpful!
Have fun with Captivate ![]()
Here is the lin to my 5 years old blog post about converting an image to a (shape) button.
I possted long time ago a similar blog. WIll put the link in a separate comment. At that moment filling a button was only possible for the new shape button. In recent releases, the Transparent button inherited the same functionality. Reason is probably that the typical embedded Quiz buttons still cannot be Shape buttons. Most Themes have a Transparent button style for those embedded buttons. You can make it look identical to shape buttons in your project if you use only those (like I do) in most courses because of their flexibility (master slides and timed for rest of project).
You must be logged in to post a comment.


