 Newbie
62 posts
Newbie
62 posts
Before one month, I had uploaded ‘Drag -n- Drop’ part3 demo. But I could not get time to upload the Captivate program steps… Today I tried to recollect all that and made a note of that as follow.
One to Many
Define Cold-drink, Tea, coffee as Drag source. & three Star shapes as Target in Drag & Drop interaction.
By default, there are no groups and your Source belongs to ‘none’.

Create a Group Called “Drinks”.

Add All drinks to this ‘Drinks’ group.

As shown for the ‘Source’ group, Create Group called “Customer”.
Add all three Stars into group “Customer”.
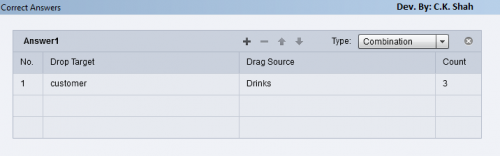
In, “Set correct answer” window, set relation between groups and not among individual source-Target.
Set relation as shown below.
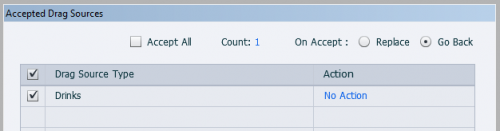
In “Object Action…”, set as follow. (Uncheck ‘Accept All’)
Many-to-Many
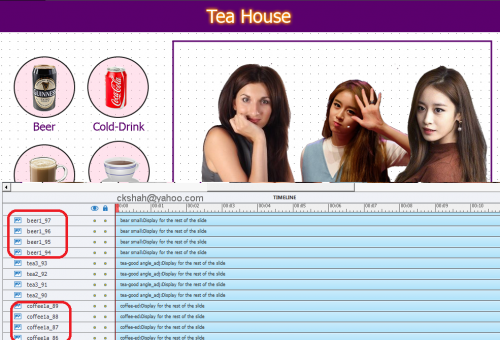
In many-to-many, there are multiple Tea, multiple coffee images, etc.(all tea images are grouped and are stacked one behind another..)
Hope this much is enough for developing many-to-many Drag-n-Drop Interaction. Try out…
Before one month, I had uploaded ‘Drag -n- Drop’ part3 demo. But I could not get time to upload the Captivate program steps… Today I tried to recollect all that and made a note of that as follow.
One to Many
Define Cold-drink, Tea, coffee as Drag source. & three Star shapes as Target in Drag & Drop interaction.
By default, there are no groups and your Source belongs to ‘none’.
Create a Group Called “Drinks”.
Add All drinks to this ‘Drinks’ group.
As shown for the ‘Source’ group, Create Group called “Customer”.
Add all three Stars into group “Customer”.
In, “Set correct answer” window, set relation between groups and not among individual source-Target.
Set relation as shown below.
In “Object Action…”, set as follow. (Uncheck ‘Accept All’)
Many-to-Many
In many-to-many, there are multiple Tea, multiple coffee images, etc.(all tea images are grouped and are stacked one behind another..)
Hope this much is enough for developing many-to-many Drag-n-Drop Interaction. Try out…


You must be logged in to post a comment.
- Most Recent
- Most Relevant
This reminds me, I have to go back and convert my Captive 9 drag and drops when I get the chance. Thanks fro the examples.
