- Learning Hub
- Captivate Hands-on
- Easy Forced Navigation with Adobe Captivate
A common request we get from our stakeholders is the idea of a multi-state object click to reveal but with a hidden continue or next button, sometimes known as forced navigation. This traditionally requires that you create a variable for each button-click to keep track if the learner has clicked on that item, as well as an advanced conditional action that performs the state change but also checks if all the items have been clicked before showing that continue or next button. That means in a six button click to reveal you need six variables and six conditional advanced actions. If you are curious or are still using Adobe Captivate 2017 or older, here is an example of how I used to create such interactions:
Hide the Next Button in Captivate Until Learners Do Something First
Today there is an easy way to do this with Adobe Captivate 2019 version 11.5 or newer. Even with this smooth workflow, there are some rules you must follow. I’ve attempted to write them out to make this easy for you to do on your own.
1. Label Your Slide
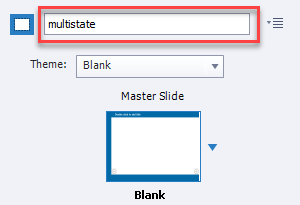
First, you must label your slide multistate. Don’t worry if your on-screen title needs to be something else. This lets Captivate 2019 know that this sort of interaction is going to be on this slide.
2. Label Your Multistate Object
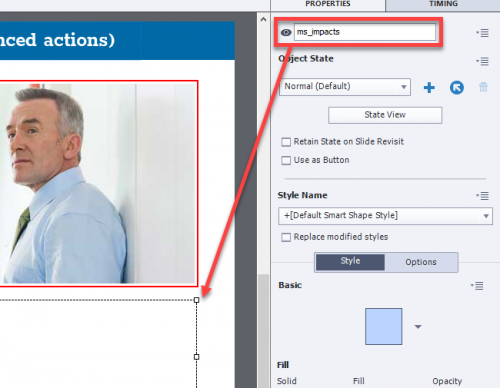
Second, you must label your multi-state object ms_ followed by the name you wish to give this interaction. For example, I’m calling mine ms_impacts. Your multi-state object can contain additional objects as mine does. I have a smart shape with text, and with each state, I’ve also included an image. Both the smart shape with text and image change with each click.
3. Label Your Buttons
You must create the same number of buttons as you have other states in your multi-state object. These need to be precisely labeled according to the name of all the states in your multi-state object. In my example, I have the following states in my multi-state object.
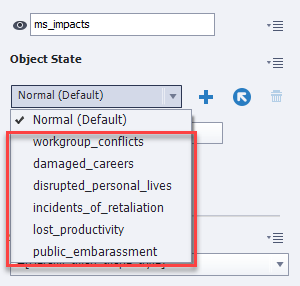
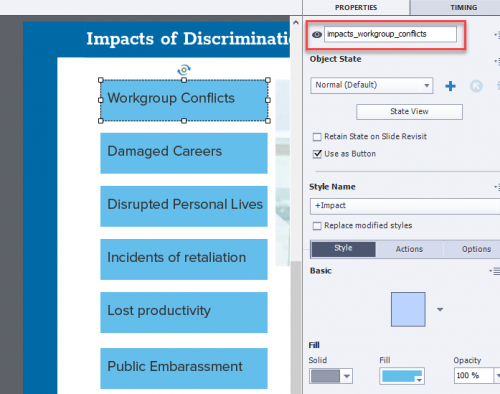
I created six buttons each set for “no action” to represent all the states in ms_impacts. Label each shape button <interaction name>_<state name>. In other words, I labeled my first button impacts_workgroup_conflicts, and so on.
4. Label Your Hidden Next Button
Lastly, make sure you have a next or continue button that you have labeled <interaction name>_completed. For my example, I’m using an arrow button to advance, and I’ve selected the Not visible in output icon and labeled it impacts_completed as you can see below.
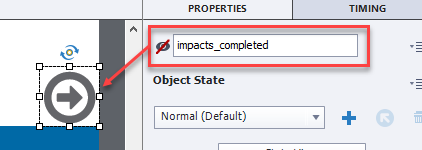
If you follow the correct labeling conventions of all of these items, this should work exactly like the more complicated interactions we used to create in the past. Both interactions behave the same, but the difference is that this method takes only minutes to create, whereas the older, more complicated process took longer. You can have as many of these interactions within a single project as you wish, so long as you follow the naming conventions. I can’t see why I would use the conditional advanced actions method when I now have such an easy process.
Click the playback icon to see an example of the old method followed by this new easy method. You will see there identical.
Here is a video tutorial where I show you the same steps described above.
Please log in and complete your profile to continue.
 Legend
639 posts
I have traied several times to get this to work without success. Anyone have a suggestion of what I might be doing wron?
Hard to know what step you might be missing without knowing what you have done. Just make sure you very precisely label each object according to the method. That’s usually where someone goes wrong. One small misspelling can make the whole thing not work. Personally I prefer to write the scripts for advanced action because I have more control over the behaviour but if it’s done correctly, this is a good alternative to those who haven’t mastered advanced actions yet.
Hi Paul,
I’m trying to accomplish what you suggested but I’m using the Wired template that already has interactions embedded (click on button and it displays text). How would I accomplish this without deleting what is there already???
Thanks,
Val
Careful with the Wired <QSP, the responsive and non-responsive version is totally different. This blog was only meant for rhe Branching Scenario which has been made with the Aspire theme. Have written several articles about custmizing QSPs. Just search for them.
The purpose of the inbuilt forced navigation is to provide simple ways to achieve what has traditionally been a procedure you need advanced actions for. Like Lieve said I would be careful mixing the functionality of the two features. The results could be unpredictable.
I have done this one my own and wanted to follow your tutorial just to compare the difference between using the multistate slide or programming it myself. I have one question, when I revisit this area I want the next button to show: <name>_completed. When I look at your demo, it stays showing even when you go back to it. Did you add an extra variable script or is there a builtin step that I am missing? How do I keep my <name>_completed button showing after I have gone through the states and return to the slide? Thank you.
Not uncommon, missing a step. Did you activate the option ‘Retain state on slide revisit’?
Thank you for answering. Yes, I did have all buttons set to retain their state on revisit. The selection buttons retain their state but the <name>_completed button which is my next button does not retain its visibility state upon revisit. It does seem odd to me, which is why I am posting this question. I don’t know if this is a bug, if I missed something, or does everyone have this same effect. I am using this on one slide in a very large project that has lots of custom JavaScript and Advanced Actions. However, I can’t imagine I am using the same variable names that Captivate may be using for this.
I never used this ready to go slide, because I suspect to bump onto this type of limitations. I suspect that the ‘revisit slide’ workflow is not taken into account in the built in actions. I have several blogs about forced navigation, one with a simple to use shared action.
Interesting. Honestly, though, I think I prefer that my buttons have some kind of action for better troubleshooting and flexibility.
For example, suppose now I want to add some sort of state change or other graphic to show up beside the button when it is pressed such as a checkmark in order to visibly show that one has been viewed. How would I accomplish that with this method? Will it still work if the buttons have an action?
Greg, this is really meant for newbies, not for you! I never like control being taken over by Captivate. It takes me more time to set it up as described (yes, did try it out) than if I set it up myself, with all the extra possibilities like the one you ask for.
What is lacking in this workflow, and is asked for by all my clients: on a second visit I want to have the Next button available right away, do not want the learner to have to click again all hotspots to be able to move on.
As for forced clicking hotspots, have several blogs as well, both with Hide/Show or with Multistate objects.
A proposed workflow in
http://blog.lilybiri.com/force-first-slide-view-micro-navigation
This feature is for new Adobe Captivate users. Experts with Adobe Captivate can continue to use advanced actions and variables to create traditional workflows.
Lieve, are you saying in this comment that the <name>_completed (Next) button was hidden for you when you returned to it a second time, even with Retain State selected? Thanks!


