 Legend
245 posts
Legend
245 posts
Alternative to switch to Destination theme, to avoid possible unwanted results. This is a second blog in a series about branding inserted slides with a different theme.
Intro
Yesterday I posted this blog ‘Destination/Source Theme’ in which I warned for using the switch button to the Destination theme if you inserted a QSP slide. You probably expect now an alternative workflow, which could be possible if the QSPs with their beautiful design were set up based on some rules. However that is not at all the case.
I will try to offer some tips here to make it possible to blend the inserted QSP-slides into your project with its custom theme. Due to the big variation, this post will be limited to:
- non-responsive projects
- Quick Start projects which use master slides in a consistent way
The second condition excludes the project Wired which only uses the Blank master slide.
Start situation
The blog will be explained for one QSP slide inserted from the project Aspire. The receiving project is the DemoProject I mentioned in the previous blog post. Both projects have rather different color palettes:


The DemoProject is using three fonts: Termina, Filson Soft and Trebuchet (rarely), whereas the Aspire project only uses Tahoma.
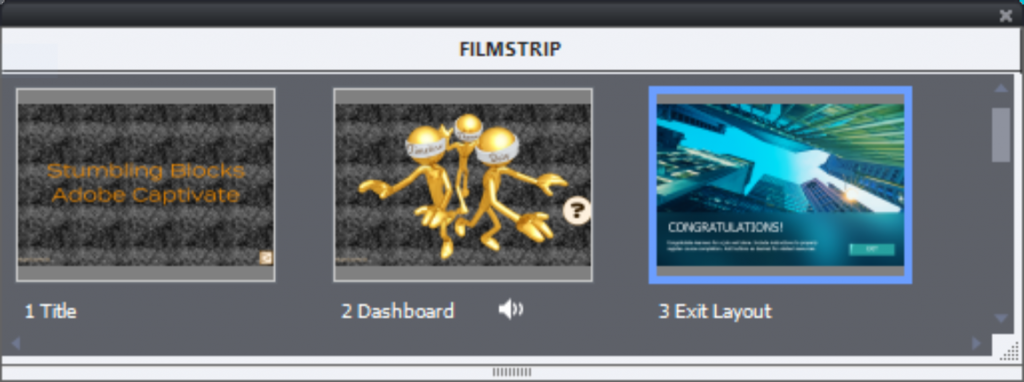
The Exit slide of the Aspire project was inserted in the DemoProject and needs branding:
Branding workflow
Step 1: Master slide
Open the Master slide panel with the inserted Aspire slide ‘Exit Layout’ selected. You will see all the master slides, but the used master slide is automatically selected it is labeled ‘Welcome w/o Sub + CONTENT’. Have a close look at that master slide and its components on the Timeline:
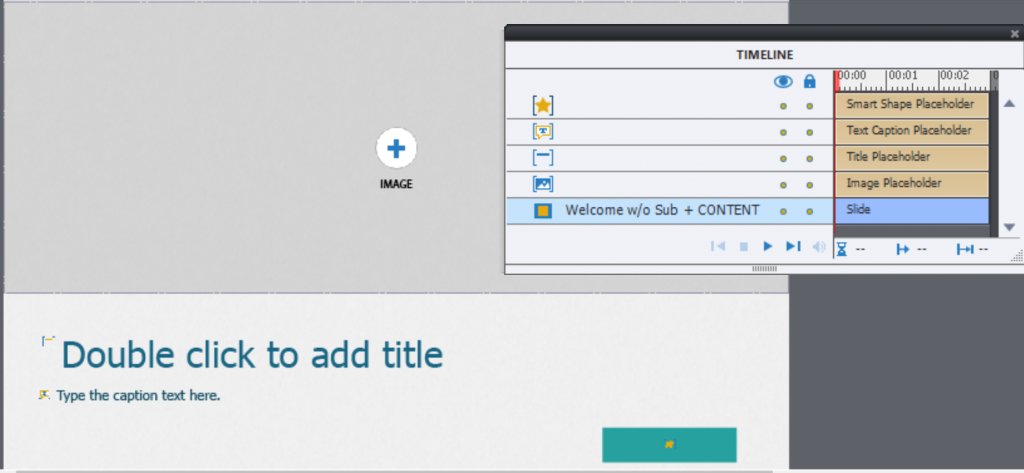
There is from bottom to top: an image placeholder, a Title (shape) placeholder, a caption placeholder and another shape placeholder meant for a shape button. Sorry, but the styles used in the master slide are mostly overridden styles, and replaced by other styles on the slide itself. That is just for your information, don’t bother about it.
Step 2 Copy master slide
You will copy and paste that master slide to the original course theme (DemoProject):
- Use right-click menu (or Edit menu) to copy the master slide described above.
- Return to the Filmstrip
- Select any slide from the original project
- Open the master slide panel again, it will refresh and show the master slides of the DemoProject.
- Paste the master slide which you copied from the Aspire master slide panel.
The result in this case is visible on this part of the master slide panel. The new master slide is still selected, and kept its original name. This was possible because that name didn’t exist in the DemoProject theme. If it had existed, you would have to rename the master slide before copying it.
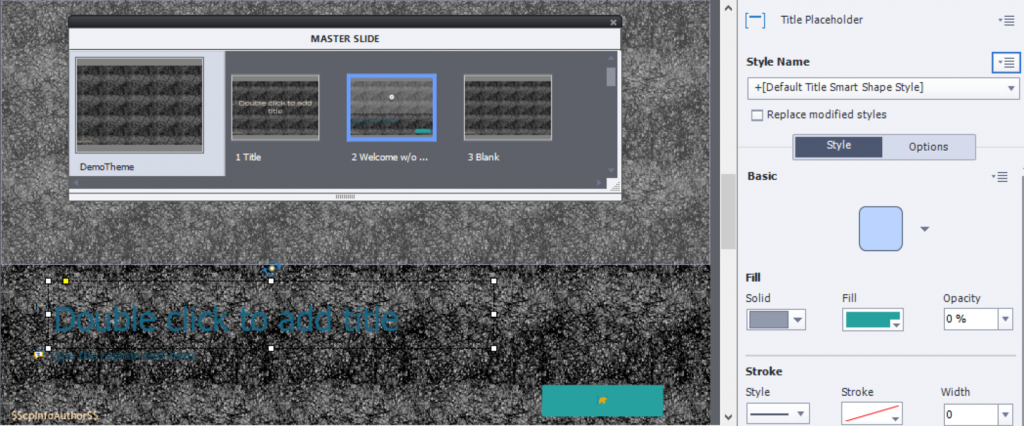
Of course the object styles are not what you want. In the screenshot above, the Title shape placeholder is selected, and you see that the style was overridden (+ sign). If that had not been the case, the Default Title Smart Shape style of the DemoProject would have been applied automatically.
Step 3: Replace styles
Still on the master slides, apply styles for the original project DemoProject theme to the objects. In this case:
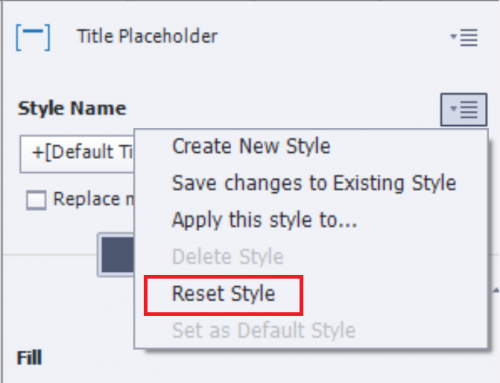
- There is a Default Title Smartshape Stylein the DemoProject theme, needed only to use ‘Reset Style’ for the title. Because the style was centered, changed it to left-aligned but the font (Termina) and the color were applied automatically.

You see a + sign, because after resetting the style I added the alignment change, didn’t create a new style for that. It will only be used on the inserted slide, all other titles are centered. - Same for the caption, since a Default Caption style exist (Filson Pro and light color)
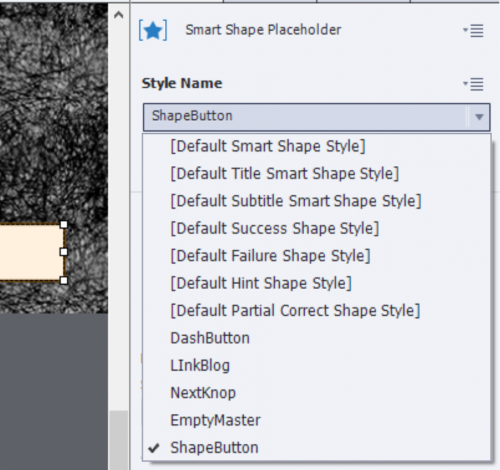
- For the shape button placeholder, another shape button style was chosen from the DemoProject theme.

Step 4: Apply Master slide
Open the Filmstrip, and select the inserted Aspire slide. In the Properties panel choose the theme DemoProject and the list with master slides will appear. Choose the ‘Welcome…..’ master slide and you should get this result:
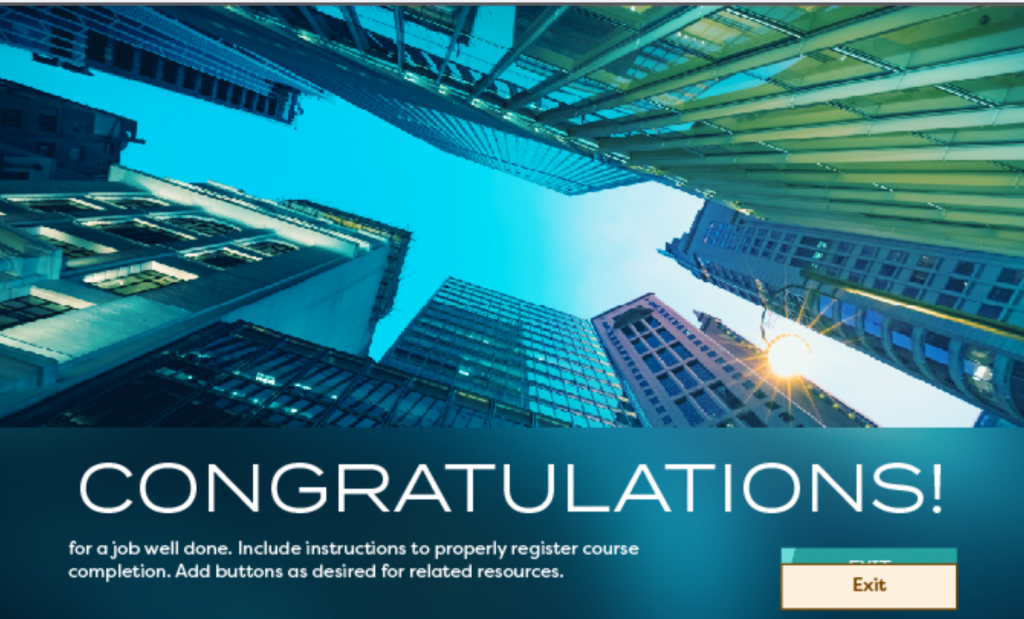
You see some remaining problems: the placeholder for the shape button was not used in the QSP, probably deleted and replaced by another button. Either you edit that original button or you keep the placeholder button.
The background has of course not changed. You may need a last step:
Step 5: Final touch
Two more tasks need to be done to have a fully branded slide:
- Replace the image. Changing the Hue with the Edit Image features could work in some situations, but not for an image with a blue sky. Of course, editing in Photoshop while masking the sky is possible.
- Replace the blueish gradient at the bottom. It is not a gradient created in Captivate but another image. However it could be possible now to edit the colors with the Edit Image features (Hue).
Conclusion?
This workflow may seem cumbersome, but it is safe contrary to the switch to Destination theme. It is only one example slide, of course. Just hoping you would try this out, and maybe derive from the experience some better practice for your custom themes.
Intro
Yesterday I posted this blog ‘Destination/Source Theme’ in which I warned for using the switch button to the Destination theme if you inserted a QSP slide. You probably expect now an alternative workflow, which could be possible if the QSPs with their beautiful design were set up based on some rules. However that is not at all the case.
I will try to offer some tips here to make it possible to blend the inserted QSP-slides into your project with its custom theme. Due to the big variation, this post will be limited to:
- non-responsive projects
- Quick Start projects which use master slides in a consistent way
The second condition excludes the project Wired which only uses the Blank master slide.
Start situation
The blog will be explained for one QSP slide inserted from the project Aspire. The receiving project is the DemoProject I mentioned in the previous blog post. Both projects have rather different color palettes:
The DemoProject is using three fonts: Termina, Filson Soft and Trebuchet (rarely), whereas the Aspire project only uses Tahoma.
The Exit slide of the Aspire project was inserted in the DemoProject and needs branding:
Branding workflow
Step 1: Master slide
Open the Master slide panel with the inserted Aspire slide ‘Exit Layout’ selected. You will see all the master slides, but the used master slide is automatically selected it is labeled ‘Welcome w/o Sub + CONTENT’. Have a close look at that master slide and its components on the Timeline:
There is from bottom to top: an image placeholder, a Title (shape) placeholder, a caption placeholder and another shape placeholder meant for a shape button. Sorry, but the styles used in the master slide are mostly overridden styles, and replaced by other styles on the slide itself. That is just for your information, don’t bother about it.
Step 2 Copy master slide
You will copy and paste that master slide to the original course theme (DemoProject):
- Use right-click menu (or Edit menu) to copy the master slide described above.
- Return to the Filmstrip
- Select any slide from the original project
- Open the master slide panel again, it will refresh and show the master slides of the DemoProject.
- Paste the master slide which you copied from the Aspire master slide panel.
The result in this case is visible on this part of the master slide panel. The new master slide is still selected, and kept its original name. This was possible because that name didn’t exist in the DemoProject theme. If it had existed, you would have to rename the master slide before copying it.
Of course the object styles are not what you want. In the screenshot above, the Title shape placeholder is selected, and you see that the style was overridden (+ sign). If that had not been the case, the Default Title Smart Shape style of the DemoProject would have been applied automatically.
Step 3: Replace styles
Still on the master slides, apply styles for the original project DemoProject theme to the objects. In this case:
- There is a Default Title Smartshape Stylein the DemoProject theme, needed only to use ‘Reset Style’ for the title. Because the style was centered, changed it to left-aligned but the font (Termina) and the color were applied automatically.
You see a + sign, because after resetting the style I added the alignment change, didn’t create a new style for that. It will only be used on the inserted slide, all other titles are centered. - Same for the caption, since a Default Caption style exist (Filson Pro and light color)
- For the shape button placeholder, another shape button style was chosen from the DemoProject theme.
Step 4: Apply Master slide
Open the Filmstrip, and select the inserted Aspire slide. In the Properties panel choose the theme DemoProject and the list with master slides will appear. Choose the ‘Welcome…..’ master slide and you should get this result:
You see some remaining problems: the placeholder for the shape button was not used in the QSP, probably deleted and replaced by another button. Either you edit that original button or you keep the placeholder button.
The background has of course not changed. You may need a last step:
Step 5: Final touch
Two more tasks need to be done to have a fully branded slide:
- Replace the image. Changing the Hue with the Edit Image features could work in some situations, but not for an image with a blue sky. Of course, editing in Photoshop while masking the sky is possible.
- Replace the blueish gradient at the bottom. It is not a gradient created in Captivate but another image. However it could be possible now to edit the colors with the Edit Image features (Hue).
Conclusion?
This workflow may seem cumbersome, but it is safe contrary to the switch to Destination theme. It is only one example slide, of course. Just hoping you would try this out, and maybe derive from the experience some better practice for your custom themes.


You must be logged in to post a comment.
- Most Recent
- Most Relevant
