 Newbie
1 posts
Newbie
1 posts
A clipping mask is an object whose shape masks other artwork so that only areas that lie within the shape are visible—in effect, clipping the artwork to the shape of the mask. The clipping mask and the objects that are masked are called a clipping set. You can make a clipping set from a selection of two or more objects or from all objects in a group or layer.
Photoshop Image Clipping Mask
A clipping mask is associate object whose form masks alternative design in order that solely area unitas that lie inside the form are visible in result, clipping the design to the form of the mask. The clipping mask and also the objects that area unit disguised area unit referred to as a clipping set. you’ll build a clipping set from a range of 2 or a lot of objects or from all objects in an exceedingly cluster or layer.
Photoshop clipping Mask area unit staggeringly an essential fraction of graphics style. it’s the first act for remodeling a picture. it’s accustomed take away the background of pictures that have hazy appearance or hair choices. Clipping mask is employed at the same time with clipping path techniques to require out the background of a many-sided image. it’s use seamlessly to chop off a picture once it’s foggy what’s a {part of} the image or what’s part of the background. notably, clipping mask is a lot of sensible once clipping path alone isn’t relevant for hair, wool or semi-transparent or clear pictures like glasses, smokes, feathers, flames, highlights, lighting, fur etc. we are able to eliminate, extract or separate a unnecessary objective from pictures by submit associate application clipping mask procedure. Technique and task isn’t therefore straightforward job to mask a picture.
Type’s of pic Clipping Mask:
Layer Mask
Alpha Mask
Channel Mask
Here we tend to discus regarding technique of Layer Mask and bit by bit the subsequent method is given bellow:
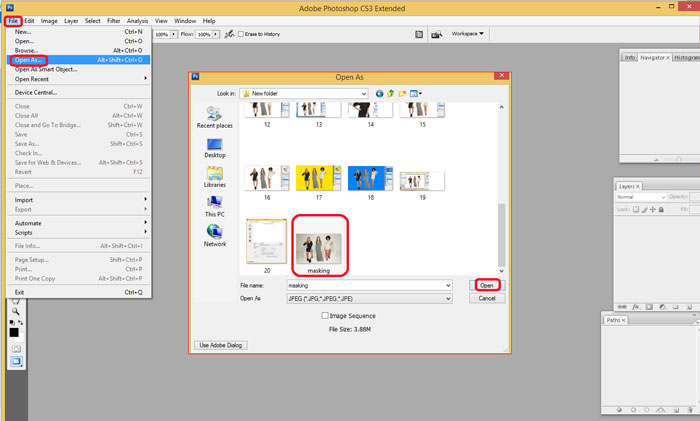
Open a picture in Photoshop that you simply wish to use for your clipping path. therefore attend the file menu in Photoshop, choose the open as and click on there you’ll see associate open dialogue box. Then select the file and click on open. Remove White Background
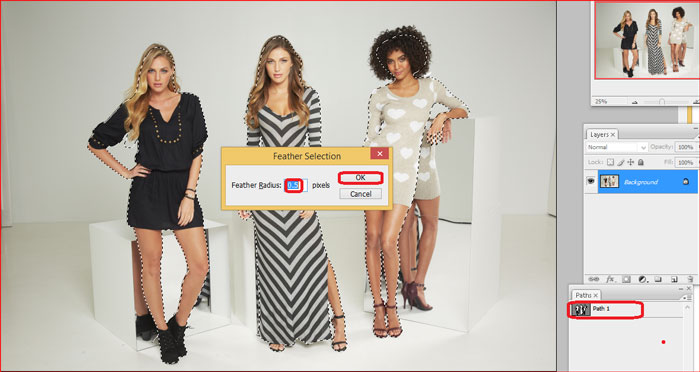
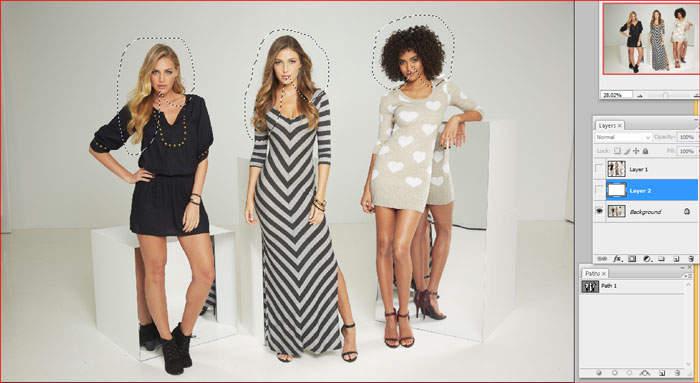
- Now selection the path by pressing Ctrl+Path 1. Must be noticed that the path shape is entire of the hair. Then pressure Ctrl+Alt+D for feather 0.5
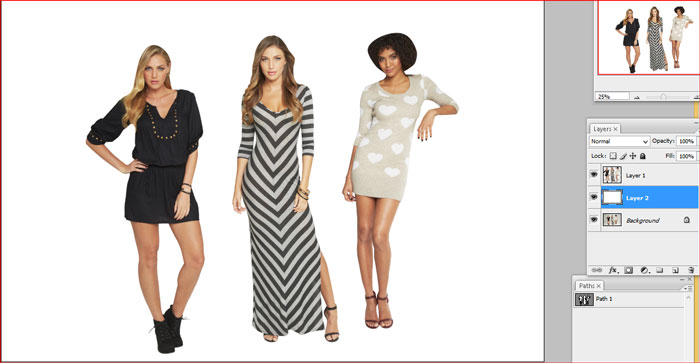
- Ctrl+J button for a new Layer 1 and create Layer 2 keeping selection at the Background. And press Ctrl+Backspace for showing the Layer 2 in white background keeping the color box black is in up and white is in down.
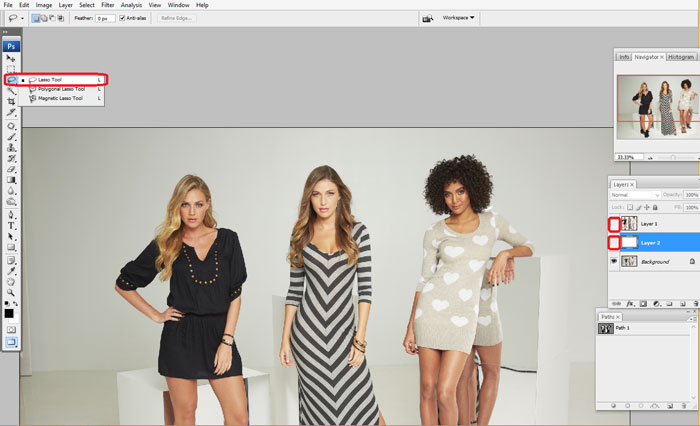
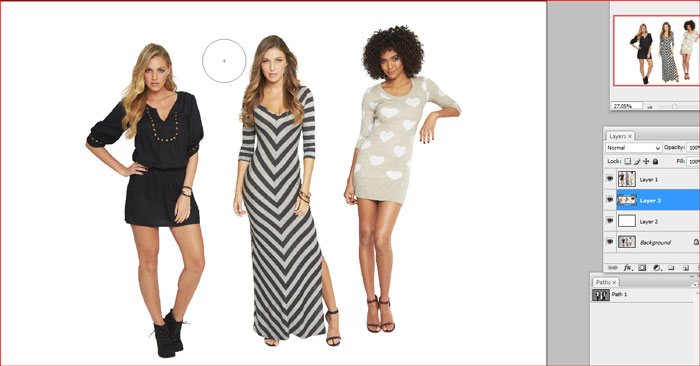
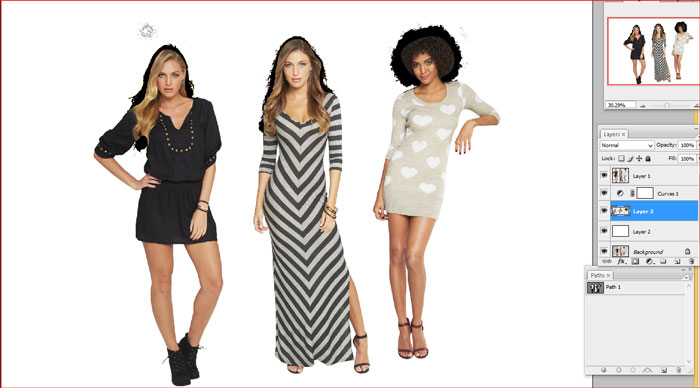
- Now close the eye of Layer 1 and Layer 2.Then select the Lasso Tool from the tool box. See in the bellow picture: Product Photo Editing
- Drag the tool around the Model’s hair.
- Then create Layer 3 keeping selection in Background which is under beneath the Layer 1. And open the eye of Layer 1 and Layer 2.
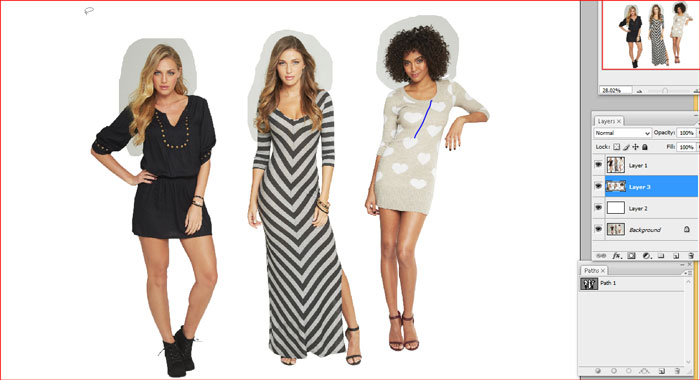
- Select now the Background Eraser Tool from the tool box.
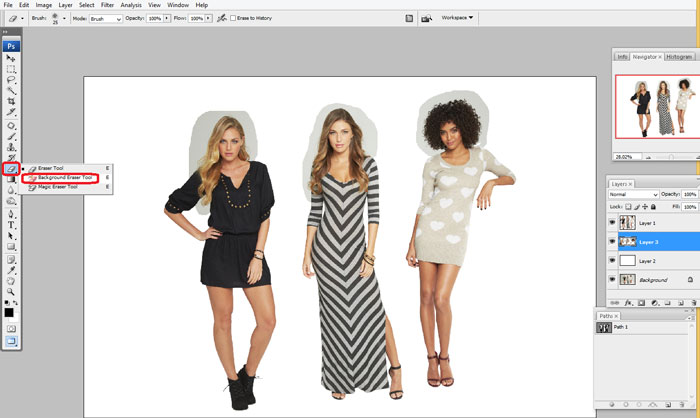
- Fill up the Background Eraser Tool requirements.
![]()
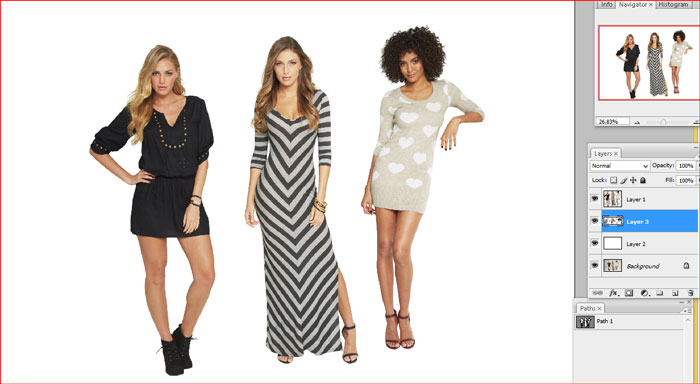
- Erase the image background just like the bellow image.
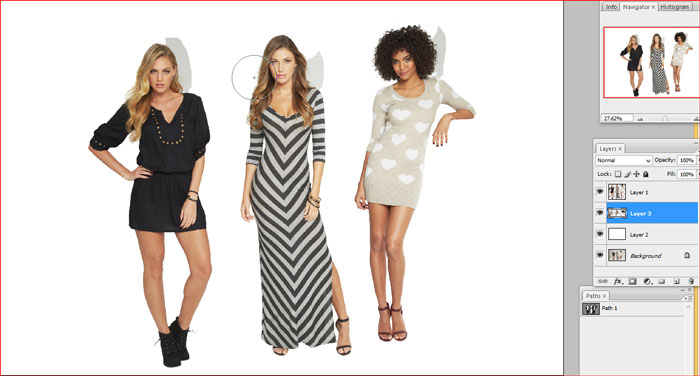
- After erase the background the image looks like the given image.
- Click in the adjustment layer and you show the Curves. Then click in the curves and fill the curves box.

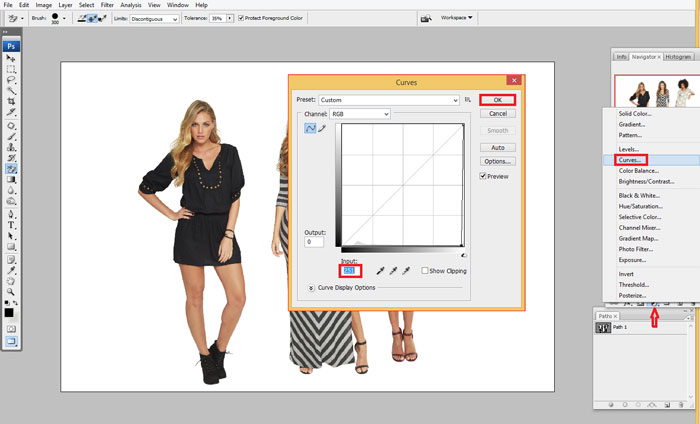
- The Curves image looks same the bellow the under beneath image.
- Select then the eraser Tool and select the 46 no. Brush Size.
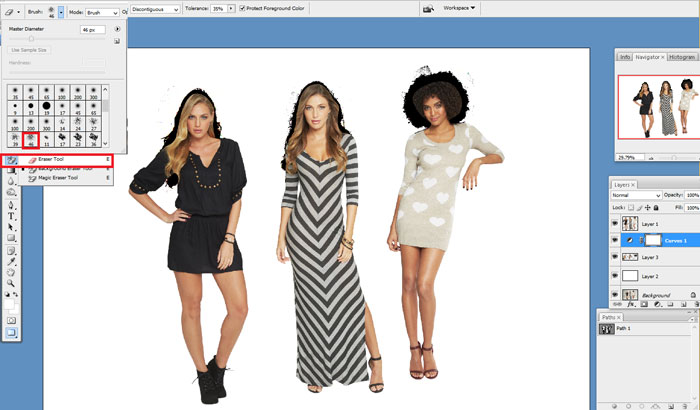
- Then erase the dust around Model’s hair selecting the Layer 3 like the image.
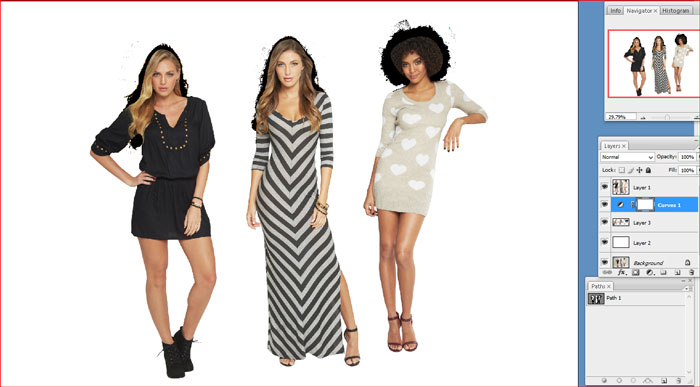
- After removing dust the curves layer would be deleted. And the image is Ok.

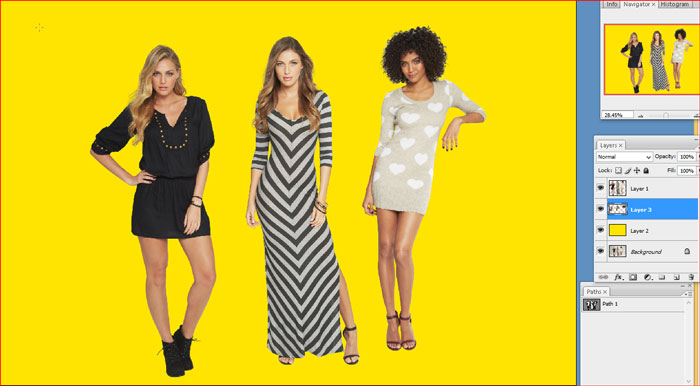
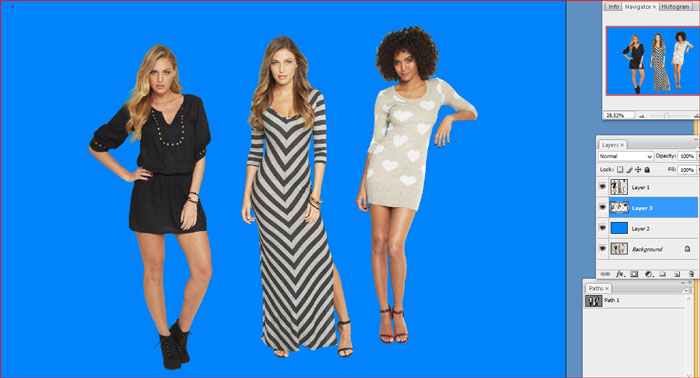
- For examine how it looks on different background color if dust appears or not. Given image looks so pretty and its ok now.
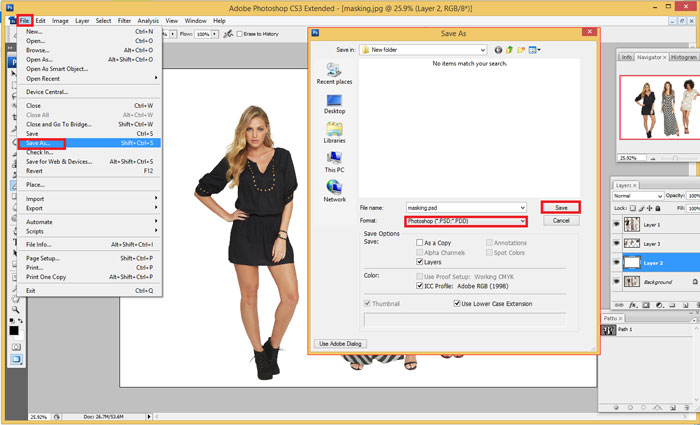
- Now it is time to save the final image. Look how I have saved the image.
Photoshop Image Clipping Mask
A clipping mask is associate object whose form masks alternative design in order that solely area unitas that lie inside the form are visible in result, clipping the design to the form of the mask. The clipping mask and also the objects that area unit disguised area unit referred to as a clipping set. you’ll build a clipping set from a range of 2 or a lot of objects or from all objects in an exceedingly cluster or layer.
Photoshop clipping Mask area unit staggeringly an essential fraction of graphics style. it’s the first act for remodeling a picture. it’s accustomed take away the background of pictures that have hazy appearance or hair choices. Clipping mask is employed at the same time with clipping path techniques to require out the background of a many-sided image. it’s use seamlessly to chop off a picture once it’s foggy what’s a {part of} the image or what’s part of the background. notably, clipping mask is a lot of sensible once clipping path alone isn’t relevant for hair, wool or semi-transparent or clear pictures like glasses, smokes, feathers, flames, highlights, lighting, fur etc. we are able to eliminate, extract or separate a unnecessary objective from pictures by submit associate application clipping mask procedure. Technique and task isn’t therefore straightforward job to mask a picture.
Type’s of pic Clipping Mask:
Layer Mask
Alpha Mask
Channel Mask
Here we tend to discus regarding technique of Layer Mask and bit by bit the subsequent method is given bellow:
Open a picture in Photoshop that you simply wish to use for your clipping path. therefore attend the file menu in Photoshop, choose the open as and click on there you’ll see associate open dialogue box. Then select the file and click on open. Remove White Background
- Now selection the path by pressing Ctrl+Path 1. Must be noticed that the path shape is entire of the hair. Then pressure Ctrl+Alt+D for feather 0.5
- Ctrl+J button for a new Layer 1 and create Layer 2 keeping selection at the Background. And press Ctrl+Backspace for showing the Layer 2 in white background keeping the color box black is in up and white is in down.
- Now close the eye of Layer 1 and Layer 2.Then select the Lasso Tool from the tool box. See in the bellow picture: Product Photo Editing
- Drag the tool around the Model’s hair.
- Then create Layer 3 keeping selection in Background which is under beneath the Layer 1. And open the eye of Layer 1 and Layer 2.
- Select now the Background Eraser Tool from the tool box.
- Fill up the Background Eraser Tool requirements.
![]()
- Erase the image background just like the bellow image.
- After erase the background the image looks like the given image.
- Click in the adjustment layer and you show the Curves. Then click in the curves and fill the curves box.
- The Curves image looks same the bellow the under beneath image.
- Select then the eraser Tool and select the 46 no. Brush Size.
- Then erase the dust around Model’s hair selecting the Layer 3 like the image.
- After removing dust the curves layer would be deleted. And the image is Ok.
- For examine how it looks on different background color if dust appears or not. Given image looks so pretty and its ok now.
- Now it is time to save the final image. Look how I have saved the image.


You must be logged in to post a comment.
- Most Recent
- Most Relevant
Yes. Creating eLearning is not only about authoring software. Graphic tools come in handy as well.
