Very basic workflow to create Click/Reveal interaction using multistate objects.
Intro
There are many ways to create a Click/Reveal interaction. Some are very old (with jump to slide), others are pretty old (show/hide) and lot depends on the exact situation. It is possible that I will make a complete analysis, although I don’t think this will appeal to many users.
However my sense of justice is too keen, and I cannot leave a comment from a newbie without reaction:
“This is basic stuff right! Why is it so complicated? ”
If you want to know more, this is the discussion link.
I created a quick example of the most basic workflow which can be used. Will explain step-by-step.
Example
Only two slides. The second slide is the click/reveal. The characters themselves are used as toggle buttons. Clicking once will pop up a speech bubble, clicking again will close the bubble.
There is also a back button top right, which allows you to test the situation when revisiting the slide.
Step-by-step
Step 1 Characters to button
Download the Characters and insert them on the slide. Check the option ‘Use as button’ in the Properties panel (red outline in screenshot below). Leave the option ‘Retain state on slide revisit’ unchecked (green outline)
TIP: you don’t have to do this three times. Select the three inserted Characters (using CTRL button to add to the selection, or by creating a selection rectangle which cuts the three characters. Check the option in the Properties and it will be done for all the Characters.

Step 2: Custom state
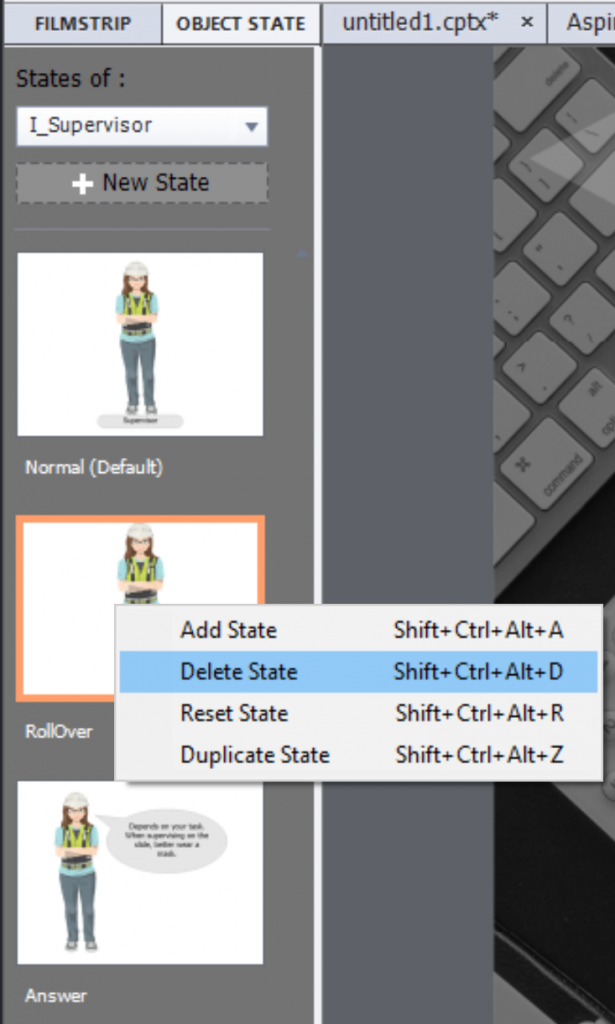
Select one of the Characters. Click the State view button in the Properties. Look at the screenshot above, where you see the button with a Blue outline. The Object state panel will appear, which will have 3 states because you have a ‘button’: Normal, Rollover and Down. I deleted the last two ‘InBuilt’ states. They were identical to the normal state. You can do that with the right-click menu as shown in this screenshot. The Down state was already deleted, here the Rollover state will be deleted.

Now add a Custom State using the New State button. Make sure to choose Custom under the first dropdown list (click the triangle button). You can edit the default name (NewState1). You have seen in the previous screenshot that I labeled it ‘Answer’.

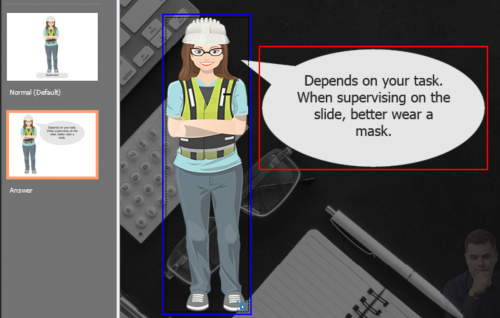
That state will be selected, and you can add the speech bubble (eventually even with audio attached to it) and or any other object you want. Use the stage, where all will be dimmed in the background except your new custom state:

Close the Object State panel using the Exit State button at the end of the top Big Button Bar:

Step 3: Actions
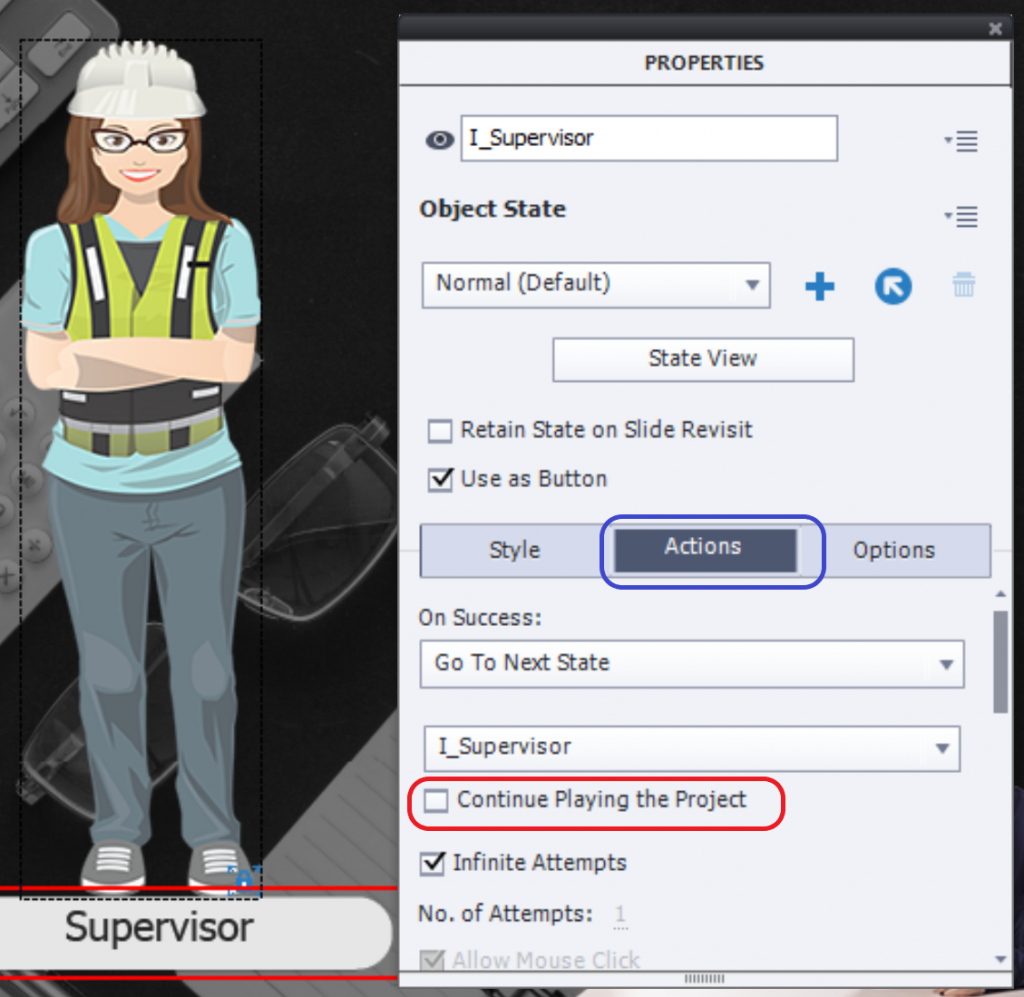
Select the Actions tab in the Properties panel for the selected Character button. For the On Success event set up this action:

You may see how easy it is to detect the multistate object to choose from the second dropdown list, since its name appears at the top of the Properties panel.
IMPORTANT! You have to uncheck the option ‘Continue playing the Project’ (red outline). That will prevent the playhead to be released. Will not expand in this article on pausing the timeline.
Your toggle button (character) is ready. Start testing using F11, Preview HTML in Browser.
Rollover replacement
The described workflow is a good and simple replacement for rollover captions, images and even little bit for rollover slidelets (since you can add as many objects in a state as wanted, with the exception of interactive objects). It is a lot better than adding click boxes over an image – which is even impossible in a Fluid Boxes project.
You must be logged in to post a comment.


