 Master
55 posts
Master
55 posts
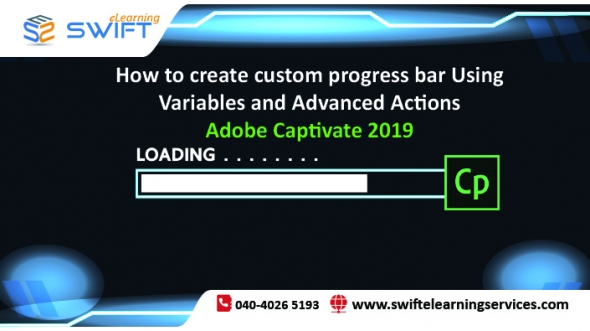
In this blog, we are going to demonstrate the steps to develop a custom progress bar displaying the overall project progress. Although we cannot adjust the progress bar’s actions directly, hence we used variables and states to create a custom progress bar.
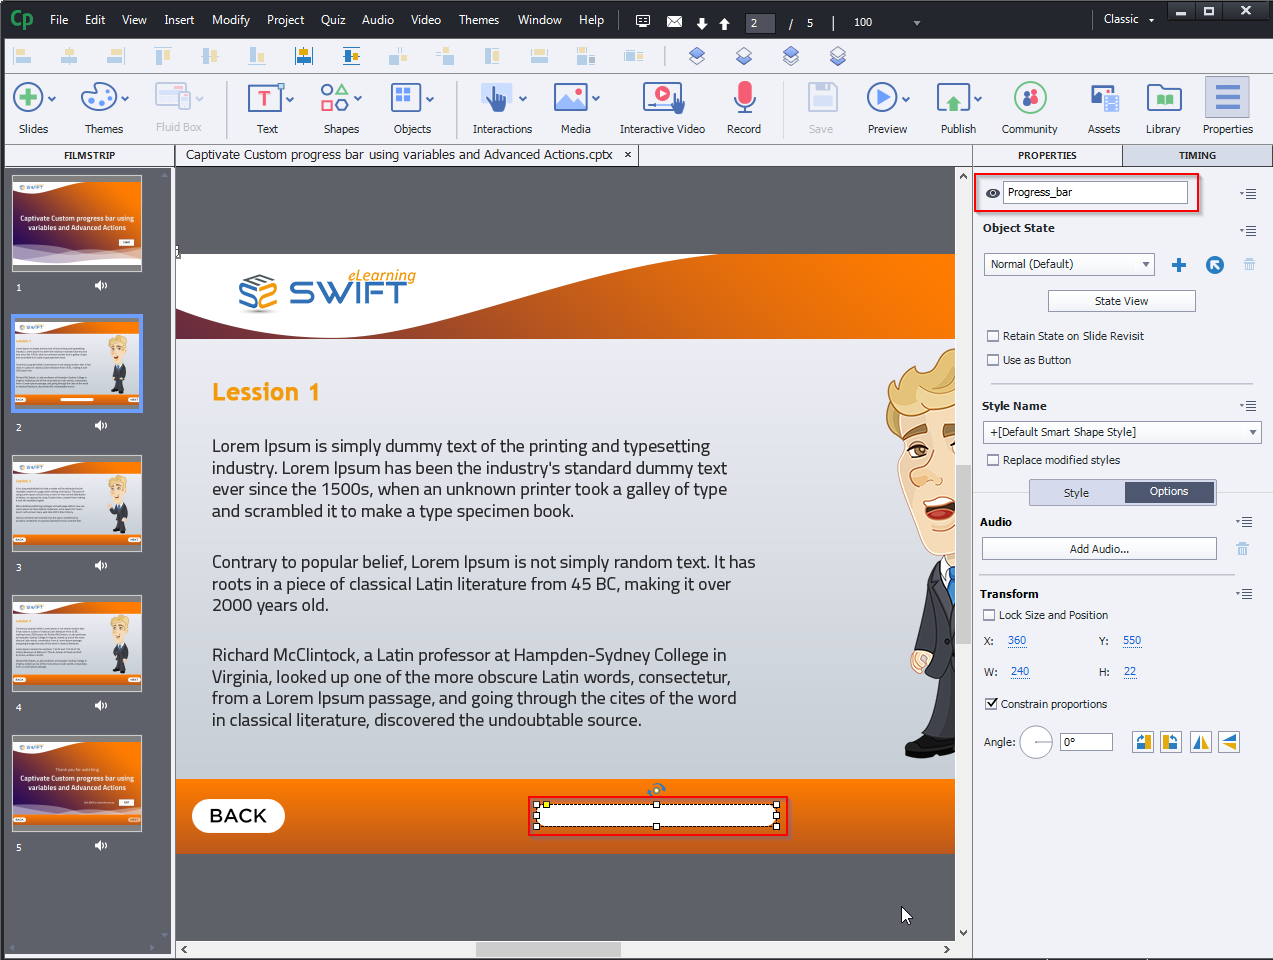
Step 1:
Create a custom bar, as shown below, and give it a unique name.
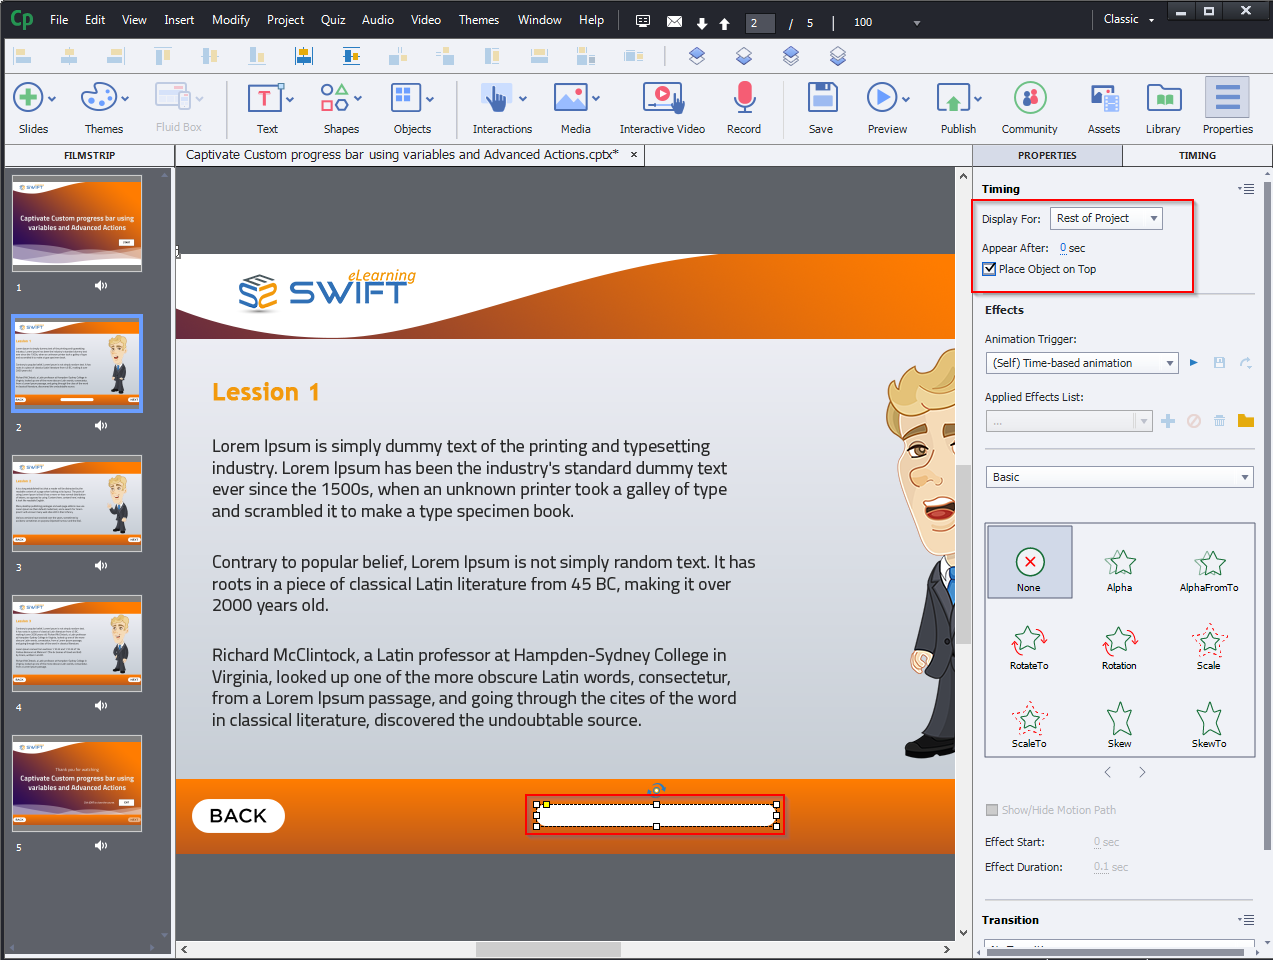
Step 2:
“Display For:” Needs to be “Rest of Project” and select “Place Object on Top”. When both of these options are selected then there is no need to include the progress bar in each slide.
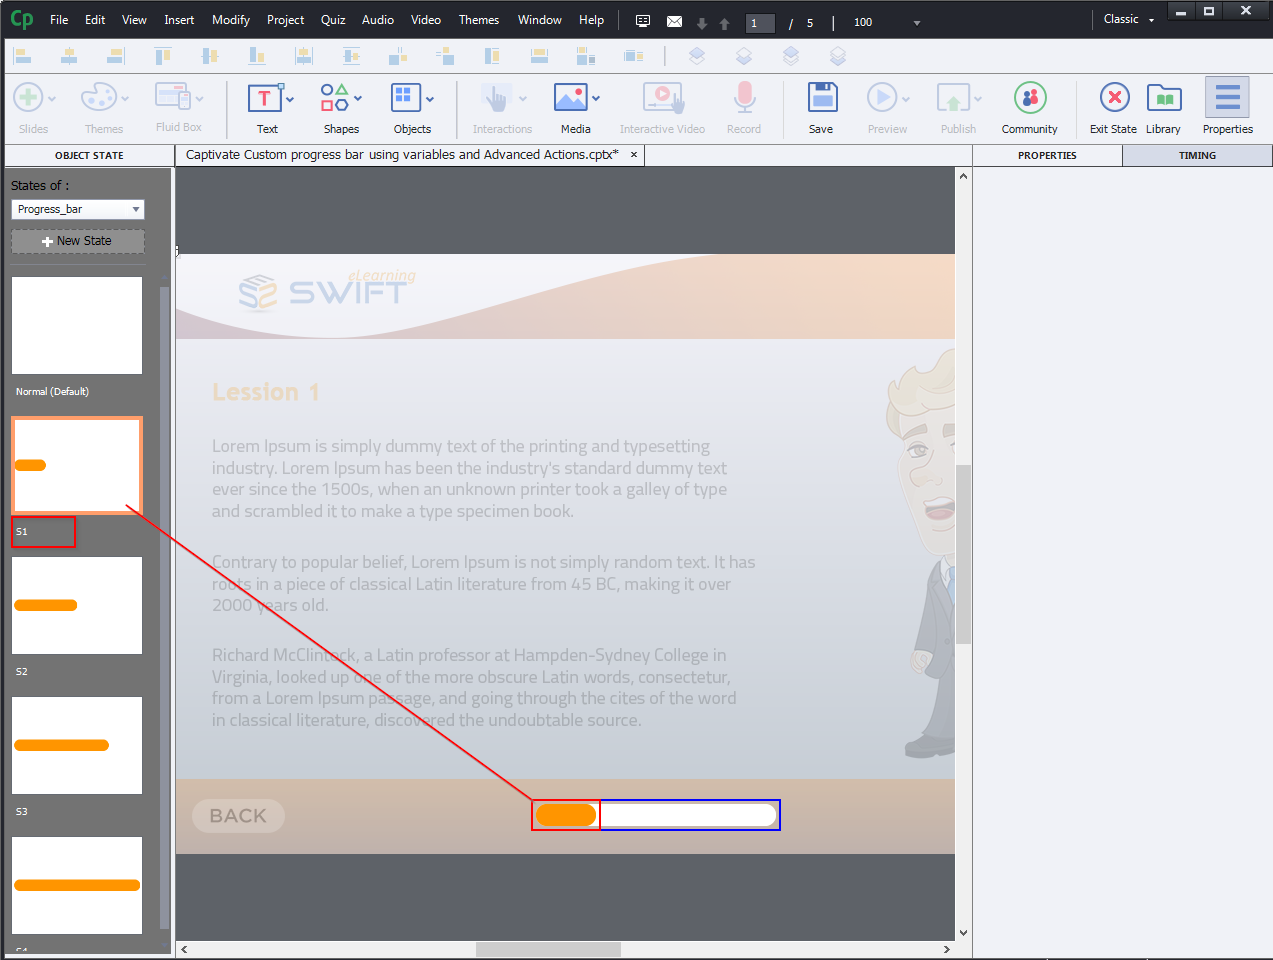
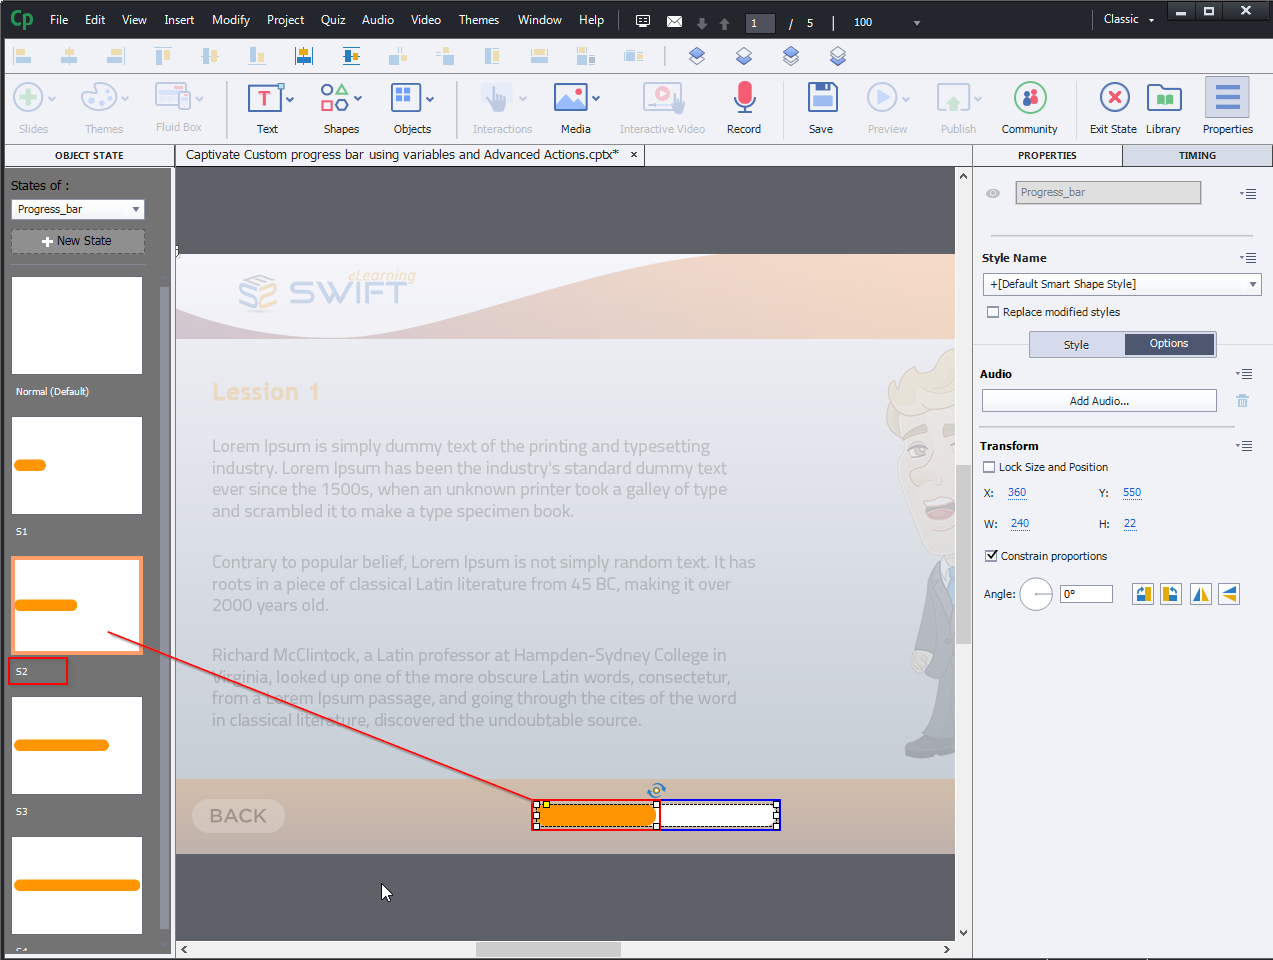
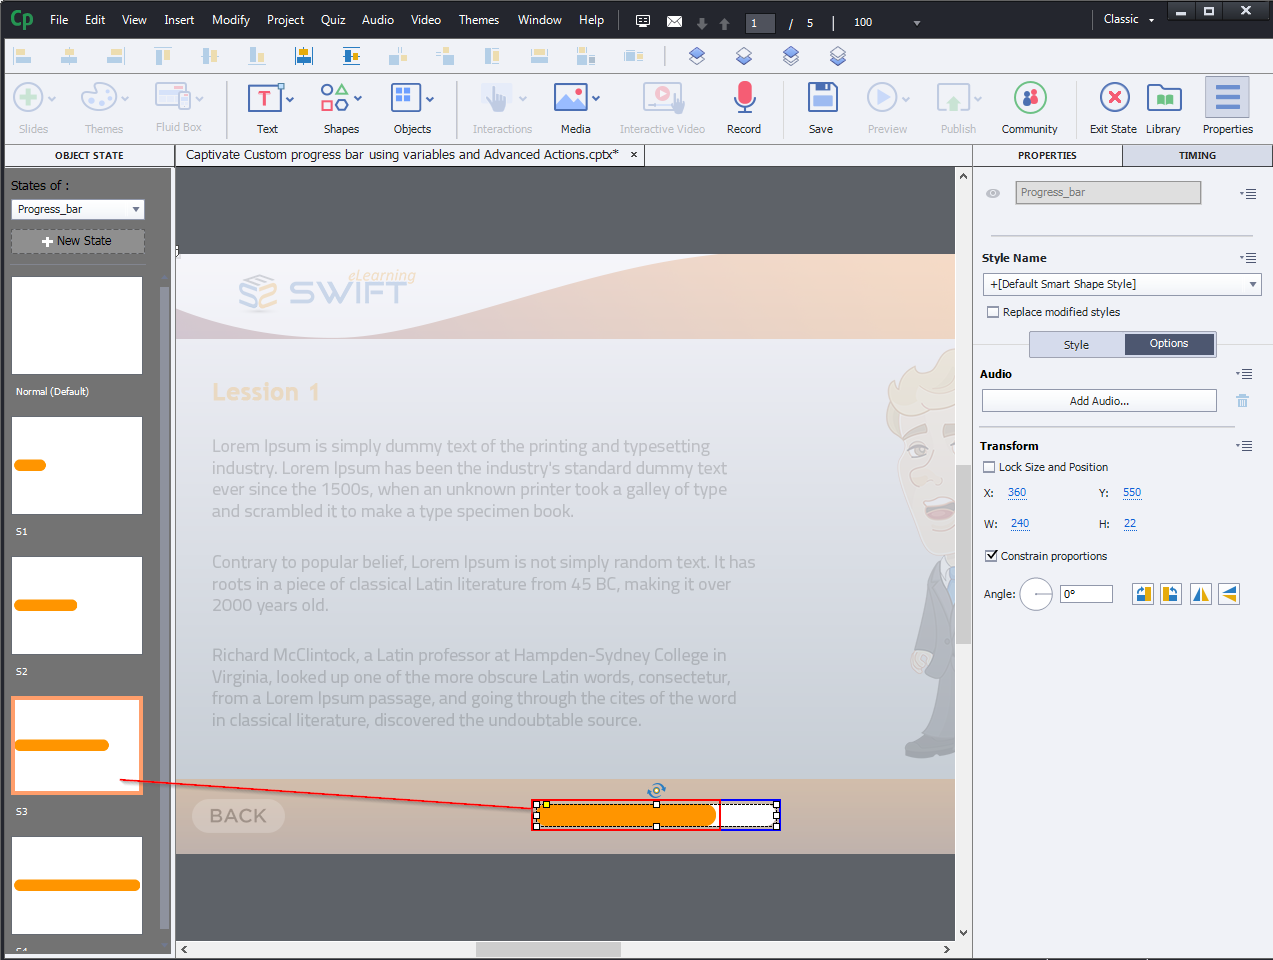
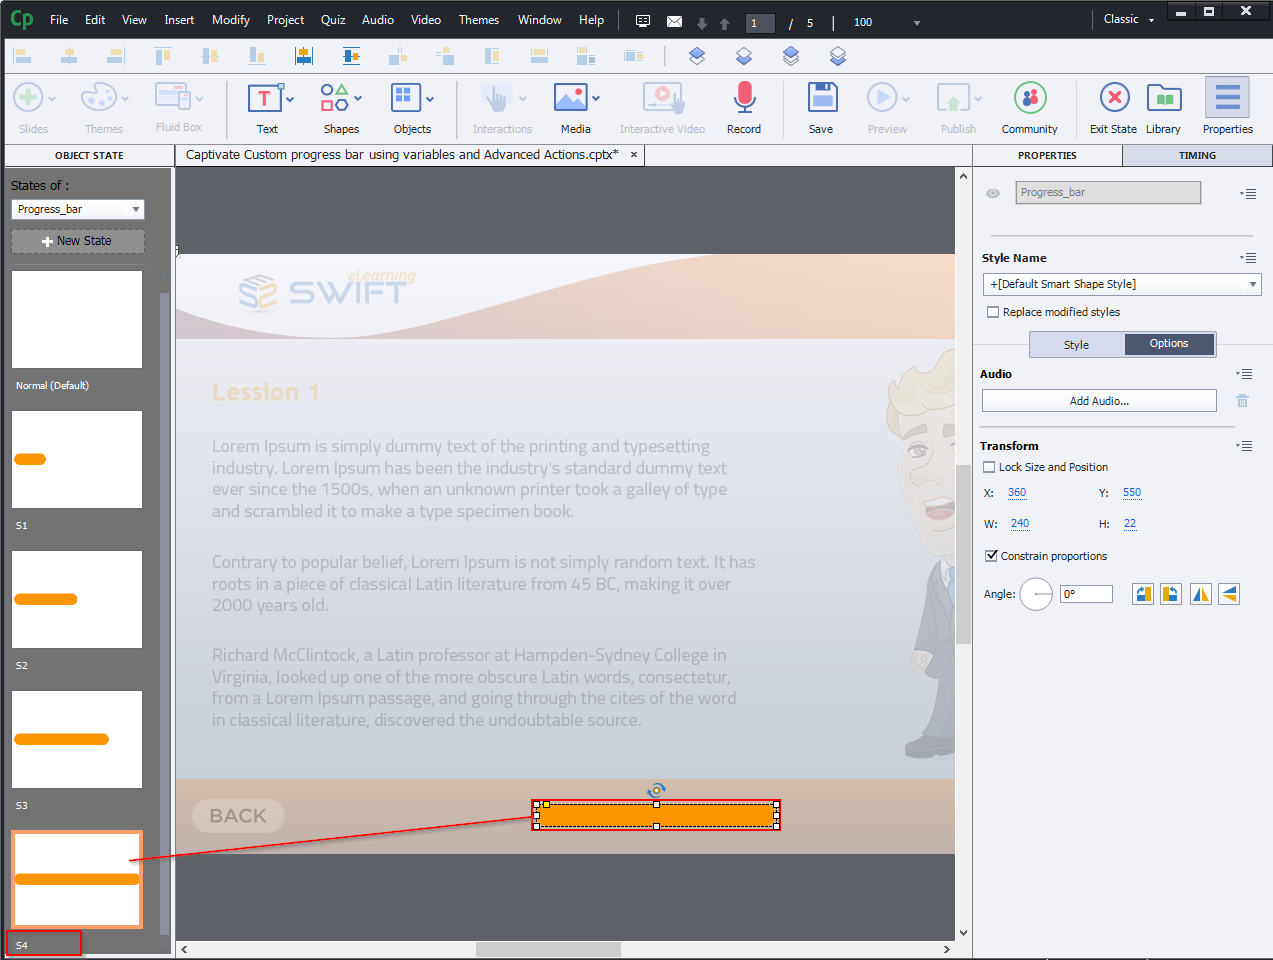
Step 3:
Now, add states to the progress bar by calculating slides, divided by total slides. Give a unique name for the newly added state as highlighted below.
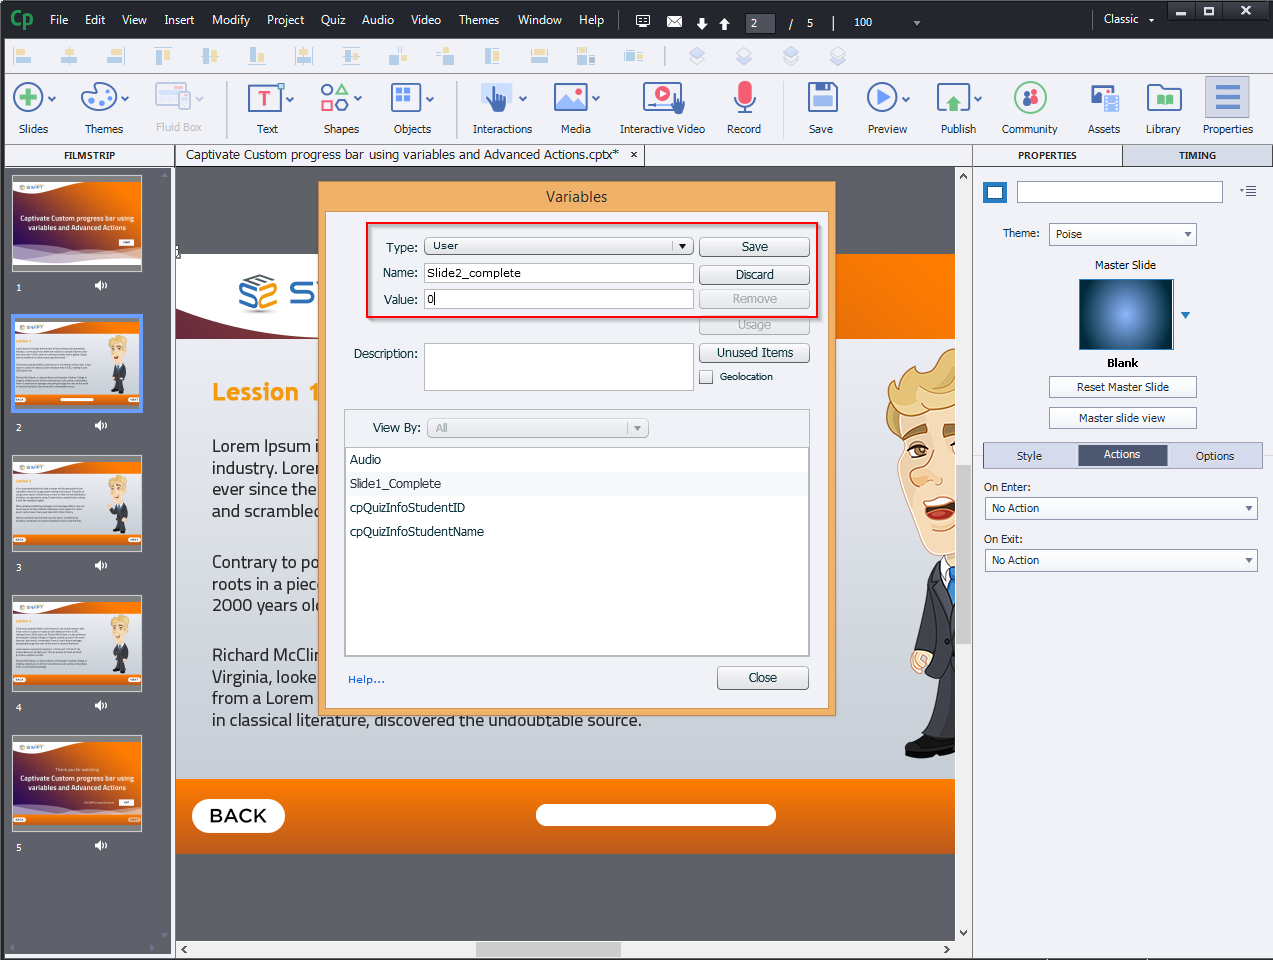
Step 4:
For creating new variables select “Variables….” from the “Project” menu.

Step 5:
Enter a unique name in the Name field, then select Value as 0 and Save it.
Example:
(Slide1_Complete) and set the Value to “0”.
(Slide2_Complete) and set the Value to “0”.
(Slide3_Complete) and set the Value to “0”.
(Slide4_Complete) and set the Value to “0”.

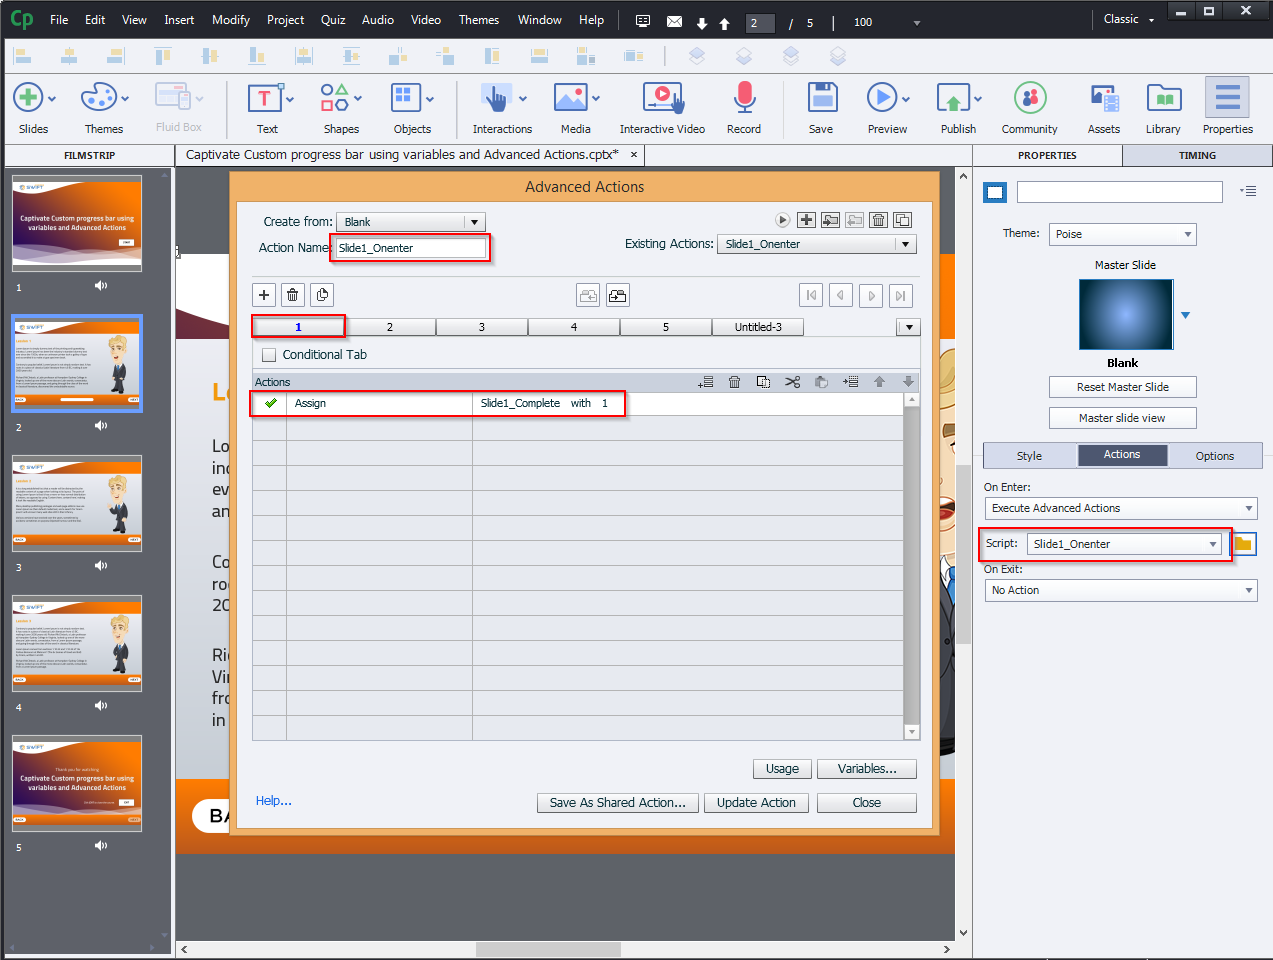
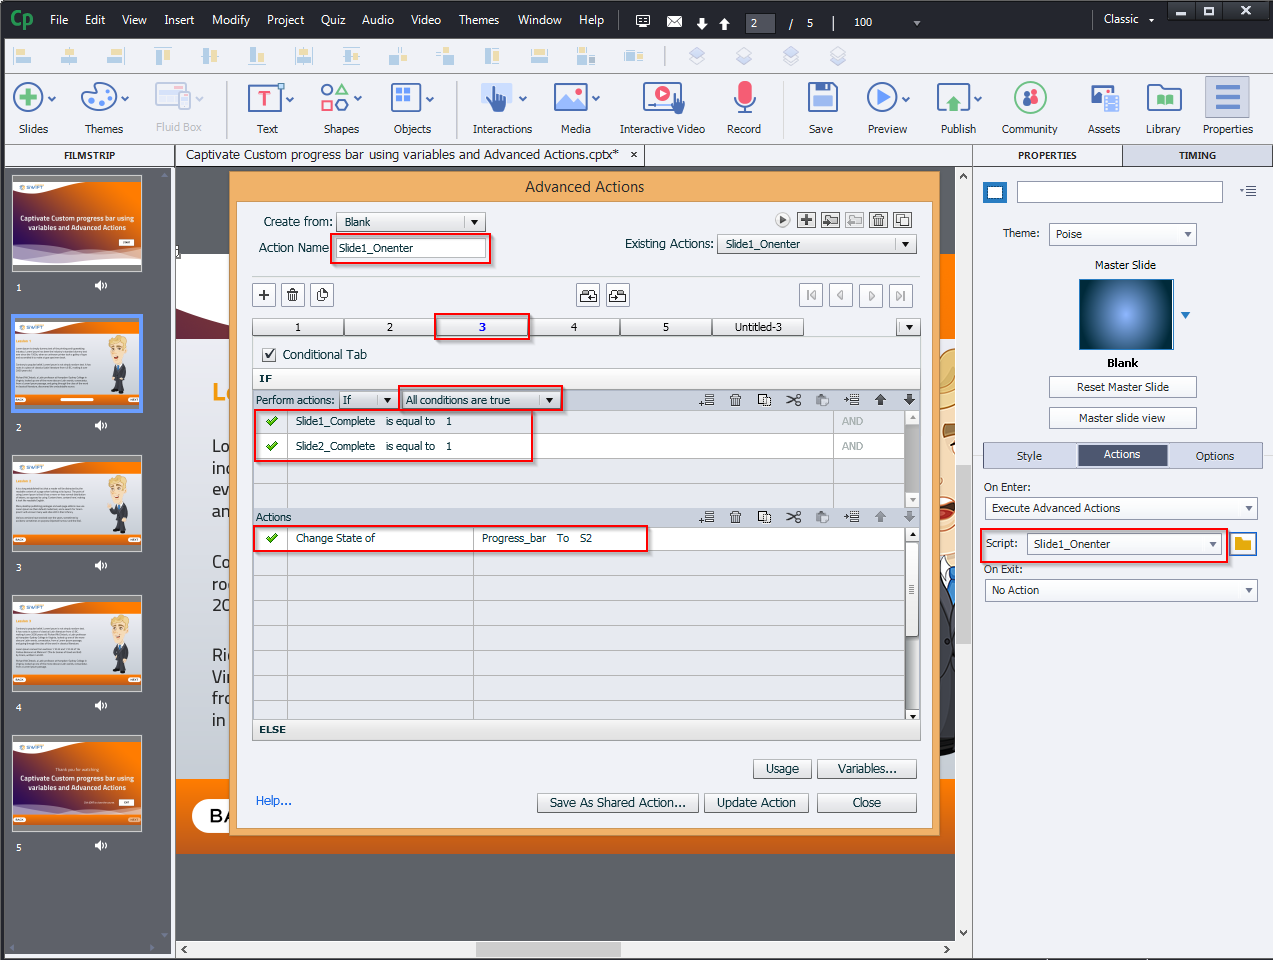
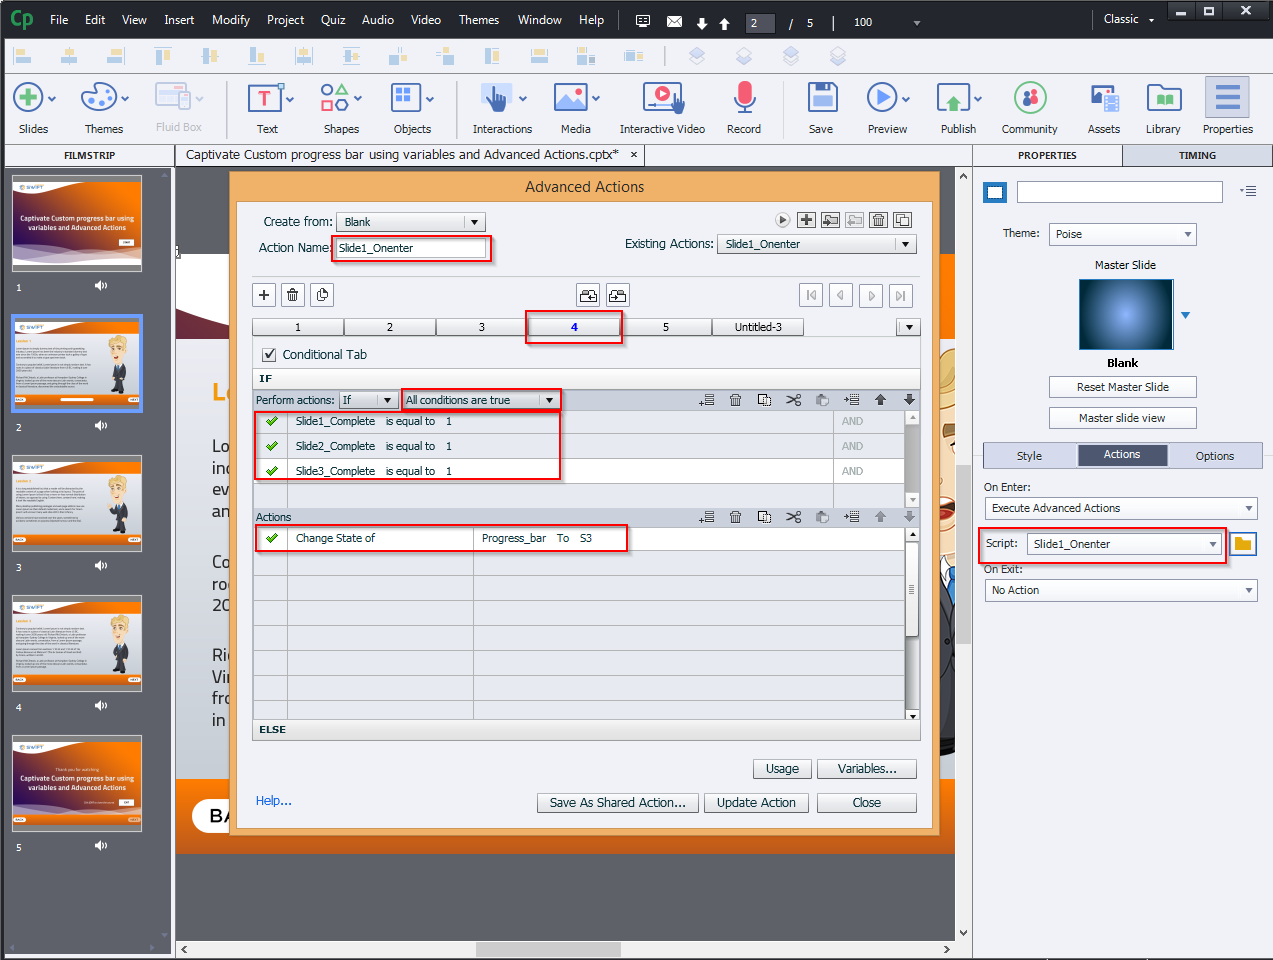
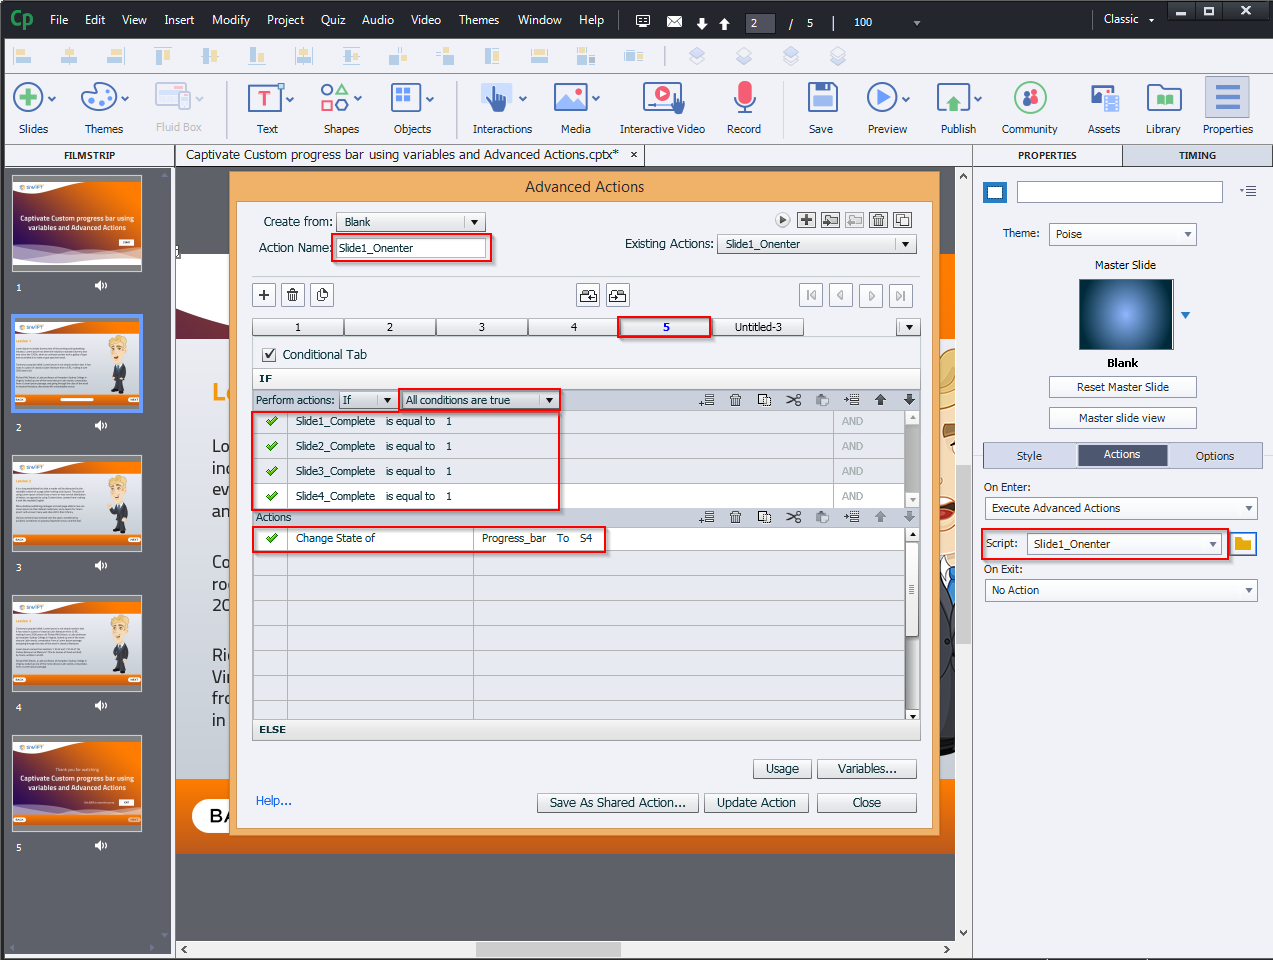
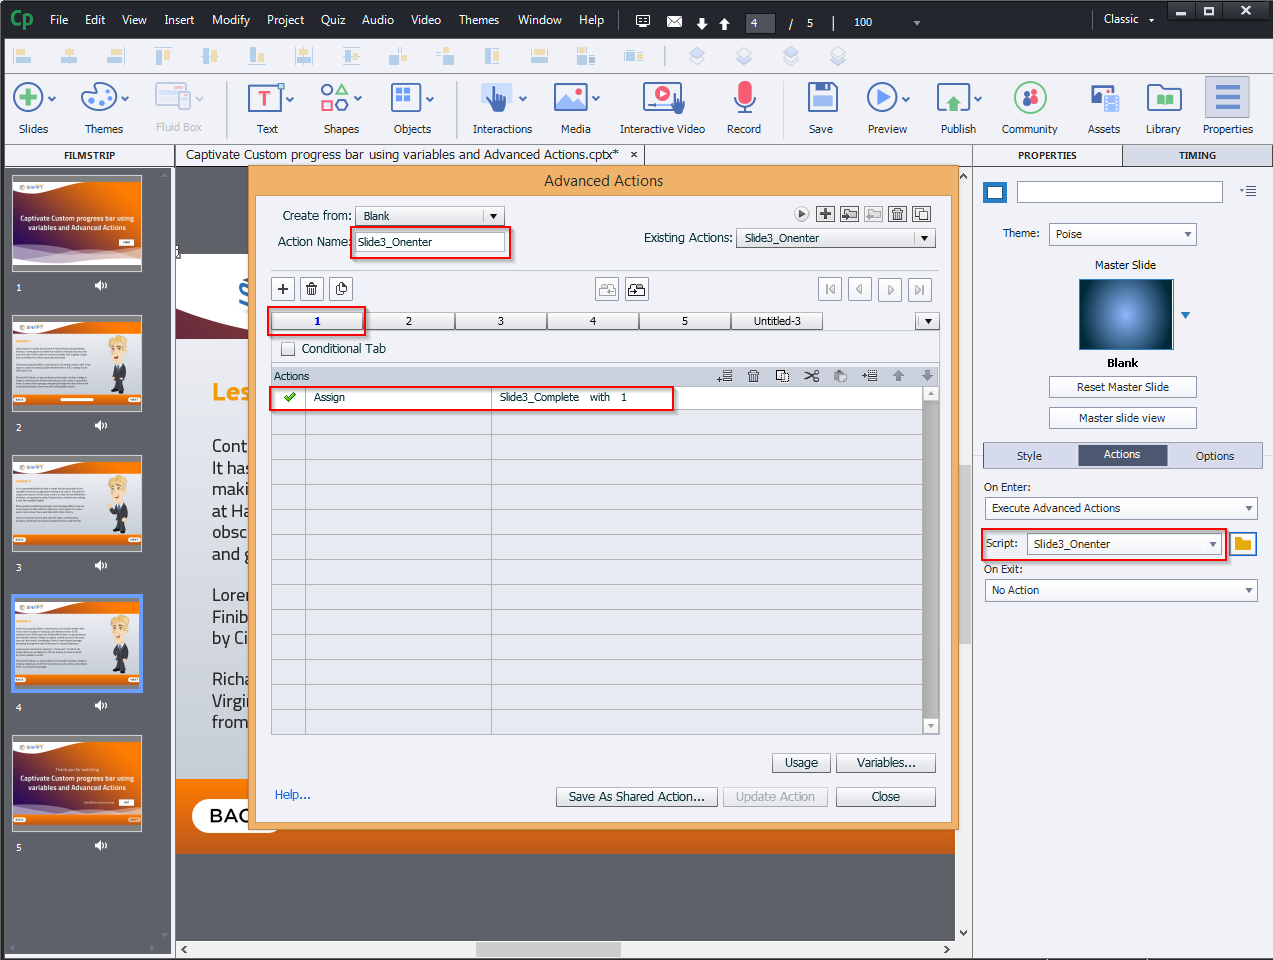
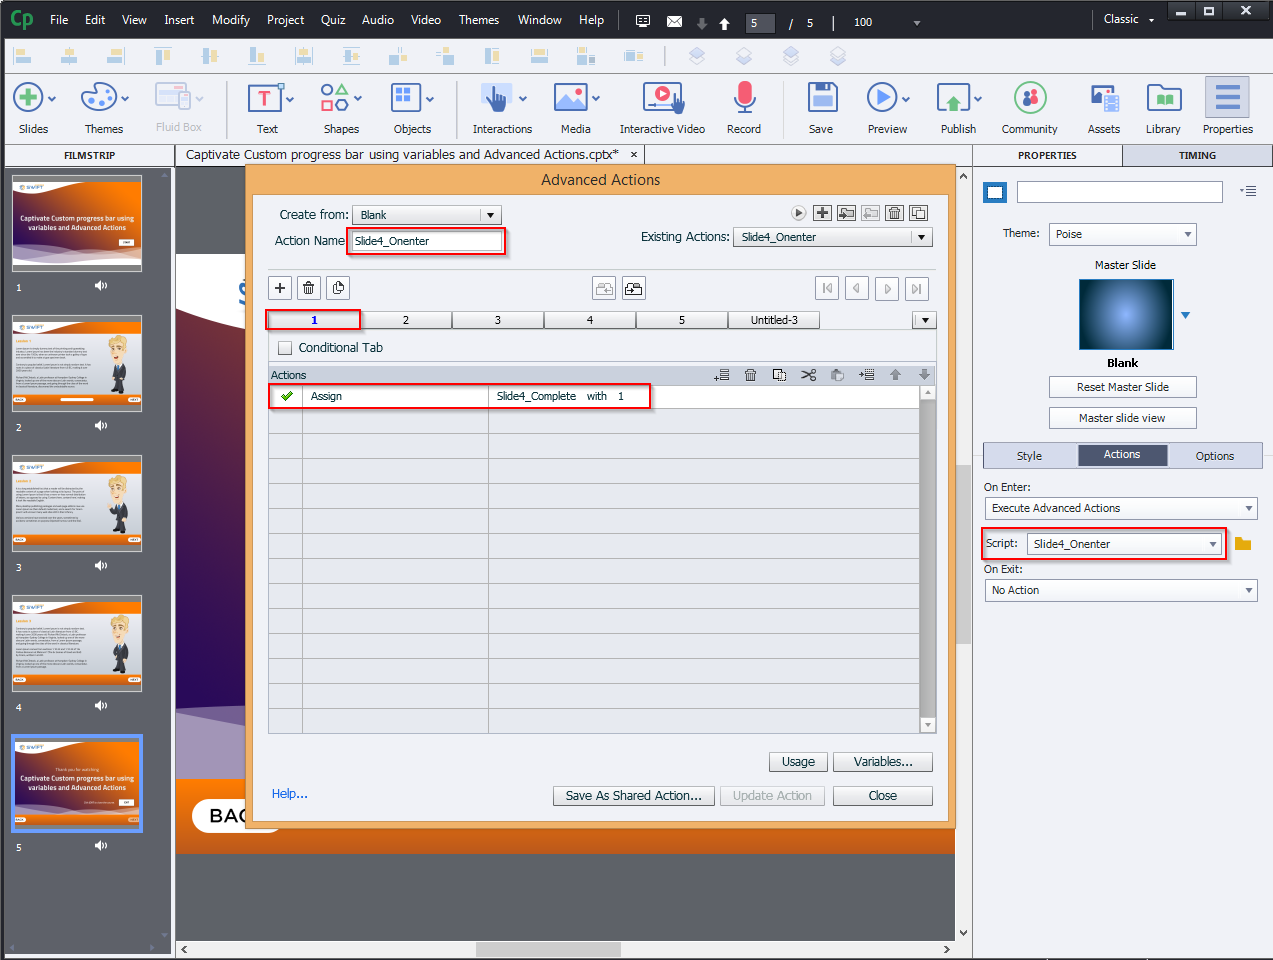
Step 6:
As shown below, add the Executive Advanced Action to each slide of On Enter.

The same procedure applies to all topics:

Visit our website for more insights: https://www.swiftelearningservices.com
In this blog, we are going to demonstrate the steps to develop a custom progress bar displaying the overall project progress. Although we cannot adjust the progress bar’s actions directly, hence we used variables and states to create a custom progress bar.
Step 1:
Create a custom bar, as shown below, and give it a unique name.
Step 2:
“Display For:” Needs to be “Rest of Project” and select “Place Object on Top”. When both of these options are selected then there is no need to include the progress bar in each slide.
Step 3:
Now, add states to the progress bar by calculating slides, divided by total slides. Give a unique name for the newly added state as highlighted below.
Step 4:
For creating new variables select “Variables….” from the “Project” menu.
Step 5:
Enter a unique name in the Name field, then select Value as 0 and Save it.
Example:
(Slide1_Complete) and set the Value to “0”.
(Slide2_Complete) and set the Value to “0”.
(Slide3_Complete) and set the Value to “0”.
(Slide4_Complete) and set the Value to “0”.
Step 6:
As shown below, add the Executive Advanced Action to each slide of On Enter.
The same procedure applies to all topics:
Visit our website for more insights: https://www.swiftelearningservices.com


You must be logged in to post a comment.
- Most Recent
- Most Relevant
