Explains how to add a Poster image to a HTML file, how to tweak the play button, get rid of the automatic dimming of the poster image and the focus rectangle.
Users of CP2019: it is no longer necessary to use the workaround to turn off the focus rectangle around the play icon on ths start screen. It has been removed, one of the tiny gems in CP2019
Edited on 16th of June to add a tweaking discovered in aother thread to get rid of the rectangle surrounding the original play icon (blue in Chrome, dotted line in Edge).
Intro
This short blog post is meant to help solving an issue that pops up in the forums once in a while: “How to get rid of the white screen and Play button on mobile devices?”. When publishing to HTML the AutoPlay is automatically disabled, Reason is that some devices and OS (iOS) do not allow Autoplay. For SWF output you had the choice: it was possible to change the default setting which was to have a movie playing automatically after loading. I often disabled that option when embedding SWF’s on my blog (look at older articles), especially when audio was involved because it is not very polite to have audio being pushed to the reader automatically.
Consequence of the AutoPlay being disabled without your control as developer, is the appearance of a big white screen with a small play button right in the middle. The button looks like this (but originally one is smaller, 96×96), black arrow in black circle with transparent background:

Such a button will not always blend well in the design of your project.
Poster image
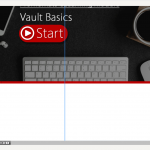
To get rid of the white screen, you need to create a “poster image”? That is a static image, preferably with the same resolution as your project. For a non-responsive project, published with Rescalable turned on, the poster image will fill up the screen. All embedded HTML movies in my blog were using this type.
Mostly I duplicate a slide from the project to create such a poster image, Duplicate because it may need some editing, especially if you also want to have a better looking Play arrow. I will take a screenshot of that slide while it is playing to save as a PNG (or other image format) and then hide the slide to avoid it to be included in output.
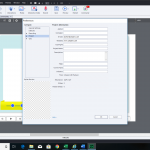
When the image is ready, set up the Preferences, Project, Start and End: turn off AutoPlay and indicate the poster image.

Play Arrow
My personal hack to have a play arrow that is fitting with the design of each project is this workflow:
- I created a copy of the original image C
 wirogram FilesAdobeAdobe Captivate 2017 x64HTMLassetshtmlimagesPlayI_icon.png and edited to turn it into a full transparent image

- I renamed the original image and put the empty image in the same path.
- On the poster image I created an arrow, mostly I use a triangular shape, rotated 90°, using colors from the project Theme Colors palette. You will have seen them in previous blog posts.
- That Arrow has to be centered horizontally and vertically.

Dimmed or not Dimmed?
The uploaded published HTML project will by default have a dimmed Poster image (Alpha = 70%). It was meant to have the original Play icon stand out from the background. But that black play icon is gone:

A helpful user on the forum posted the solution: Mark Sabrento Thanks a lot, Mark (screenname sabre123). I tried it out and it works great. You find it in this thread.
Look for the file CPM.js, which you’ll find in the published folder under assetsjs
cp.autoplayImage.style.opacity=0.7

Update: an expert posted a solution (not mine!) in a thread to get rid of the focus rectangle surrounding the play icon. Sorry, but I forgot to bookmark the thread, which means I cannot pay credit to that expert by name, but found it worthwhile to complete this blog post with that solution:
- Find the file CPLibraryAll.css in the published folder under assetscss.
- Add these lines before the existing script:
   *:focus {
   outline: 0;
   }
In that same file you could also change the width and height of the original Play icon which is set at 116x116px.
Hi Lieve. This is fantastic! Everything works like a charm, everything is so well explained, I have not had any problems. A little request, or advice if possible. Do you know if the settings in the CPM.js and CPLibraryAll.css can be changed somewhere in Captivate (even system files) thus I don’t have to change them every time I publish a file? All my files are cp.autoplayImage.style.opacity=1 and I always remove the rectangle of the play icon. I hope there is a way, this will save me so much time. Cheers!
You posted this on my blog as well. Here is a copy of my answer:
“You must have missed the first upgrade alinea. You don’t need to take out the rectangle anymore in the most recent versions. I never dabble with those files anymore when i publish, just create a poster image with a mimicked play shape in the center. You will still have the dimmed version of the poster image, but I wonder if many learners are frustrated by that? Look at my most recent posts which have an embedded tutorial showing that approach.”
Oh… Lieve, I did the same thing, I got tired of adding the play button, so I did the same thing, I mimicked a play shape icon on the actual splash or autoplay background image. You are the best. For the Play_icon.png I use a one-pixel transparent background image.
Hi everybody. Informative little article, thanks. FYI, disabling the focus indicator is NOT a good thing. It’s in violation of every accessibility requirement (which is law pretty much everywhere), and for the person who isn’t blind but uses a keyboard only (e.g., paraplegic), not seeing where you are on the page really reduces usability. Consider restyling the focus indicator instead of disabling it.
Was already told that and will answer same way. This is not a pure American forum, I am not American. You may have to cripple every course due to laws. As a teacher i tried to provide every student with the best course. That meant Photoshop for the majority of students, but Audition for those who couldn’t use a graphic application because of their eyesight. Not any law in the world can make a PS course accessible to those students.
Hello… I am trying to preload my poster image underneath the play arrow because the white screen is confusing and will not engage users. I have posted my learning activity, but I am still not seeing the poster image in the background behind the start arrow:
https://lauralanoue.com/eLearning/HTML/OldMacDonald/OldMacDonald_1280x270/
Hello Laura I had made a video about that. You can remove the play arrow if you want. You can watch the video entirely or between the ninth and eleventh minutes it is shown how to remove it. I hope it help you.
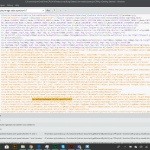
I too have a concern about the 508 compliance of the auto-pause screen that adobe has implemented. To circumvent this I opened the original HTML > index.html file in the Adobe Captivate 2019 folder. Do a search for, or scroll and locate — function CPINIT()
navigate to just before the final closing bracket } and add the following command:
cp.movie.play();
Here is a screenshot of the code.
This will autoplay the movie and start the first slide of your Captivate movie. It’s a simple javascript command to start playing the captivate file. I have tested this on Apple devices, the chrome browser, and it works just fine.
On every other Captivate slide I can set shortcuts for buttons and ALT text to instruct the viewer when they are using a screen-reader. However, there is no direction for screen readers when the paused captivate file loads. There is no direction to press space to start the file.
That command is a workaround, but will not be functional always nor on all devices. I have see a lot of problems reported everywhere when using it. Hence my conclusion: we have to cope with AutoPlay being disabled.
As for the compliance, please log a feature request.
Sorry to be a dunce, but I am still missing how I can disable Autoplay upon start in Captivate 2019. I have looked elsewhere, but I am new to Adobe, so maybe I am missing something.
To get to preferences, I have to go to Edit>Preferences (or shift+ F8) …but nothing under there about autoplay.
Hi Lieve. This is fantastic! Everything works like a charm, everything is so well explained, I have not had any problems. A little request, or advice if possible. Do you know if the settings in the CPM.js and CPLibraryAll.css can be changed somewhere in Captivate (even system files) thus I don’t have to change them every time I publish a file? All my files are cp.autoplayImage.style.opacity=1 and I always remove the rectangle of the play icon. I hope there is a way, this will save me so much time. Cheers!
This is a great way to create a nice ‘start’ page but I too will need a 508 compliant one. Has anyone found a solution for anastasiam55465973
Is there a way to add a label for the button so that a screen reader will recognize the button? Currently, I created a page with an image of a button when I play the file the invisible icon is on top and begins the lesson. The only problem is I need to have a screen label that a screen reader can read. I am unsure how to access the button so that it has a screen label. Any suggestions?
This is a good solution. From a 508 compliancy perspective I still am a bit worried, at the moment I am working on a project that requires 508. So being, unlike many following this topic, I actually want the focus rectangle.
By default, the white screen with the play button will respond to the space bar being pressed as an alternative to clicking. There is no indication to the user that the space bar is what they should press, as opposed to the enter key or any other key. Maybe someone who uses a assistive technology would know to try that anyway, but I don’t want to assume.
Putting a poster image that somewhere says something like ‘click or press the space bar to continue’ and modifying the play button to transparent is a step in the right direction… but the instruction is embedded in the image. I do not know of any place to add alt or descriptive text to it to say ‘press the space bar’. Hopefully Adobe thought of it already and it is included as a description for that play button when you Enable Accessibility in the preferences. If anyone has any perspective on this, I’d love to hear about it.
Hi, great tutorial this was very helpful. I hope I can ask a few questions:
I created a 1024×768 (project size) loading screen which has a “button” on the image just for display purposes, created a transparent .png of the same size to replace Play_icon.png – this is the size of the screen meant so that the user can click anywhere to start, and when i resize the button in the css file, the loading screen gets bumped up. Also when i re-zip the contents after editing the code, my LMS isn’t allowing it saying it’s missing imsmanifest.xml. Any help?
Hello if it can help people and to complete the Lieve’s post, I had made a video and a blog page about this problematic. It is better to see the video first.
Video: https://elearning.adobe.com/preview/15711/
Blog page: https://elearning.adobe.com/preview/17121/
Around the 12th minute in the video you can see a solution about the way we can remove the rectangle surrounding the play icon or the poster image inserted.
Hello, my video was about Cp 2017 but you’ve right for the rectangle with Cp 2019.
As I know that a lot people continue using Cp2017 I put the right links which were wrong in my last post:
Blog page: https://elearning.adobe.com/2017/11/make-responsive-splash-screen-poster-image-several-pictures/
I have perfected this poster image, play button, remove the dimmer, remove the box…for Chrome. However, IE will not display the poster image! I don’t write javascript, help! Is there a workaround like with the css file that does not involve getting into javascript? I need a solution for both audiences, Chrome and IE!
Strange, I also use Chrome and the poster image displays for me. Look at this link, in Chrome, from my most recent blog:
You comment, like anything else in this portal, has to be approved and that can take a while. Sorry about that, not due to me at all. As author of that blog post I am not at all responsivle for this approvement. My personal blog doesn’t suffer from this problem.Thanks for extending my workflow with a more permanent solution if you alwats want to use the same workflow.
It’s fine I figured there was something like that but usually a site will indicate that your post is awaiting approval. Instead, here it just went straight back to the post giving no indication at all. I know that’s out of yours or anyone but Adobes control. Just kind of new here so wasn’t sure if it was actually working or not.
Yes, you must still create a poster image with my method and I agree it would be nice to choose a slide for that purpose.
As for the big majority of users not wanting to edit files, you have to edit files regardless of the method used. So if people have a problem editing files then I guess neither method is really for them.
However, for those that don’t have a problem editing files then I’d choose my setup any day of the week because it’s less work over the course of a project. You can set it up once or you can opt to create more work for yourself and edit a generated CSS and JS file after each project publish.
I think I have a solution that is a bit better in regards to implementation in order to keep you from having to edit files all the time. To start with I’ll mention that I opted for having the Play button completely transparent as mentioned in the main post. But I also made mine the same size as the Poster image I created. Regardless, the implementation is the same no matter what appearance you go for.
First, create a custom CSS file that contains any custom settings you want to make to the size/position etc. of the Play button. Make sure to tag every setting you want to override with !important to ensure your settings are chosen above all others that may exist or be inherited from. Then place the file in Adobe Captivate 2017 x64 HTML assets css to ensure it is included every time you publish your project. I’ll post a copy of my CSS if anyone wants to see it.
*:focus{outline:0;}.autoPlayButton{width:1024px !important;height:768px !important;left:0 !important;top:0 !important;}
Next, edit the index.html file located 2 levels up in the HTML folder and add a <link> to your custom CSS near the top of the document just before the first <style> element with the text/css information. Again, this ensures that this modification is included every time you publish a project. (Be sure to make a backup copy of your index.html file if you haven’t already in case you need to revert changes and forget what you did down the road.)
Finally, create a custom javascript file and insert the following code in the file. Place the file in the assets\js folder that is up 1 level from the CSS folder and then add a <script> reference to the file to ensure that it too is included in your project publishes. Alternatively, you could opt to add some javascript directly to the index.html file that was edited earlier. However, with this method, you can expand upon any custom CSS that you want to create and maintain externally.
window.addEventListener(“moduleReadyEvent”, function (evt) {
cp.autoplayImage.style.opacity = 1; //set poster image to 100% opacity
});
You must be logged in to post a comment.


