 Newbie
13 posts
Newbie
13 posts
New to Captivate? Here’s a quick guide to the VISITED state.
I love the VISITED state. Even more, I love how easy it is.
I use the VISITED state a lot. It offers users a visual clue to keep track of what they’ve clicked on initial visit or on revisit, if you choose that latter option.
Using the VISITED state is a simple workflow. As Newbies, it’s common to get bogged down in the menus, properties, and actions. You don’t need to worry about those here.
VISITED states require 1 step only. Just add the VISITED inbuilt state and determine what it will look like. Well… maybe 2 steps. But you do them in 1 step in the State View.
Let’s take a look at what you don’t have to do first…
1) If you’ve got only 1 object that you want to add a VISITED state to, you don’t have to define that action On Exit.

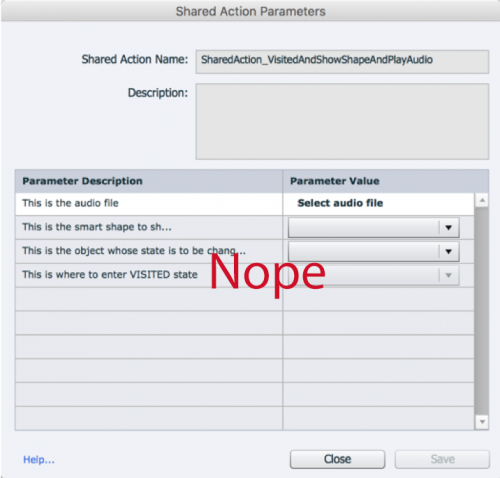
2) You don’t have to include it in a Shared Action or Advanced Action.

What do you have to do?
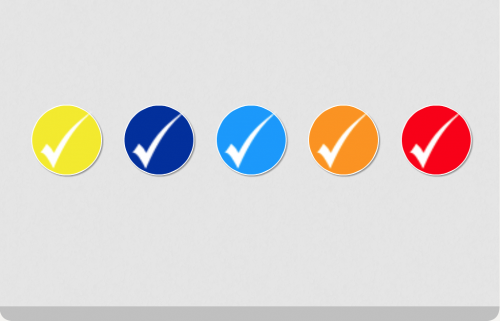
1) Add a new VISITED State and determine how it will look. I used a checkmark. But, other choices could be a lower opacity or an “X.” Captivate’s guides make it easy to align any other objects you want to add.

2) If you want that state to be there when the user comes back to the slide, click “Retain State on Slide Revisit.”

Now, let’s see what things look like when all 5 circles are clicked.
And that’s it! VISITED State is incredibly powerful and an intuitive Captivate 2017 feature! Have fun adding it to your courses.
I love the VISITED state. Even more, I love how easy it is.
I use the VISITED state a lot. It offers users a visual clue to keep track of what they’ve clicked on initial visit or on revisit, if you choose that latter option.
Using the VISITED state is a simple workflow. As Newbies, it’s common to get bogged down in the menus, properties, and actions. You don’t need to worry about those here.
VISITED states require 1 step only. Just add the VISITED inbuilt state and determine what it will look like. Well… maybe 2 steps. But you do them in 1 step in the State View.
Let’s take a look at what you don’t have to do first…
1) If you’ve got only 1 object that you want to add a VISITED state to, you don’t have to define that action On Exit.
2) You don’t have to include it in a Shared Action or Advanced Action.
What do you have to do?
1) Add a new VISITED State and determine how it will look. I used a checkmark. But, other choices could be a lower opacity or an “X.” Captivate’s guides make it easy to align any other objects you want to add.
2) If you want that state to be there when the user comes back to the slide, click “Retain State on Slide Revisit.”
Now, let’s see what things look like when all 5 circles are clicked.
And that’s it! VISITED State is incredibly powerful and an intuitive Captivate 2017 feature! Have fun adding it to your courses.


You must be logged in to post a comment.
- Most Recent
- Most Relevant
Thank you this is so informative!
We will try this Alice
There is a reason why I not always use the visited state, but prefer using a custom state to indicate that something has been accomplished. Example: a dashboard or menu slide. Normally the ‘visited’ state should appear after the part of the course linked to a button has been finished, not when the button is clicked which is the situation for the InBuilt Visited state. Moreover there is the usual flicker, the visited state will show for a very short time before navigation to the chapter happens. You have no control over its appearance because it is situation linked like all other InBuilt states. With a custom state you can delay the appearance of the custom ‘done’ state until the chapter has been visited.. That can be done either with a tracking variable and the On Enter action of the dashboard, or with a shared action on the Back button of the chapter’s last slide.
It is also a pity that the Visited state is never included in the Object style of a button or a shape. It would save a lot of time if you need to create similar Visited states for many buttons. Logged this as a feature request.
I am having the same issue, is there a work around for this that I can use? I know its been a couple years since this reply, I just can’t seem to find an answer online. Thanks!
What do you mean? Visited state is still not part of the object style. When I need a visited state for multiple objects I will create the first object, than duplicate it and edit the duplicate. Not a very good workflow. However I do use the Visited state, and you can control it from another slide if you use an advanced or shared action.
Alice, a highly informative, high-quality blog. I am currently preparing some beginner-level docs for Captivate users. Would you mind if I include a link to your blog from one of my blogs?
Thanks,
Saurav
