I’m editing a Demo Simulation created with Captivate 9 for a responsive project using breakpoints. I was able to adjust the position of the background graphic (or the position of viewed area of the graphic), but I can’t position it precisely. As a result, the background “jumps” between slides.
Is there an option to precisely position the background graphic for a simulation, for example, set the position of the graphic to 100,100 for two successive slides?
You must be logged in to post a comment.
- Most Recent
- Most Relevant
Lieve,
Thanks for the feedback. I can see where the Video Demo option would solve many of the issues.
I was able to resize and re-position all the objects for each of the breakpoint views. It took some work, but it turned out fairly well, except for the issue I mentioned (precise position of the background graphic).
I got back into the project and could not find a Position tab in the slide properties area. The Position tab shows up when I select an image in the Master Slide view, and it works as you describe. However, I can only access the simulation background graphics through the main edit window.
What seems to be happening is that I’m re-positioning the yellow “Device Height” box, as though its an overly, not the background graphic itself. (see pic)
Lieve, I’m guessing I’ve got the Newbie UI, its the demo version. The path Window –> Workspace only has “Classic” listed.
I checked for a specific option for Position Properties for Breakpoint views, but didn’t see one. Is there a specific path to follow?
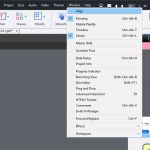
Position panel is not under Workspace, but under the Window menu.If you want to switch to the Expert UI where you can create workspaces and move panels, you need to go to Edit, Preferences, General settings and activate the option (4th) ‘Enable custom workspaces….’. You have to restart CP after that.
Thanks for all your feedback, its appreciated.
Unfortunately, I don’t see it there. I’ve clicked everywhere, but it may not be available in the Demo version that I’m using.
Quick question, Is the Newbie UI the demo interface?
I’m going to upgrade from the Demo version soon, so that may take care of the problem.
Did you see the screenshot I have posted? It is in the top of this thread.
The trial version is fully functional. The Newbie UI is the one you start on even with a licensed install. I already told how to get to the Expert UI (is always my first task, at the same time when turning on backup): go into Preferences, General Settings and check the option ‘Enable undocking…..’
Use the Position Properties panel, align the graphic at 0% from left and top, set its width to 100%. Be careful with the height however, that is the problem with a software simulation. If you set the height to Auto, the background image will not be distorted, but how will it look in portrait mode? If you set it also to 100%, it will be distorted.
A software simulatino is not that well suited for a responsive project, even though you can zoom in on part of the image for mobile screens. Since you talk about a Demo, do you know that Captivate is packed with a Video Demo feature, which allows to create a video with a higher quality than what you’ll achieve with a software sim in Demo mode. Both are meant to be watched in a passive way, no interactivity.


