 Staff
8 posts
Staff
8 posts
I have something exciting for the Captivate course authors to try and trust me when you tell your learners they need not switch on their laptops or PC’s to access their course, they will surely be overwhelmed. Yes, following some generic guidelines you can re-design and upgrade your old Captivate blank projects to a responsive one and this time without breakpoints (Captivate 8 and 9 users will be familiar with this term) and if you are a new Captivate user you can always go and explore the scope and power of the new Fluid Boxes concept.
- Save as Responsive (version and properties upgrade)
First thing that you need to do is open your old Captivate 8 or 9 Projects in Captivate 10 and perform a Save As Responsive operation. (you can exercise this on attached sample1)
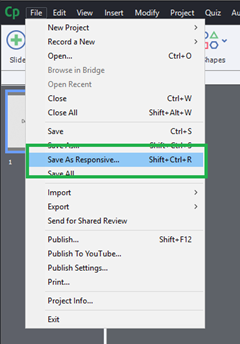 PS: this functionality will be supported only for your old Blank Projects.
As you click on Save as Responsive you will be prompted with a dialog listing out the unsupported items in your projects. These objects are basically the ones which are not supported in general for an HTML5 output. For more details, you can visit the following link, https://helpx.adobe.com/captivate/using/publish-projects-html5-files.html
Once you see the dialog you can click on show unsupported items (if any) and consider replacing them after you save it as responsive and an upgrade operation is performed.
Now you project shall open in the responsive UI where you shall be able to see the responsive width slider. This marks the stage where you can start working with the Fluid Boxes in your project. You can go about adding these fluid boxes manually or even with the help of the Suggest Fluid Box Button.
SUGGEST FLUID BOX
Before reading this part, make sure you have a fair idea of the the fluid Box and their properties.
You can refer to the following articles by Zeeshan:
What Suggest Fluid Box does?
Suggest Fluid Box is an algorithm which tries to detect the distribution and layout of the objects on the slide and tries to fittingly place them inside these fluid boxes setting the most appropriate properties for flow, wrap, horizontal and vertical alignment. Apart from this, it intelligently sets the alignment and margin of text captions and has considerations whether to Maintain Aspect Ratio for an object or not. (say for an image it always checks the checkbox for maintaining the Aspect Ratio)
Assuming you are aware of the 2-Dimensional design paradigm with fluid boxes (that is, you cannot have overlapping items inside the fluid boxes), you may consider the following useful tips before you hit the suggest fluid box button.
You can try these along in the attached samples, which have been divided in 3 parts:
1)original blank project (sample1)
2)post suggest (sample2)
3)final project after modifcations(sample3)
Before You Hit Suggest Fluid Box
You can go along and perform these steps on the project which you saved as responsive, (ie upgraded sample1 to cp2017 project)
- Setting the correct properties for the Background Images:

By default the images are set to maintain Aspect Ratio and if you happen to move the slider you may see your Background Image diminishing in size to maintain the AR. This may go well for the other images on the slide but with the Background image it may lead to blank or empty spaces on the slide. ( as in the adjacent image).
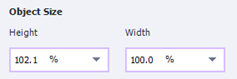
To avoid this, you need to set the object size (height and width) as % and % respectively.
As the image in the sample project comes from the Master Slide. Goto the Master slide view-> select the image in the master slide->open the position panel from the properties inspector and slect the object size as % and %:

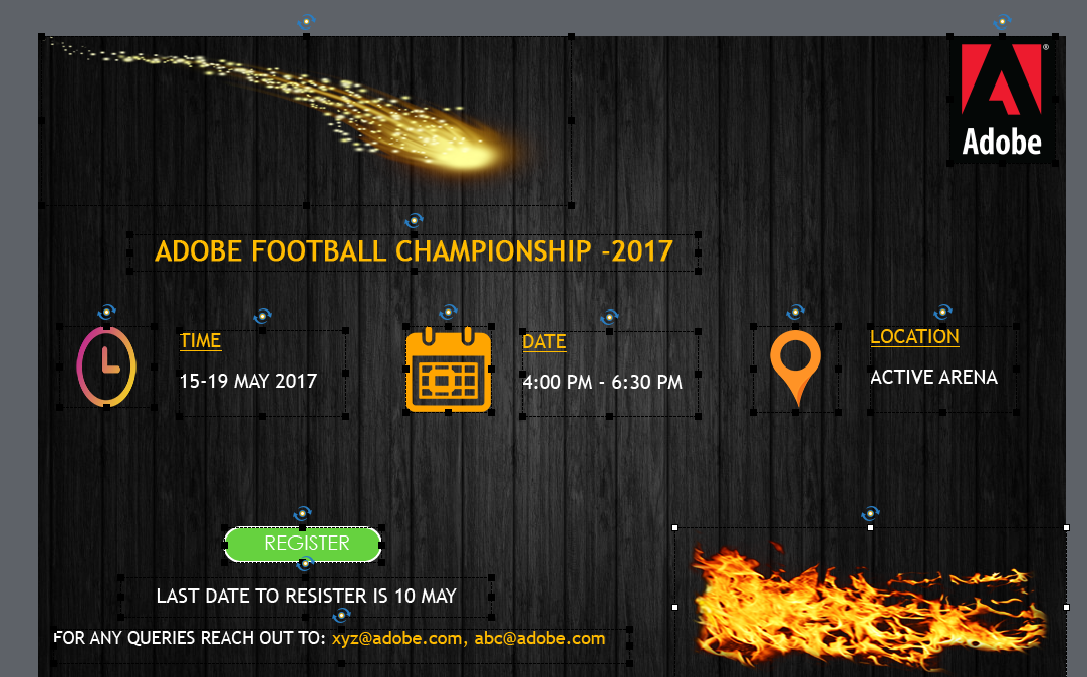
- Checking for the overlap of items
This consideration comes in handy before suggestion, as suggestion tries to put even the slightly overlapping items in a Static Fluid Box ( I shall write an additional article of where and how to use them), for now you can consider to ignore them as they may not make your project visually appealing on the first go unless you have a fair idea of where and how to use them. To check for the overlap, you can simply select all (CTRL+A) items and check for the overlapping boundaries. Consider, resizing or re-positioning such objects so that Suggest can produce best results for you. ( now you may be able to link to the fact I told you about 2-Dimensional design paradigm and how the algorithm goes about determining the Fluid Box layout).
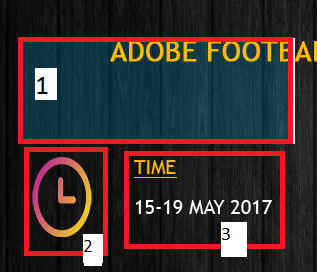
For slide 1 you can identify 2 sets(marked by red boundary) of overlap as indicated in the following images : Overlapping boundary have been indicated by saffron:

Consider re-positioning or resizing the objects to avoid overlapping as in the demarcated regions. End Result be something like this:

Now what about time, date and location, where I actually need the background smartshapes to Overlap?
Can you recall reading something about fluid boxes and fill?
- Deleting background(highlighting) smartshapes and achieving this using fill
I have separated out three objects from the overlap. Consider deleting part 1.Now if you wonder where do I get to apply fill, you shall be able to do so once you have Fluid Boxes in your project post suggest.(remember to come to this part after suggestion) for now delete part 1.Make sure you delete the same smartshape for DATE and LOCATION as well.
Hit the suggest button and you shall see Fluid box Grid applied to your slide. Now your slide should look exactly as in the slide of sample2.
If you see something weird on the slide perform an undo(CTRL+Z) operation and check if you missed any of the above steps and verify overlapping (CTRL+A).Perform Suggest Fluid Box again.
PS: Do not confuse Remove Fluid Box operation and undo. Both are different operations and have different use.
At this point, your further course of action depends on the satisfaction of your results. The next phase is concerned more with the visual enhancement of your course which revolves around setting Fluid Box properties along with previewing the project moving the responsive slider, which I shall cover in part 2 of this blog.
I have something exciting for the Captivate course authors to try and trust me when you tell your learners they need not switch on their laptops or PC’s to access their course, they will surely be overwhelmed. Yes, following some generic guidelines you can re-design and upgrade your old Captivate blank projects to a responsive one and this time without breakpoints (Captivate 8 and 9 users will be familiar with this term) and if you are a new Captivate user you can always go and explore the scope and power of the new Fluid Boxes concept.
- Save as Responsive (version and properties upgrade)
First thing that you need to do is open your old Captivate 8 or 9 Projects in Captivate 10 and perform a Save As Responsive operation. (you can exercise this on attached sample1)
PS: this functionality will be supported only for your old Blank Projects.
As you click on Save as Responsive you will be prompted with a dialog listing out the unsupported items in your projects. These objects are basically the ones which are not supported in general for an HTML5 output. For more details, you can visit the following link, https://helpx.adobe.com/captivate/using/publish-projects-html5-files.html
Once you see the dialog you can click on show unsupported items (if any) and consider replacing them after you save it as responsive and an upgrade operation is performed.
Now you project shall open in the responsive UI where you shall be able to see the responsive width slider. This marks the stage where you can start working with the Fluid Boxes in your project. You can go about adding these fluid boxes manually or even with the help of the Suggest Fluid Box Button.
SUGGEST FLUID BOX
Before reading this part, make sure you have a fair idea of the the fluid Box and their properties.
You can refer to the following articles by Zeeshan:
What Suggest Fluid Box does?
Suggest Fluid Box is an algorithm which tries to detect the distribution and layout of the objects on the slide and tries to fittingly place them inside these fluid boxes setting the most appropriate properties for flow, wrap, horizontal and vertical alignment. Apart from this, it intelligently sets the alignment and margin of text captions and has considerations whether to Maintain Aspect Ratio for an object or not. (say for an image it always checks the checkbox for maintaining the Aspect Ratio)
Assuming you are aware of the 2-Dimensional design paradigm with fluid boxes (that is, you cannot have overlapping items inside the fluid boxes), you may consider the following useful tips before you hit the suggest fluid box button.
You can try these along in the attached samples, which have been divided in 3 parts:
1)original blank project (sample1)
2)post suggest (sample2)
3)final project after modifcations(sample3)
Before You Hit Suggest Fluid Box
You can go along and perform these steps on the project which you saved as responsive, (ie upgraded sample1 to cp2017 project)
- Setting the correct properties for the Background Images:
By default the images are set to maintain Aspect Ratio and if you happen to move the slider you may see your Background Image diminishing in size to maintain the AR. This may go well for the other images on the slide but with the Background image it may lead to blank or empty spaces on the slide. ( as in the adjacent image).
To avoid this, you need to set the object size (height and width) as % and % respectively.
As the image in the sample project comes from the Master Slide. Goto the Master slide view-> select the image in the master slide->open the position panel from the properties inspector and slect the object size as % and %:
- Checking for the overlap of items
This consideration comes in handy before suggestion, as suggestion tries to put even the slightly overlapping items in a Static Fluid Box ( I shall write an additional article of where and how to use them), for now you can consider to ignore them as they may not make your project visually appealing on the first go unless you have a fair idea of where and how to use them. To check for the overlap, you can simply select all (CTRL+A) items and check for the overlapping boundaries. Consider, resizing or re-positioning such objects so that Suggest can produce best results for you. ( now you may be able to link to the fact I told you about 2-Dimensional design paradigm and how the algorithm goes about determining the Fluid Box layout).
For slide 1 you can identify 2 sets(marked by red boundary) of overlap as indicated in the following images : Overlapping boundary have been indicated by saffron:
Consider re-positioning or resizing the objects to avoid overlapping as in the demarcated regions. End Result be something like this:
Now what about time, date and location, where I actually need the background smartshapes to Overlap?
Can you recall reading something about fluid boxes and fill?
- Deleting background(highlighting) smartshapes and achieving this using fill
I have separated out three objects from the overlap. Consider deleting part 1.Now if you wonder where do I get to apply fill, you shall be able to do so once you have Fluid Boxes in your project post suggest.(remember to come to this part after suggestion) for now delete part 1.Make sure you delete the same smartshape for DATE and LOCATION as well.
Hit the suggest button and you shall see Fluid box Grid applied to your slide. Now your slide should look exactly as in the slide of sample2.
If you see something weird on the slide perform an undo(CTRL+Z) operation and check if you missed any of the above steps and verify overlapping (CTRL+A).Perform Suggest Fluid Box again.
PS: Do not confuse Remove Fluid Box operation and undo. Both are different operations and have different use.
At this point, your further course of action depends on the satisfaction of your results. The next phase is concerned more with the visual enhancement of your course which revolves around setting Fluid Box properties along with previewing the project moving the responsive slider, which I shall cover in part 2 of this blog.


You must be logged in to post a comment.
- Most Recent
- Most Relevant
It works fine with such a simple sample project. This one slide project is using the White Theme, Title master slide where the placeholder has been deleted. In a real world project created with CP9, I do use a custom theme, which means that several master slides have been used. Most content master slides in the CP9 default themes (and in my themes) have overlapping objects. Example: often a text caption is put on top of a shape. Converting such a project, using the Suggest Fluid Boxes feature, will result for most slides in one static Fluid box. Maybe you’ll talk about editing the master slides in the next part? At this moment I feel that this conversion is only possible for very simple projects, which do use only blank master slides.
Hi Lieve,
When we talk about overlapping objects, I am considering you would be overlapping a smart shape with some other object which you can achieve by having fill in the fluid box.I hope you read the second part of this blog:
https://elearning.adobe.com/2017/06/guidelines-for-considerations-before-and-after-upgrading-a-blank-project-to-a-responsive-project-part-2/
The whole idea of writing this blog is to find alternatives of handling your objects from the old project with the new 2d design paradigm. When you talk about several master slides with complex overlapping, these are basics which you can consider applying in Master slide view as well. I dont claim hitting suggest would lead to some magic that is why the blog aims to provide guidelines before and after hitting suggest. You can always go and explore “n” possibilities of handling objects. This blog aims to get you started with conversion process and make it simpler as you go along.
Thanks,
Aditya
You second post was not yet published when I did write the comment. I had tried to convert older projects to responsive but it looked better to start from scratch because of the reasons I mentioned with content slides based on master slides which had a lot of overlapping objects. That is the case for most content slides in the default themes in CP9 and former releases.
Already with responsive projects in Breakpoint view workflow I recommended as best practice to restrict the number of objects by using fill with an image for shapes, and/or using shapes as text containers instead of the usual work flow in the CP-themes where a text caption is put on top of a shape. This is good practice, but largely ignored by many CP-users. Maybe you could offer some more tips like that?
